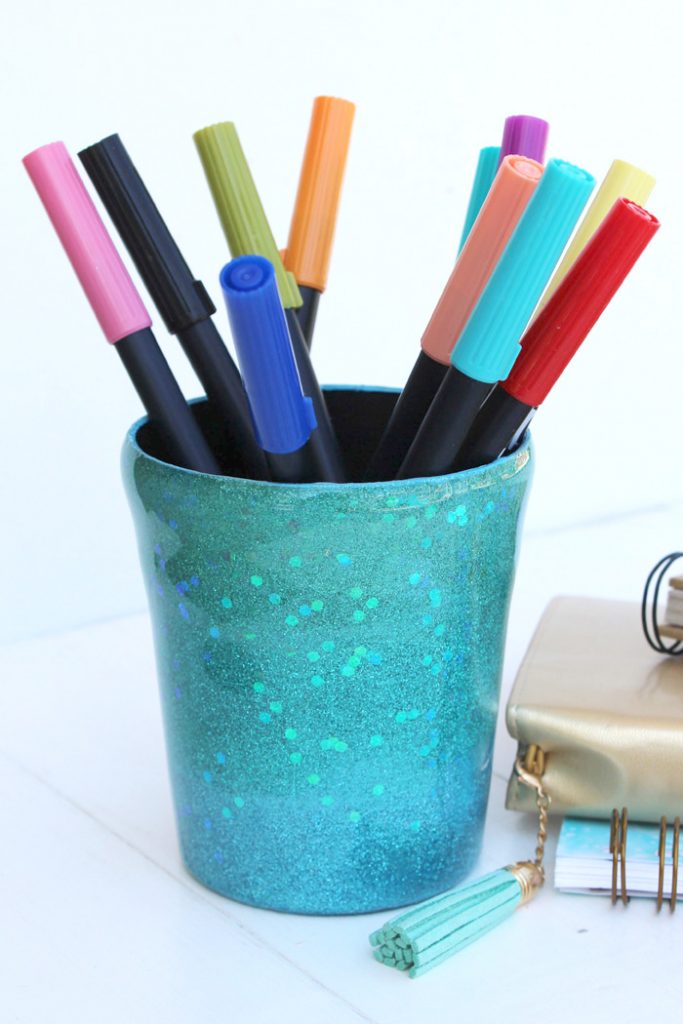
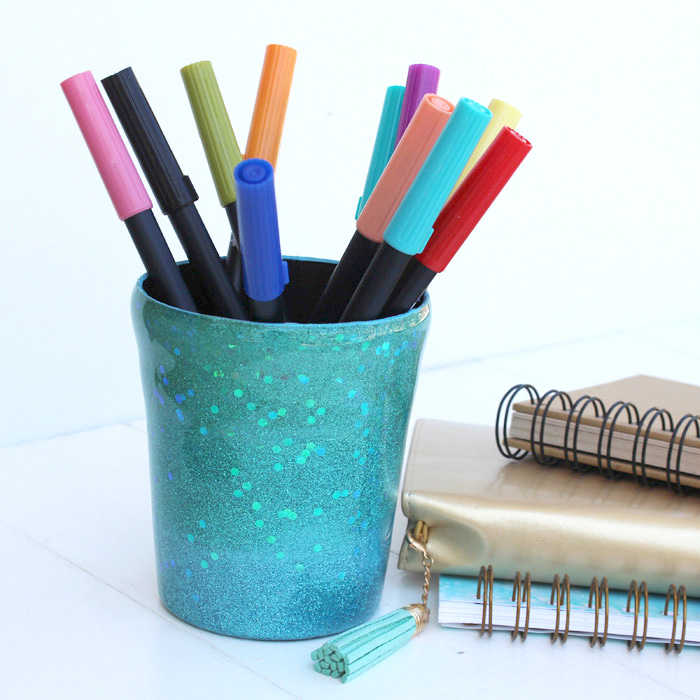
Make the perfect resin glitter tumbler for holding art supplies!
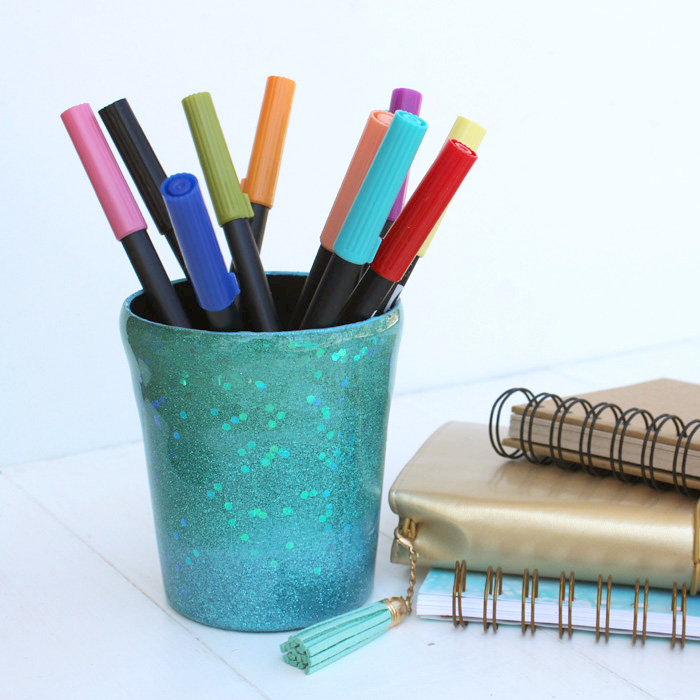
Hi Resin Craft friends, it’s Natalie from Doodlecraft. This glitter pen holder is my favorite desk accessory right now! It’s so shiny! Makes a great handmade gift too!
Learn how to make a gorgeous Resin Glitter Tumbler pencil holder with ETI Envirotex Lite and sparkly glitter!
It’s very simple to apply resin to a flat surface. Don’t be scared away by the shape of this project, once you try it, you’ll be hooked! This resin glitter tumbler craft is so much fun and can be used in many other applications, let’s get started.
This technique is great for embellished drink tumblers, water bottles, vases, planter pots and more! Be sure to wear gloves, work in a ventilated area and work in a well ventilated area or wear a respirator mask when working with resin.
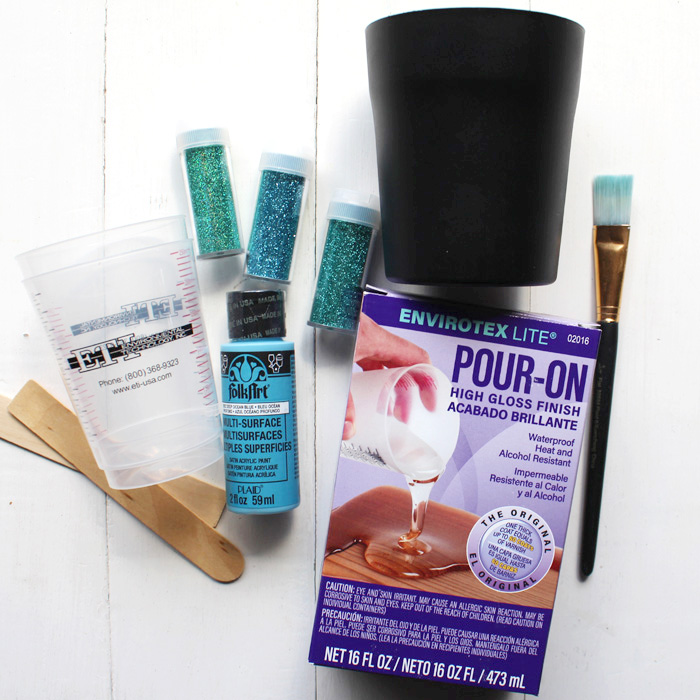
Supplies Needed for Glitter Tumbler:
- Envirotex Lite Pour-On High Gloss Finish
- Plastic Tumbler (mine’s from the dollar store)
- Acrylic Craft Paint and Paintbrush
- Various Colorful Glitter
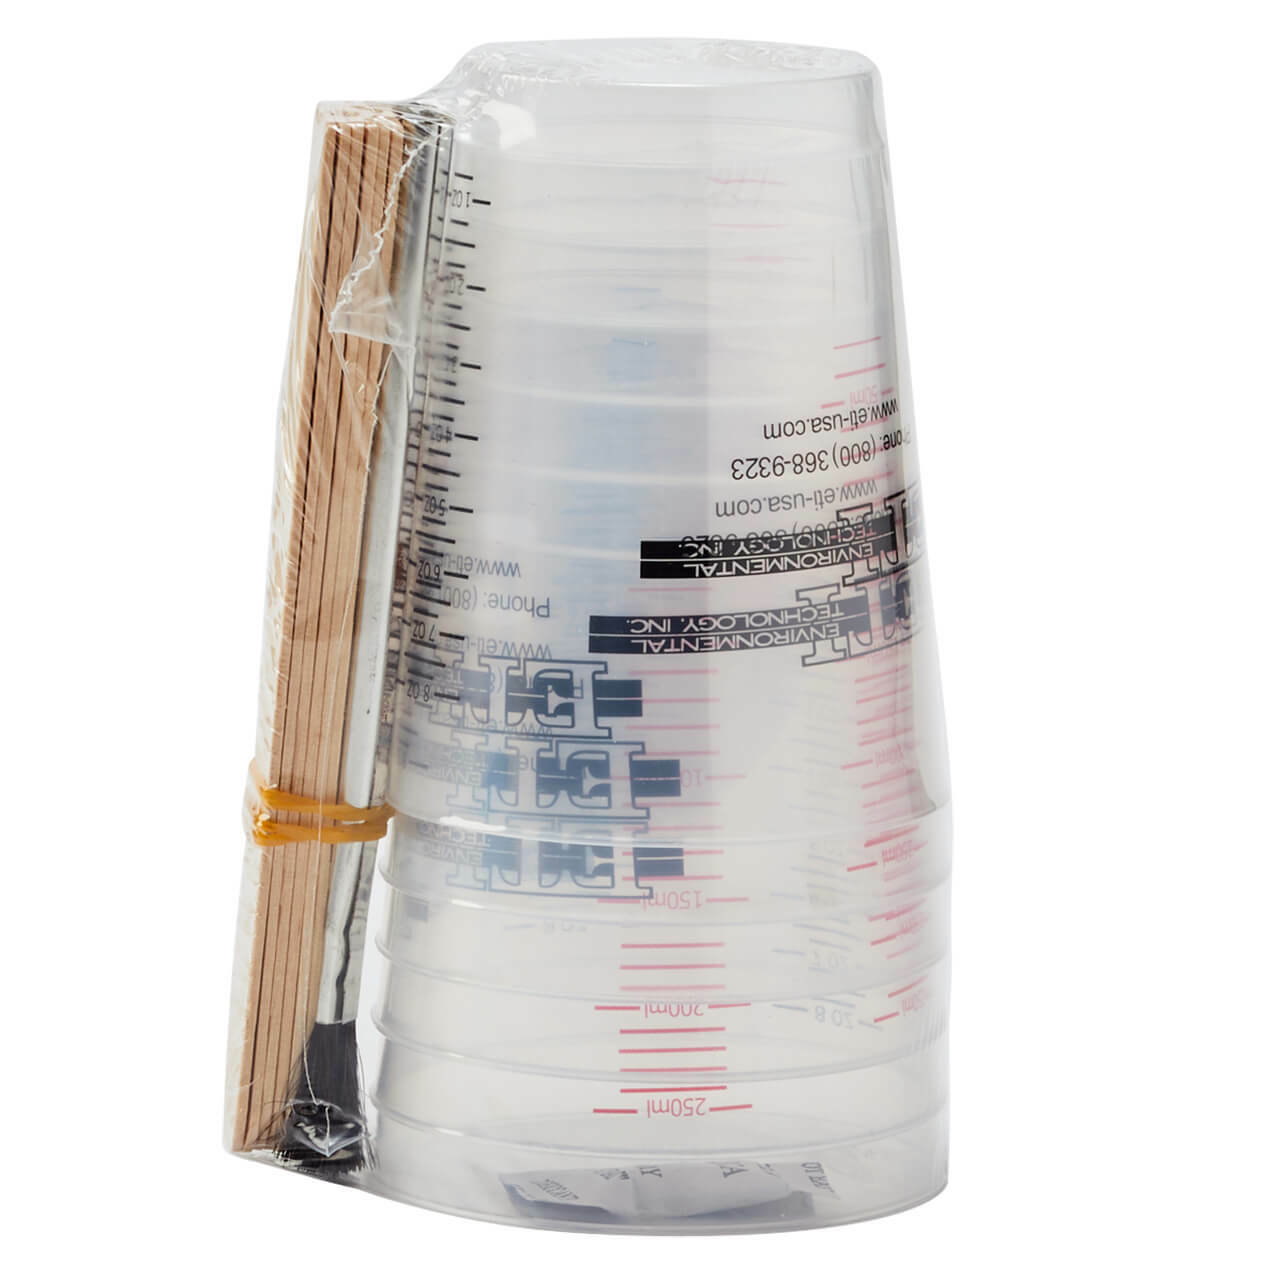
- Mixing Cups and Stirring Sticks
- Disposable Gloves
- Cup Turner (Check out Amazon)
- UltraSeal or other Decoupage Adhesive

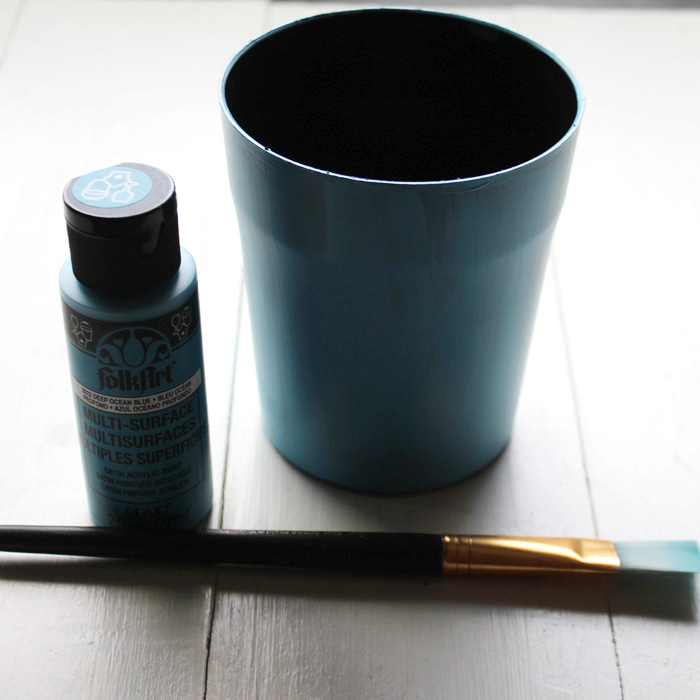
Step 1: Painting Tumbler!
Begin by painting the plastic tumbler the color of your choice. Just a light layer of paint is all that is needed. Let it dry completely.
Step 2: Glitter Time!
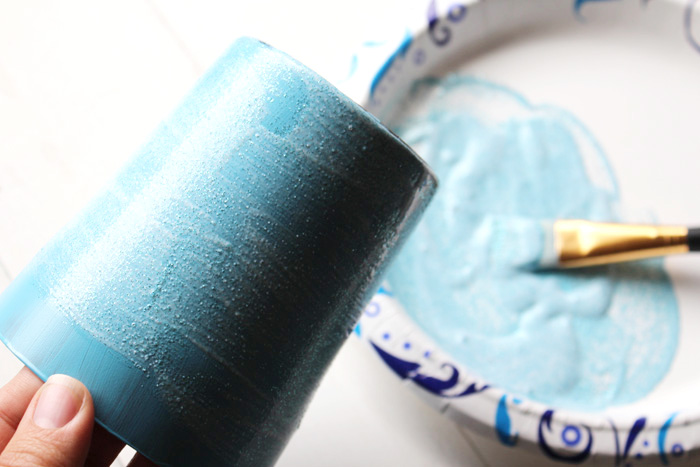
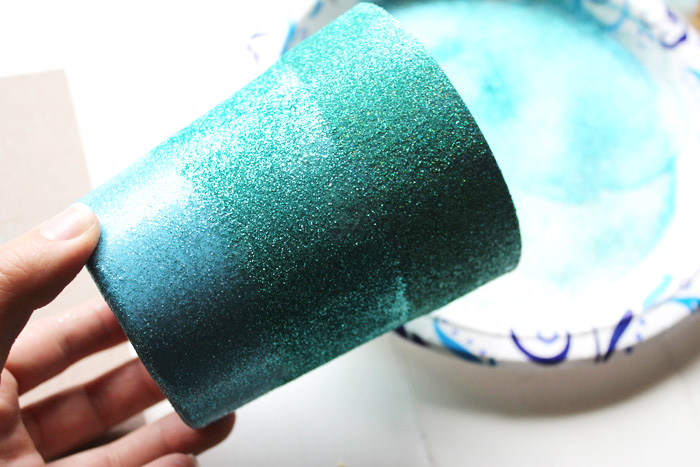
Pour out some Ultra Seal on a paper plate and then dump a bunch of glitter into it. You can never have too much glitter! Mix it together and then paint the glitter all over the tumbler. Then let the glittery adhesive dry completely.
Step 3: Ombre Glitter Effect!
After the glitter has dried, add more of the Ultra Seal on the mug and sprinkle additional colors of glitter on it. Do one stripe at a time for an ombre effect.
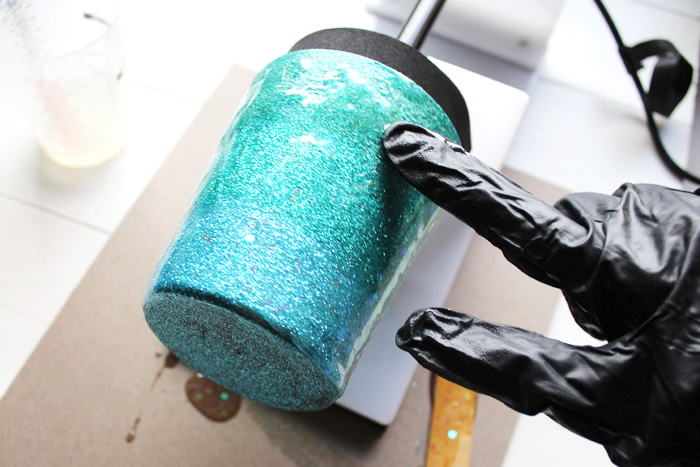
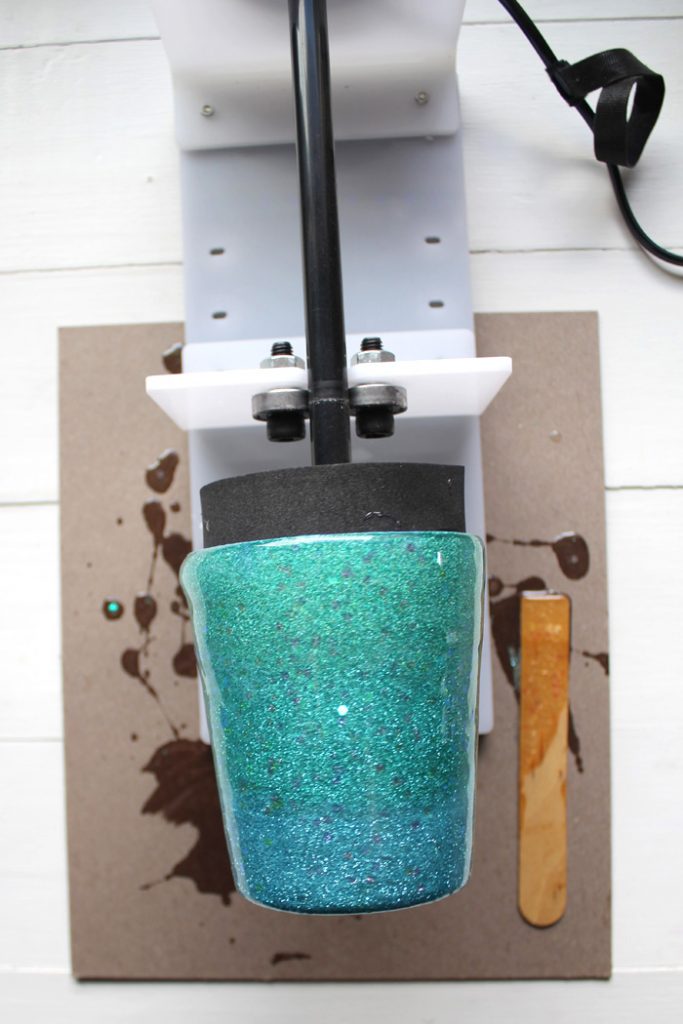
Step 4: Get Spinning!
Now set up the cup turner. With a touch of a button the cup will spin around slowly and allow the resin to cure all around the cylinder shape. The turner has a foam end so the cup can fit snuggly on it while it spins. Place the cup turner on some thick cardboard because some resin will drip. Get the cup in place and then mix up the resin.
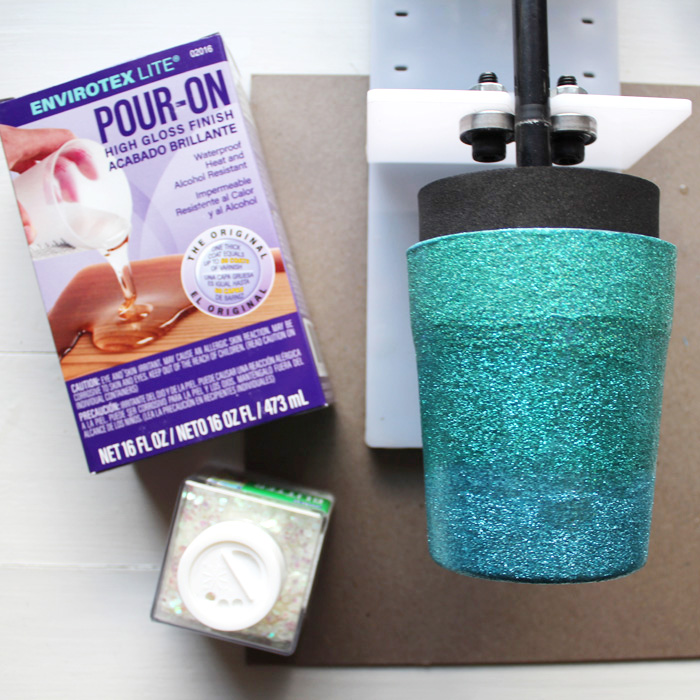
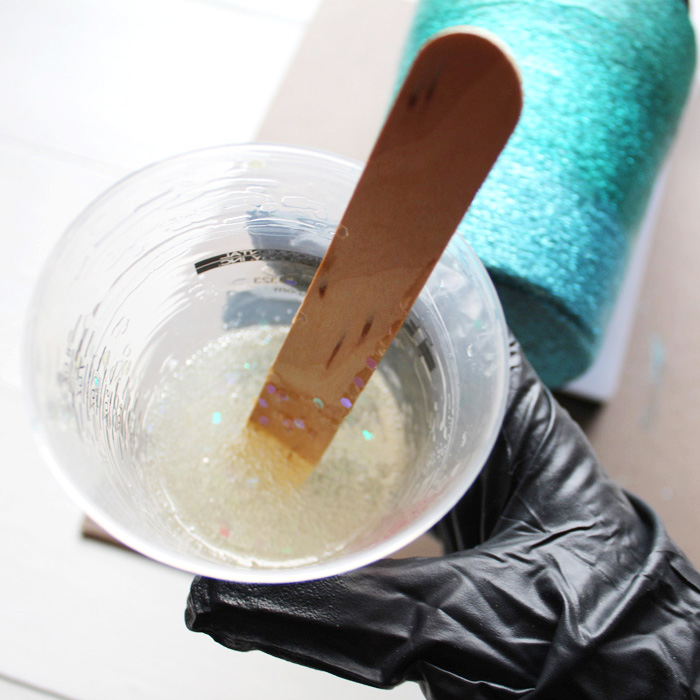
Now mix up the Envirotex Lite High Gloss Resin according to the package directions in the 2 phase mixing process. Wear gloves and work in well ventilated area.
For a Resin Glitter Tumbler this size, only 1 ounce of Envirotex Lite is needed.
After mixing completely, add some chunky glitter right into the resin mixture.
Step 5: Resin Pouring!
Start the cup turner spinning then pour a little resin right on the tumbler. Use your gloved hand to smooth the resin all over the tumbler. Add more resin a little at a time until the entire tumbler looks coated.
Let the cup turner spin for 24 hours before stopping it. (My spinner will spin in the reverse direction if I click the button off and then back on, so I alternated every hour for the first 6 hours)
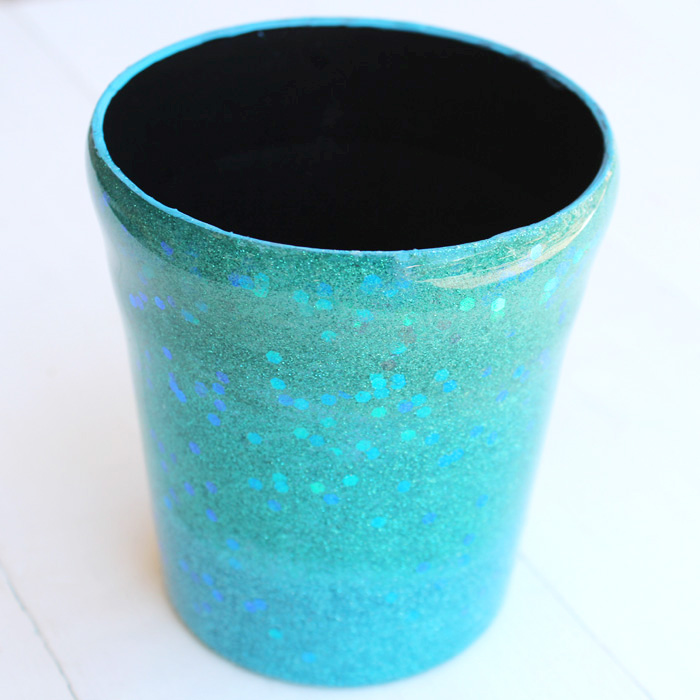
After a full 24 hours of curing, turn off the cup spinner and remove the tumbler. I love the thick glossy resin and the shiny glitter!
That’s it!
Now the Resin Glitter Tumbler is ready to fill with favorite art supplies and adorn your desk! Make custom waterbottles as handmade gifts, add glitter and resin to a planter pot for a perfect Spring bloom. So many fun ways to use Envirotex Lite Pour on High gloss finish!

Make your own Resin Glitter Tumbler and share it with us on social media! Be sure to tag @resincraftsblogbyeti and @doodlecraft so we can cheer you on and maybe feature you! Join our Resin Crafts Facebook page for challenges, giveaways and frequently asked questions.
Natalie Shaw is a Craft/DIY blogger at Doodlecraftblog.com. She loves sci-fi, fantasy and video game geekery and that comes out in many of her projects. She posts budget conscious DIY’s, crafts, jewelry, kid friendly projects, upcycled treasures and other fun on her blog 5 days a week.


Leave a Reply