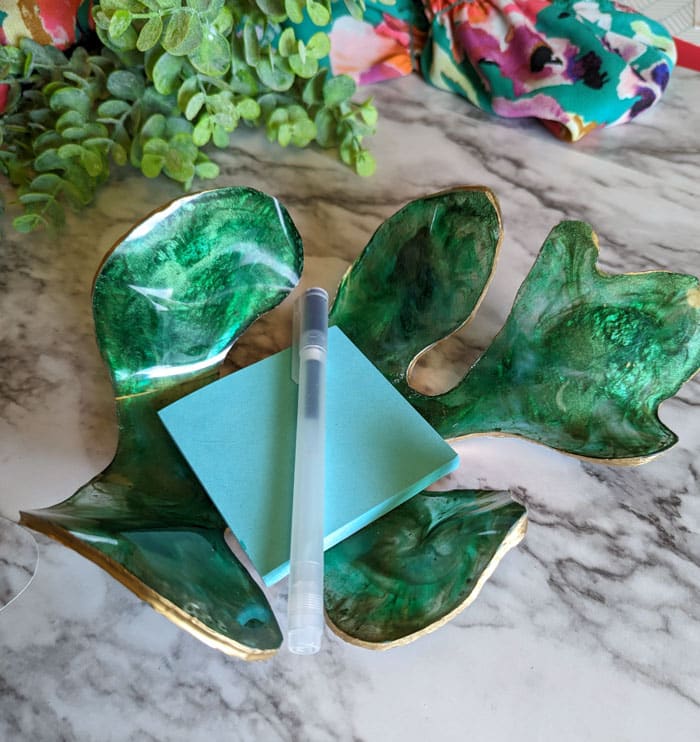
Want a custom decorative piece that feels like fancy nature? I made a custom mold, and then a leaf shaped resin bowl – get the tutorial here.
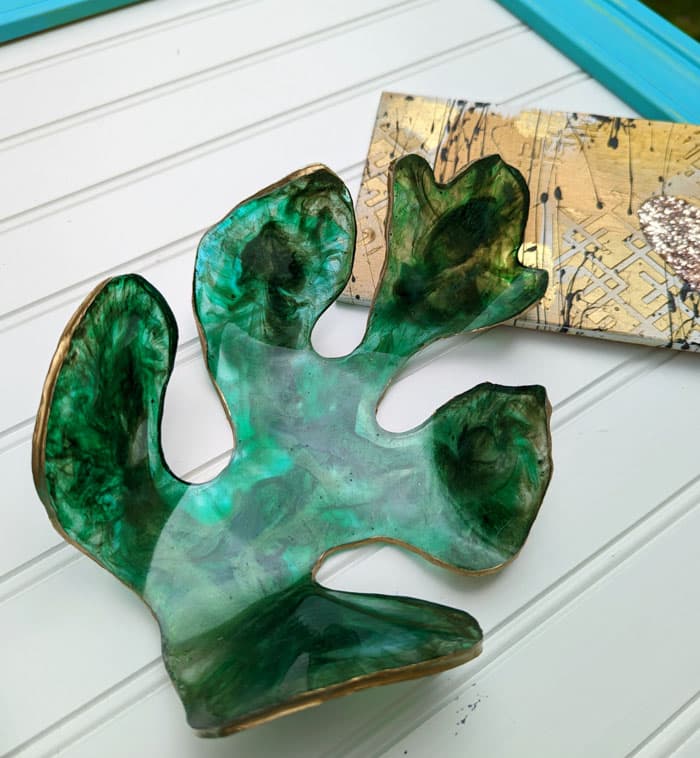
Create a beautiful swirled fiddle fig leaf resin bowl! Be sure to read Amber’s post about making a rainbow resin bowl too. I’m going to show you how I made a leaf shaped resin bowl.
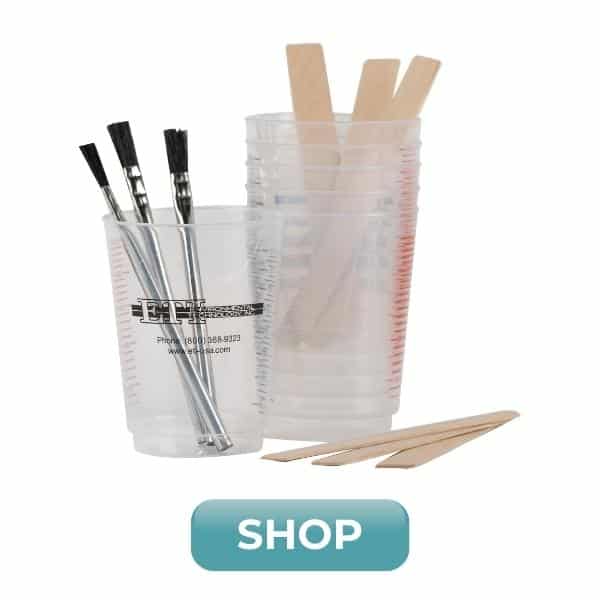
Supplies for making a resin leaf
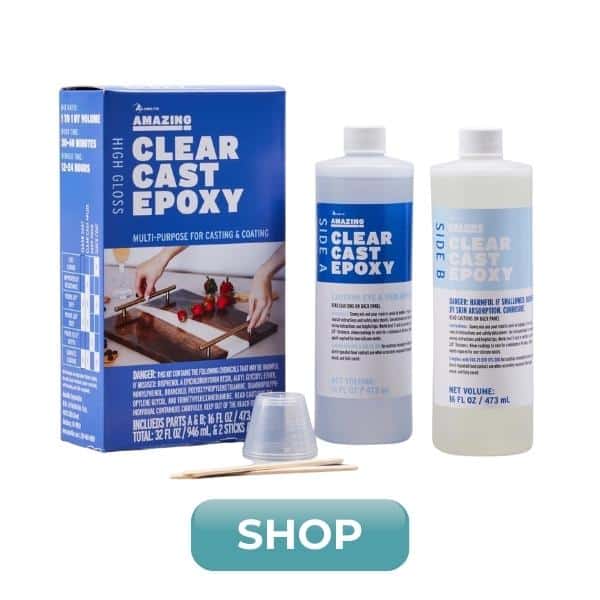
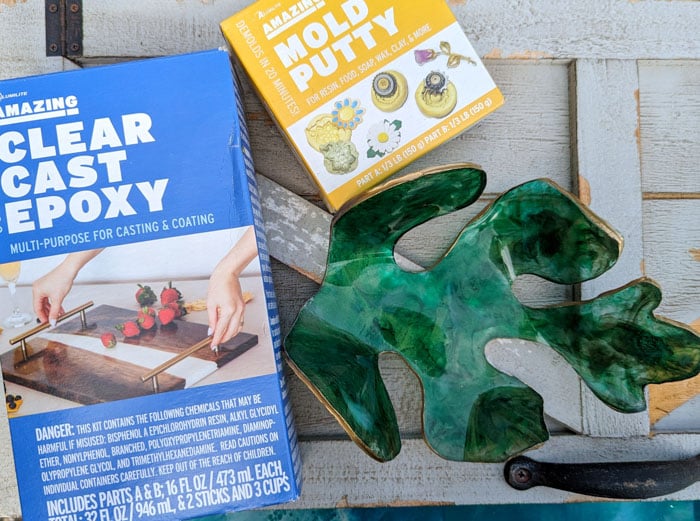
- Alumilite Amazing Clear Cast Epoxy
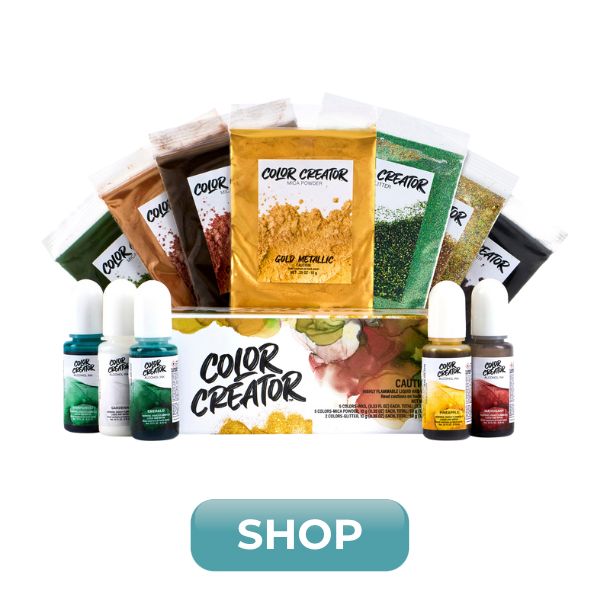
- Color Creator Greenland Gift mica powder and alcohol ink
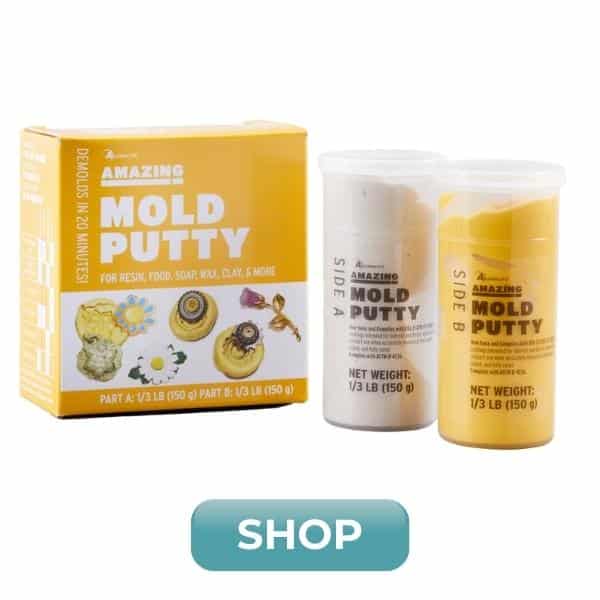
- Amazing Mold Putty
- Mixing cups and stir sticks
- Freezer paper or wax paper
- Leaf image (draw or print one, or get the one that I drew)
- Hot glue gun
- Gold paint pen
- Nail file drill or dremel
- Glasses, gloves, and mask
Create a resin leaf mold
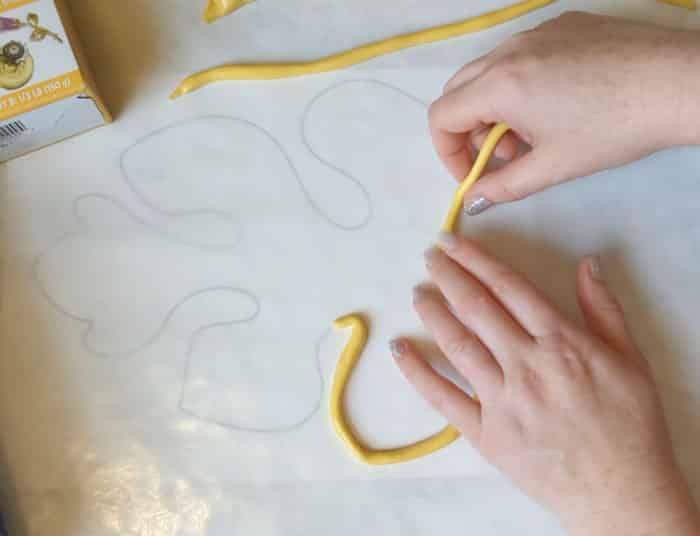
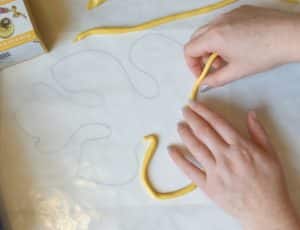
Start by getting your leaf pattern ready. You can draw or print on a piece of paper. Lay a piece of freezer (shiny side up) or wax paper over it and tape down so it doesn’t shift.
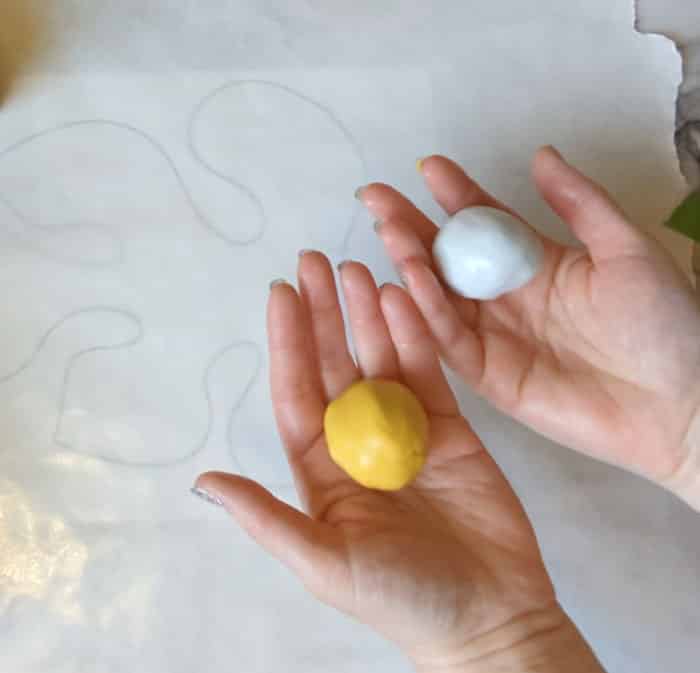
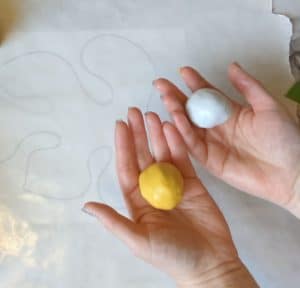
Roll up a golf ball sized amounts of the yellow and white mold putty sides. Combine them thoroughly by pinching, “smooshing” and rolling until it’s a uniform yellow color with no white parts.
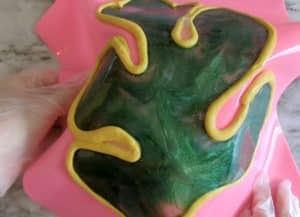
Roll it into a snake that’s a little thicker than a pencil. Bend it around on the paper to follow the leaf shape. Pinch ends together where they meet, trying to smooth a bit. Press it all down a bit too, to make sure it has flat contact with the freezer paper – but don’t lose the height.
- If you mix mold putty and then put it on the silicone mat, it will cure to the mat! So, if you want a reusable leaf mold and want to use the silicone mat later, the putty needs to cure separately.
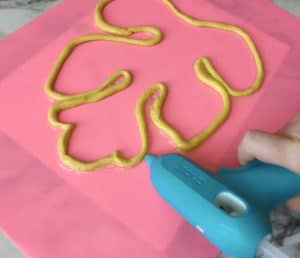
Let the mold putty set for at least one hour. Then put the leaf pattern under the silicone mat and move the putty rope over to the silicone.
To keep resin from leaking out under the mold, add a line of hot glue all around the outside of the mold.

Mix colored epoxy
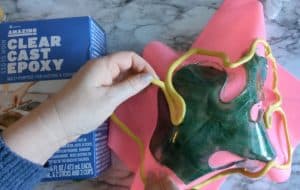
In a measuring cup, pour 2.5 ounces of part A and 2.5 ounces of part B of Amazing Clear Cast Epoxy. Stir for 4 minutes or until no swirls are visible.

Amazing Clear Cast Epoxy has a working time of 30-40 minutes, so you’ve got a bit of time to play with colors – but watch the clock still.
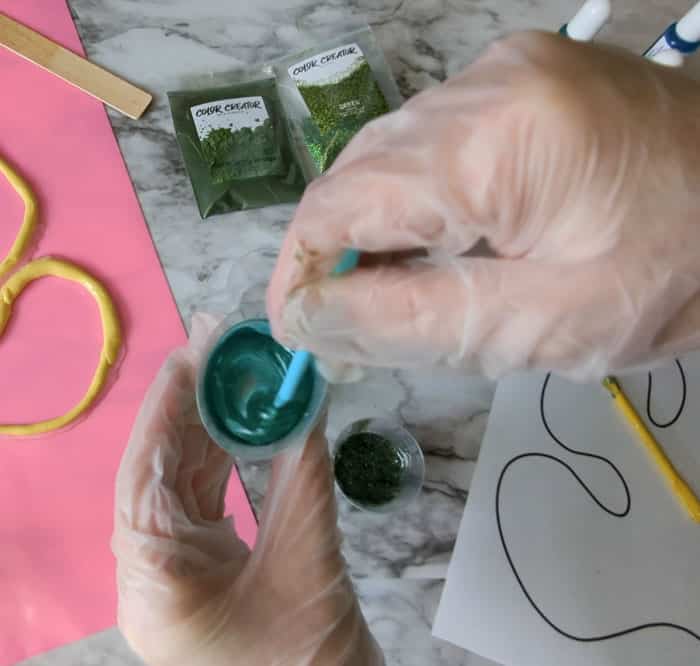
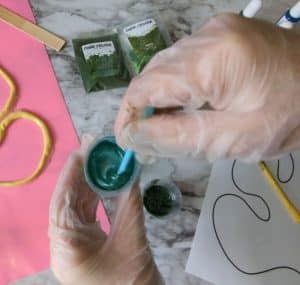
Pour clear resin into smaller mixing cups to add mica powder and alcohol inks. The powders will make the resin opaque, and the inks will stay more see through.
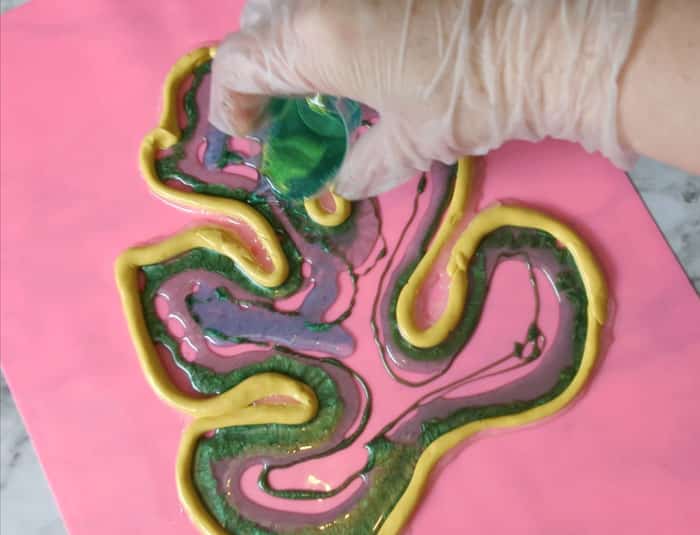
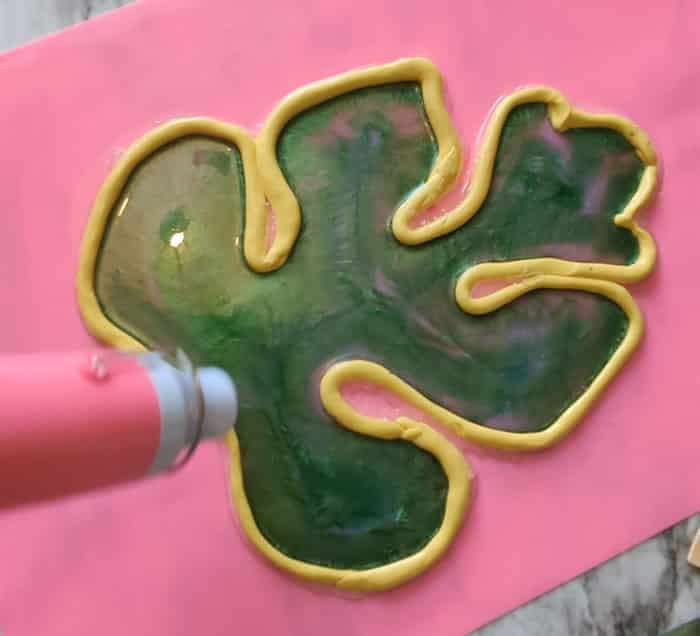
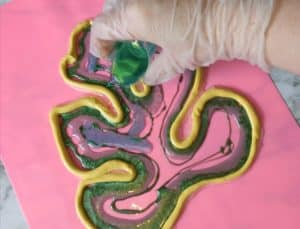
Then pour the colored resin into the mold, kind of following the shape of the leaf as you pour it in. When the mold is filled in, about 1/4 inch deep or a little less, remove bubbles with a heat gun.
I tried to give it some swirly patterns, but I have found that resin still pretty much does what it wants as it cures and the colors settle where they want 🙂
After about 10 minutes, give a light spritz of alcohol to remove any other bubbles.
I had about an ounce of resin left over, so I poured it into a coaster mold so I could check the hardness over the next few hours.
Shape resin bowl
- You can let the leaf continue to cure flat, and then you’d have a decorative resin leaf when it finishes curing. Continue the next steps to make it into a bowl.
To decide when to drape the silicone mat over a bowl to finish curing, check the coaster to see that the resin is a bit bendable still, but not runny. For me, it was between 3 1/2 and 4 hours.

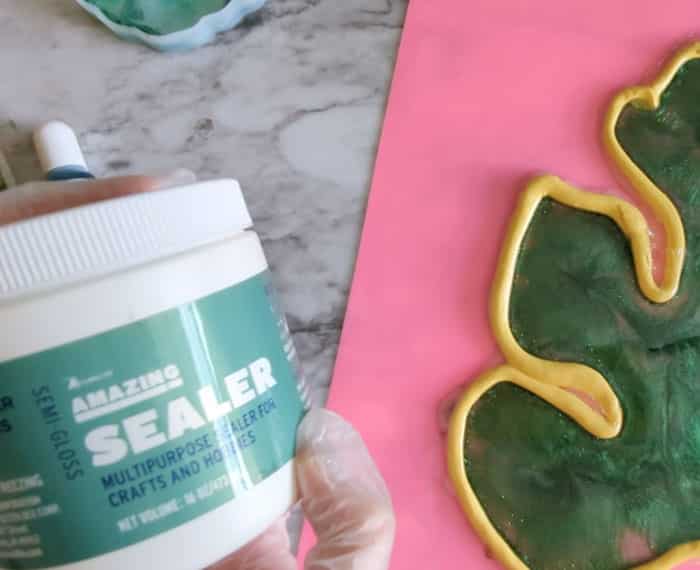
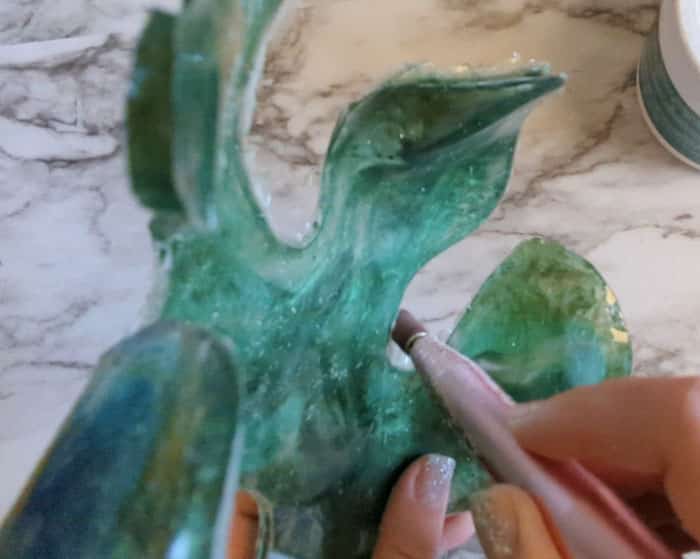
I set the epoxy bowl form over a container of sealer and left it overnight. The next morning I peeled away the mold and the mat and used an electric nail file to smooth the edges. This was MESSY! I should have done it in the garage because it made so much resin dust. Definitely have your mask and glasses on for this part!
The resin was still a bit bendable though, so I set it back over the container for one more day.
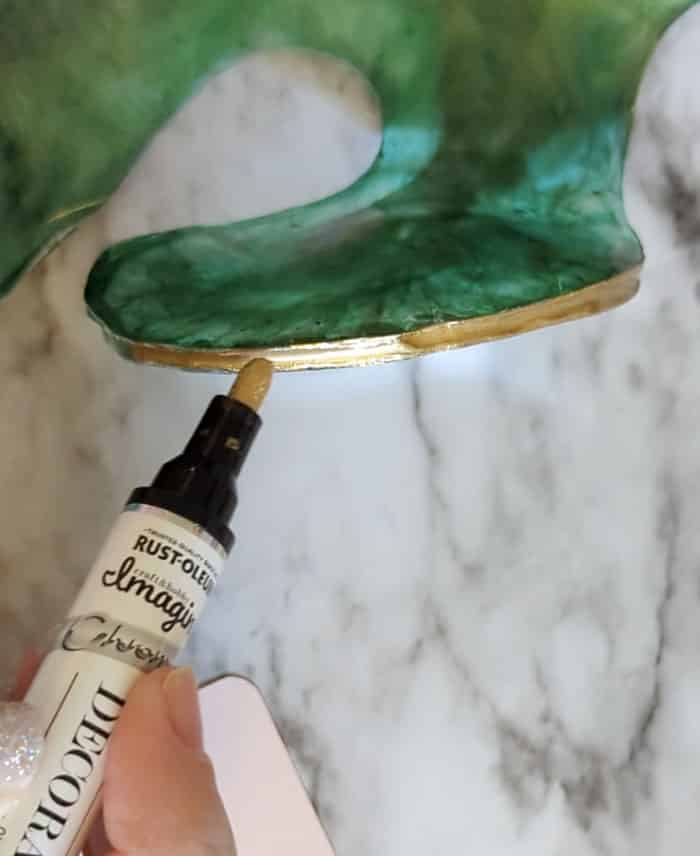
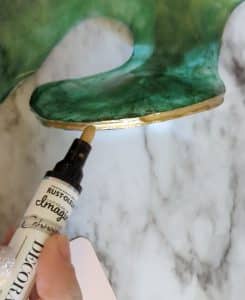
Then when it was fully cured I used a gold paint pen to color the edges (and cover the now-cloudy edges where I sanded.
What do you think? Leave us a comment and let us know if you’re going to try it!
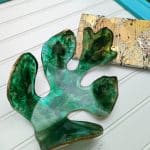
DIY Leaf Shaped Resin Bowl
Materials
- Amazing Clear Cast Epoxy
- Color Creator Greenland Gift Pack mica powder and alcohol ink
- Amazing Mold Putty Kit
- Mixing cups and stir sticks
- Freezer paper or wax paper
- Leaf image draw or print one, or get the one that I drew
- Glue gun
- Gold paint pen
- Nail file drill or dremel
- Glasses gloves, and mask
Instructions
Create a resin leaf mold
- Start by getting your leaf pattern ready. You can draw or print on a piece of paper. Lay a piece of freezer (shiny side up) or wax paper over it and tape down so it doesn’t shift.
- Roll up a golf ball sized amount of yellow and white mold putty. Combine them thoroughly by pinching, “smooshing” and rolling until it’s a uniform yellow color with no white parts.
- Roll it into a snake that’s a little thicker than a pencil. Bend it around on the paper to follow the leaf shape. Pinch ends together where they meet, trying to smooth a bit. Press it all down a bit too, to make sure it has flat contact with the freezer paper – but don’t lose height.
- Let the mold putty set for at least one hour. Then put the leaf pattern under the silicone mat and move the putty rope over to the silicone. To keep resin from leaking out under the mold, add a line of hot glue all around the outside of the mold.
Mix, color and pour resin
- In a measuring cup, pour 2.5 ounces of part A and 2.5 ounces of part B of Amazing Clear Cast. Stir for 4 minutes.

- Pour clear resin into smaller mixing cups to add mica powder and alcohol inks. The powders will make the resin opaque, and the inks will stay more see through.
- Pour the colored resin into the mold, kind of following the shape of the leaf as you pour it in. When the mold is filled in, about 1/4 inch deep or a little less, remove bubbles with a heat gun. After about 10 minutes, give a light spray of alcohol to remove any other bubbles.
Shape resin bowl
- When the epoxy is set but still bendable (about 3 -4 hours, climate dependent. Drape the silicone mat over a bowl to finish curing for 36 – 72 hours until fully cured.
- Once fully cured, peel away the mold and the mat and used an electric nail file to smooth the edges.
- Use a gold paint pen to color the edges.
Stephanie is a crafty wife and mom living in the Pacific Northwest. She shares her creative ideas -along with a bit of “making it up as she goes” – on her blog, Crafting in the Rain.


I am planning on making these for an upcoming Bridal Shower. Really cool. What is the mat used to lay out the putty pattern?
That sounds really fun! I used a silicone mat – I ordered these https://amzn.to/3rcq0hZ