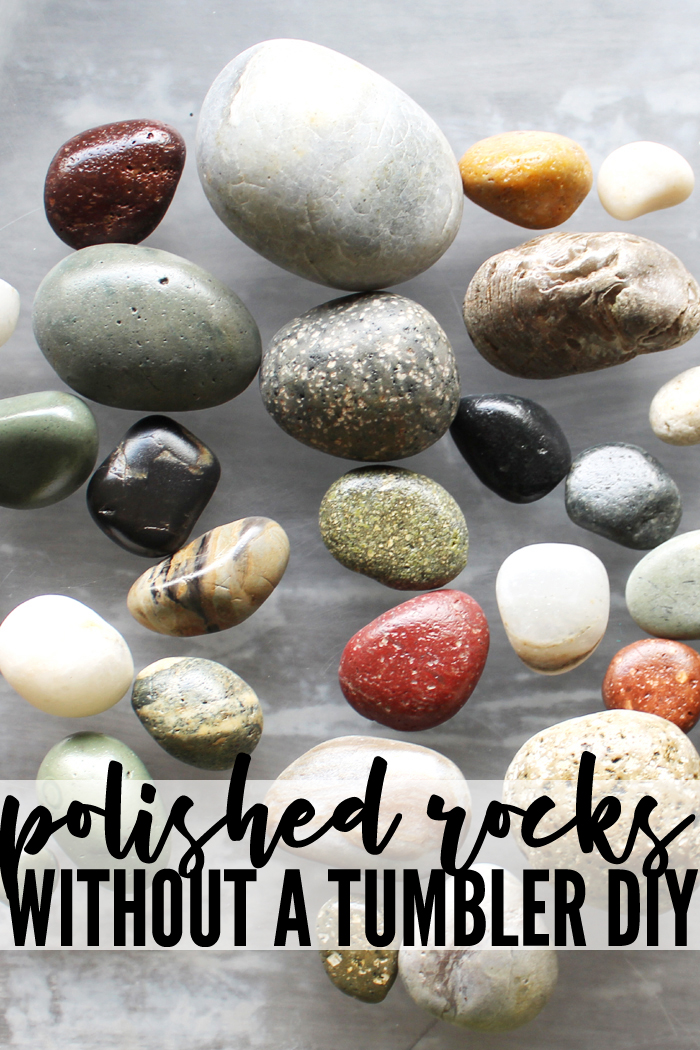
Give your rocks the perfect shine without needing a rock tumbler. Follow this simple tutorial to learn how to use resin spray to get polished rocks!
Are you a rock collector or a crafter looking for an easy way to add a dazzling finish to your rocks? We have just the solution for you! Get ready to make your collection stand out and shine so bright!
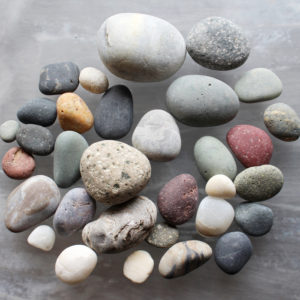
Hi Resin Crafters, it’s Natalie from Doodlecraft sharing a quick and maximum impact craft. Polished stones are shiny and smooth and can be made without expensive rock tumblers and supplies! I love collecting rocks and typically end up carrying pounds of rocks around on hikes and trips because I love them so much. My husband thinks I’m crazy! Shiny wet rocks always look so amazing until they dry and become dull. Polished rocks are the best way to keep that shine permanently!

How do you polish rocks?
The most common methods of rock polishing are either through a manual sanding process or by using a rock tumbler. The manual sanding process requires many tools (a rotary tool with a polishing wheel attachment, sandpaper of varying grits, polishing compounds, and a polishing cloth) and is quite time consuming. Additionally, this method of polishing requires several rounds of sanding, using coarse to fine grits and a couple of rounds of polish.
Using a rock tumbler is also time-consuming, noisy, and much more expensive. But those aren’t the only methods you can use to achieve a high shine on rocks. But here’s my secret weapon — a simple and effective alternative to using a rock tumbler. In this tutorial, I’ll guide you step-by-step through polishing your rocks with a high gloss resin spray and sealer. This method produces a clear high gloss finish showcases the beautiful colors and patterns of the rocks just as vividly as other methods. With a quick application, you don’t have to wait for days to achieve that polished look. It’s also ideal for sealing. Plus, it’s wallet-friendly too!
Supplies for making polished rocks
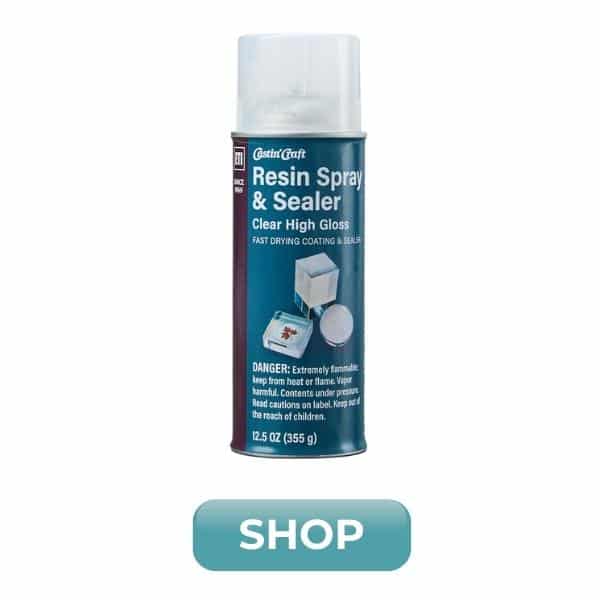
- Resin Spray & Sealer
- Smooth rocks (these were curated near the ocean, so they are round and smooth)
- Soap
- Gloves and mask
- Disposable work surface like a cardboard box

How to Polish Rocks with Resin Spray and Sealer
Printable instruction card can be found at the bottom of this post.
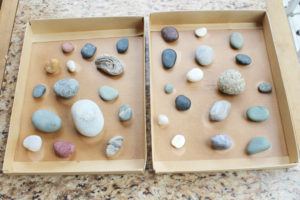
Step 1: Gather Rocks
Step 2: Clean rocks
Before you start the polishing process, clean your rocks thoroughly. Use soap and water to remove any dirt, debris, or oils from the rocks’ surface. Next, dry the rocks with a towel and make sure there is no moisture left on them. Moisture can hinder the polishing process or, worse, damage the rock.
Step 3: Prepare your work surface.
Place the dry rocks in a shallow cardboard box or on another disposable work surface and take them outdoors. Safety first! Put on gloves and a mask to protect yourself from fumes and any skin contact. For the best results, follow the manufacturer’s safety guidelines.
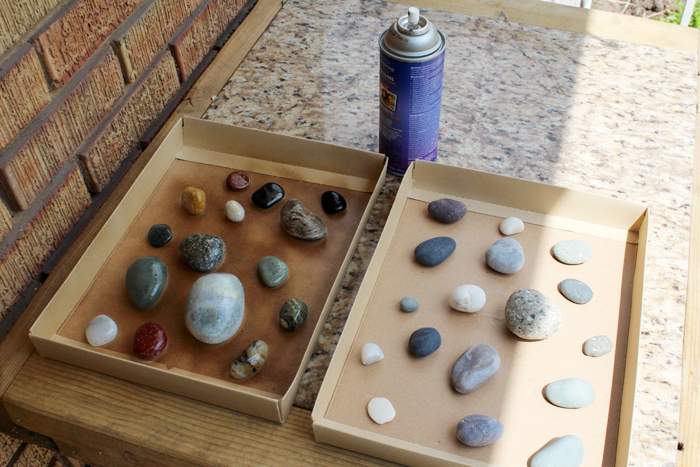
Step 4: Spray Rocks with High Gloss Spray
Shake the can for about 30 seconds. Then hold the can about 6-8 inches away from the rocks and spray them with a gentle mist.

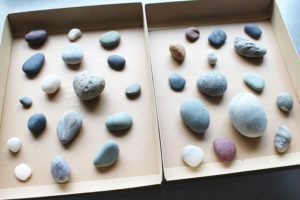
Let the resin spray dry and then repeat again. Then let the rocks dry and turn the rocks over. Spray the other side of the rocks and repeat a second coat.
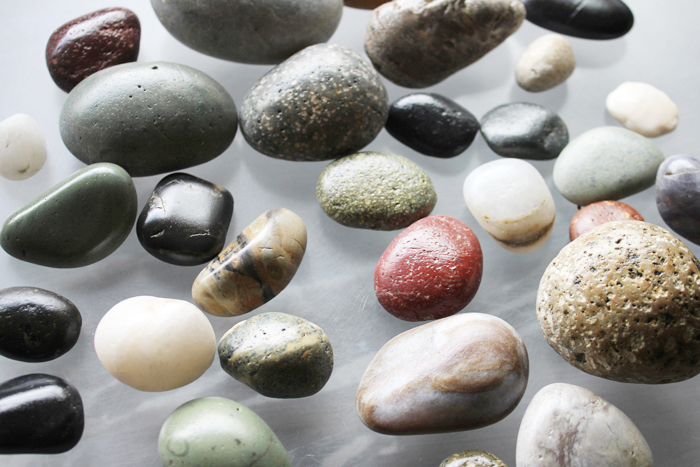
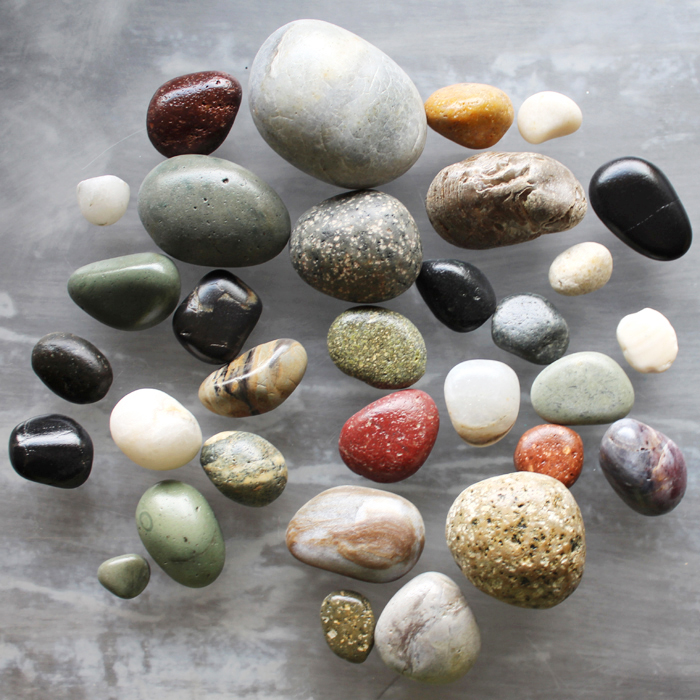
Now the rocks are especially shiny and perfectly polished!
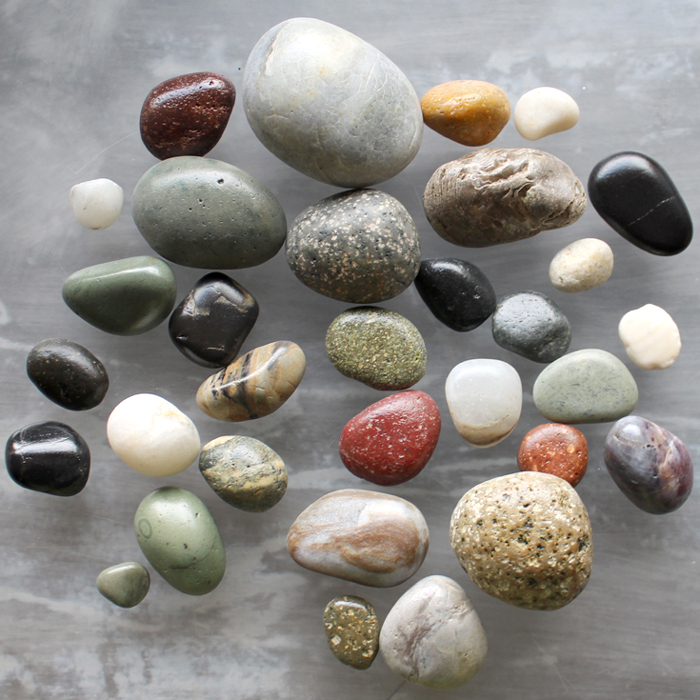
By using already smooth rocks, the shiny finish completes the polished look. This is just how the rocks look with waves splashing over them!
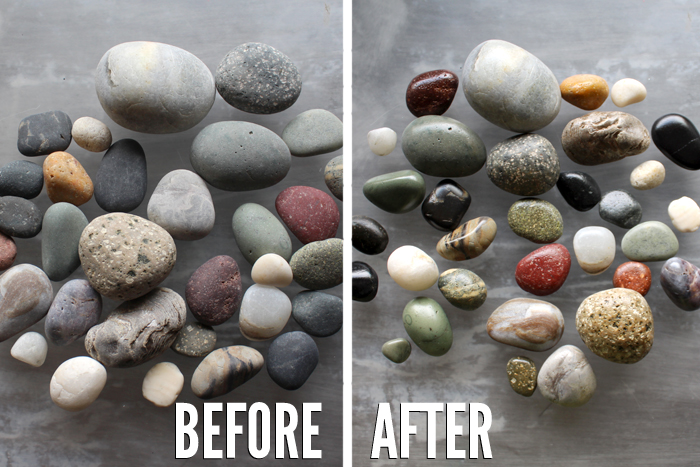
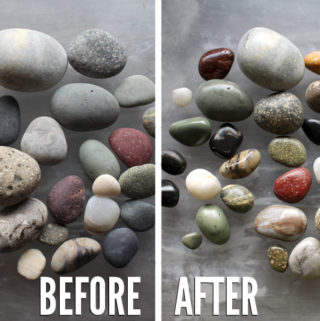
Look at this amazing before and after side by side, the rocks are uniquely bright and vivid! Display them in a pretty dish or adorning a small garden. Awesome, right? This is the perfect craft for those pockets full of rocks after a trip to the beach or river!
Feel inspired? Share your polished rock creations on social media and keep experimenting with different color combinations and patterns. Also, don’t forget to challenge other rock collectors and crafters to get in on the fun and polish their rocks with a high gloss resin spray. Happy polishing!
Polished Rocks with High Gloss Resin Spray
Materials
- Resin Spray & Sealer
- Smooth rocks these were curated near the ocean, so they are round and smooth
- Soap
- Gloves and mask
- Disposable work surface like a cardboard box
Instructions
- Gather Rocks
- Clean rocks thoroughly with soap and water. Dry the rocks with a towel.
- Place the dry rocks in a shallow cardboard box or on another disposable work surface and take them outdoors. Wear gloves and a mask.
- Shake the Resin Spray can for about 30 seconds. Hold the can about 6-8 inches away from the rocks and spray them with a gentle mist.

- Let the resin spray dry and then repeat again. Then let the rocks dry and turn the rocks over. Spray the other side of the rocks and repeat a second coat.
Natalie Shaw is a Craft/DIY blogger at Doodlecraftblog.com. She loves sci-fi, fantasy and video game geekery and that comes out in many of her projects. She posts budget conscious DIY’s, crafts, jewelry, kid friendly projects, upcycled treasures and other fun on her blog 5 days a week.


Thanks! I have been wanting to do something like this. I’ll get some spray and go for it on our next road trip!
I have several small totes of rocks that I purchased as gems and crystals. So many did not even have a shine to them. I would not get rid of them. I also have a small collection of rocks that I have found just walking around my yard and the neighborhood and I think they would be very pretty all shiny. I do wire wrapping and I cannot wrap the ones that are not shiny with that finished look. Thanks so very much for this information. As soon as I can, I am going to get busy shining my stones and rocks up. Then I will be able to continue wire wrapping them. Great idea and thanks again-Loretta
these look beautiful, does the spray hold up if they rocks are outside in teh weather?
Just like anything in direct sun, there will be some wear over time. But yes, this has worked better for my rocks than any other finish. I keep my rocks outside year round and re-spray them in the late Spring, after all the snow melts. 🙂
I collect a lot of rocks from the beach, especially red and green ones. Sadly they are too large for my rock tumbler. This is a great idea for them. Now I can display them in my garden without having to wet thwm just to see their true color.
Do you use anything on the rocks or spray them completely dry? I was thinking of rubbing mineral oil on my rocks before spraying them with the epoxy you recommended and seeing if it increases the shine… Any thoughts? Beautiful rocks btw 😍
Hello! They need to be dry or the resin spray will not adhere.