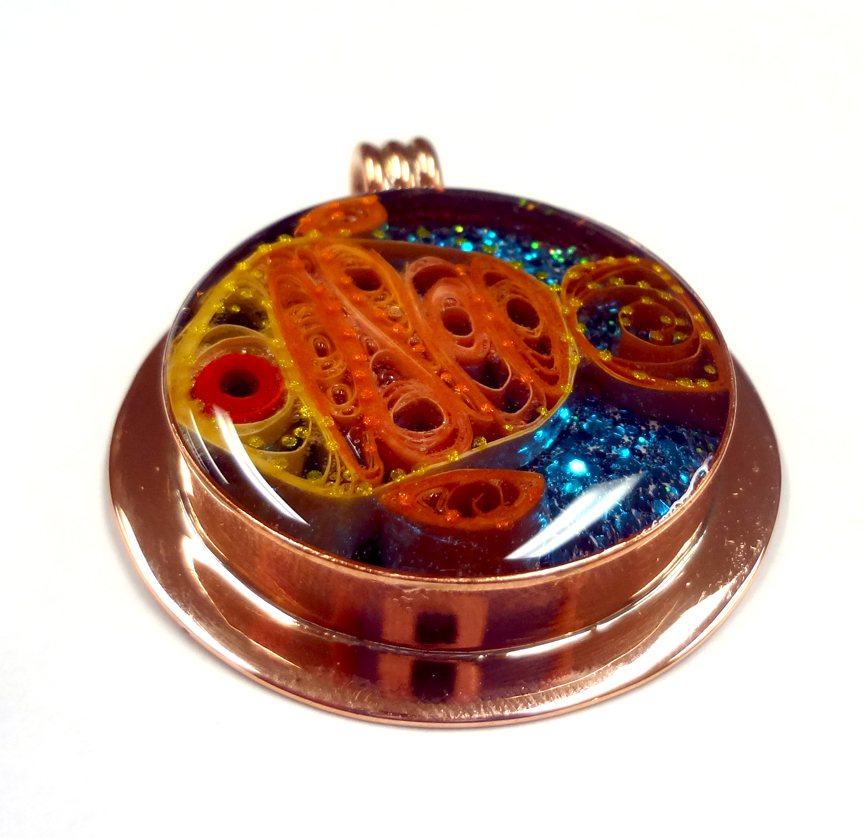
This quilled gold fish is an experiment with very happy results.
I had no idea this would turn out so well!
I do love the art of Quilling.
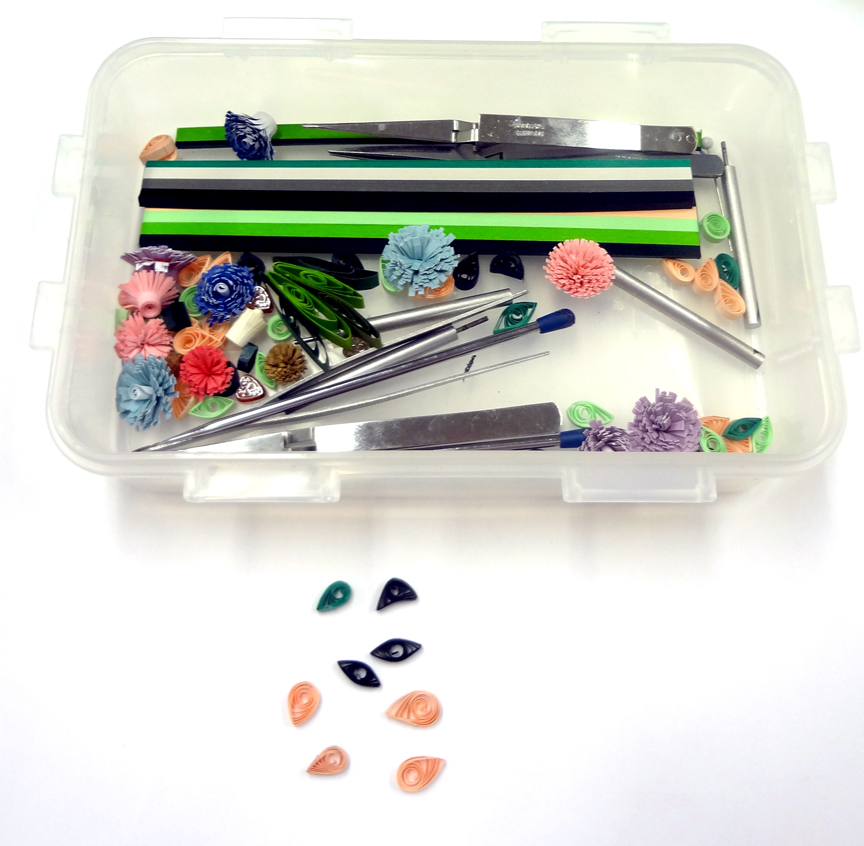
I don’t have very much time to practice but I keep my box of quilling supplies handy and have even brought it on a plane to pass the time. At the Craft and Hobby Show last month I spent some time with Alli Bartkowski, the owner of Quilled Creations. We were both curious about embedding quilled creations in resin and I promised to do some experiments when I got home.
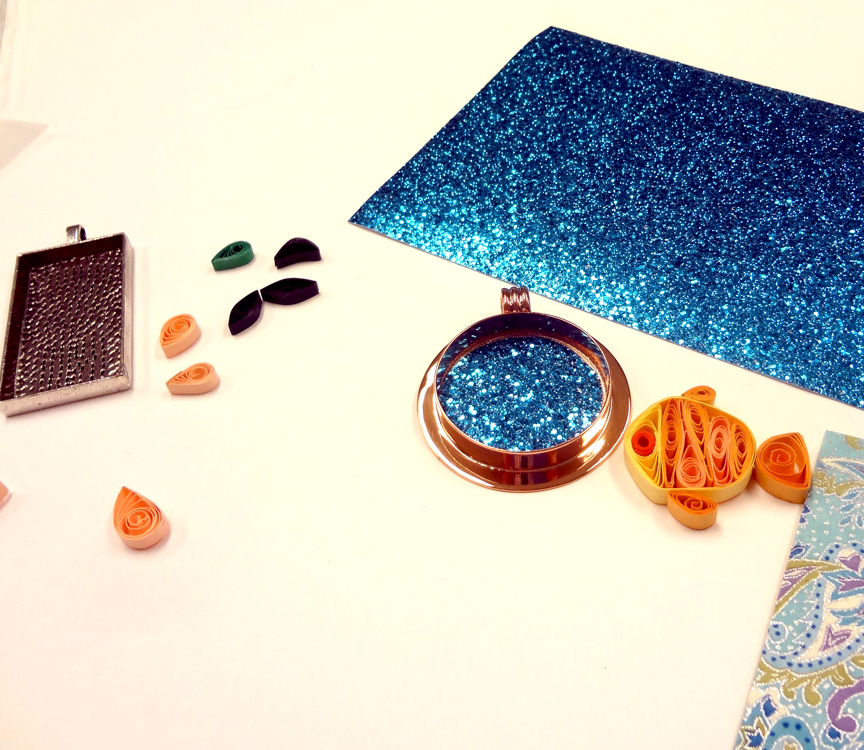
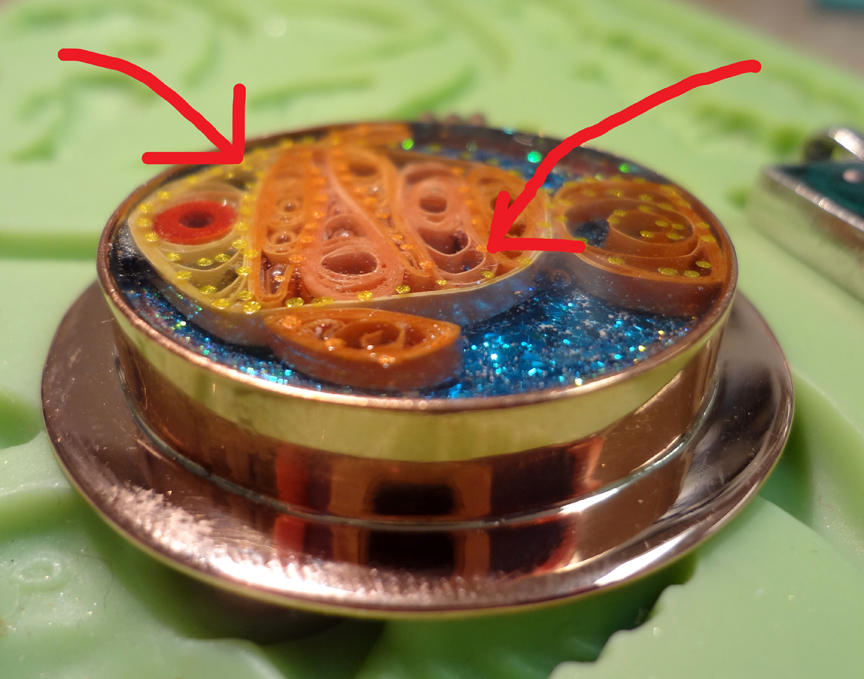
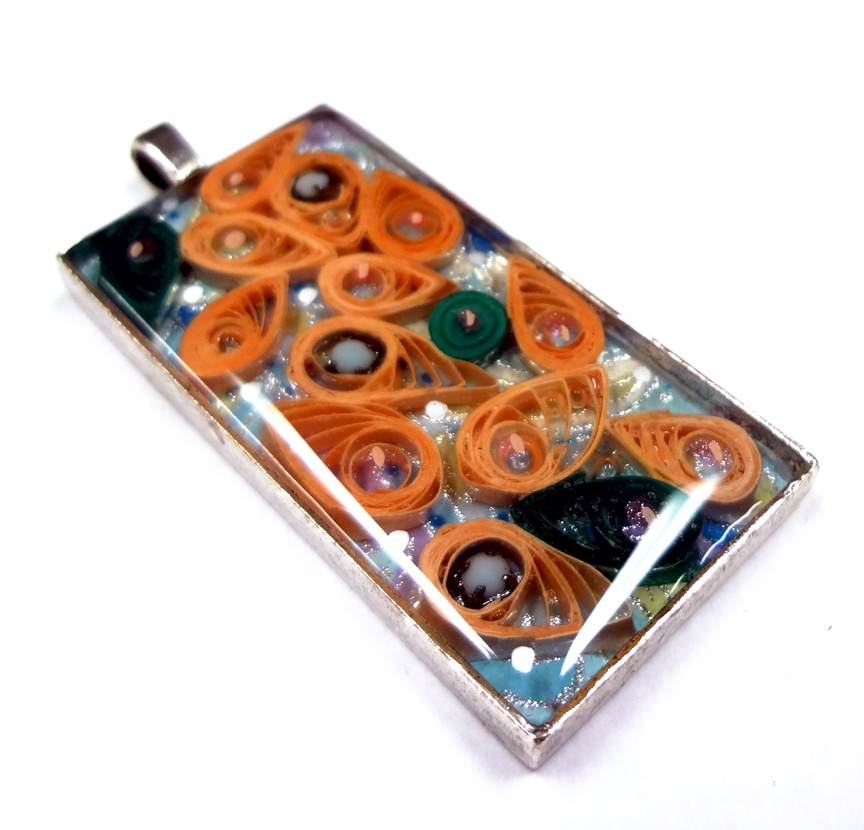
I gathered two bezels and some background papers from my stash. My quilled shapes are 1/8 of an inch tall and I wanted to completely submerge them in resin, so a deep bezel was needed.
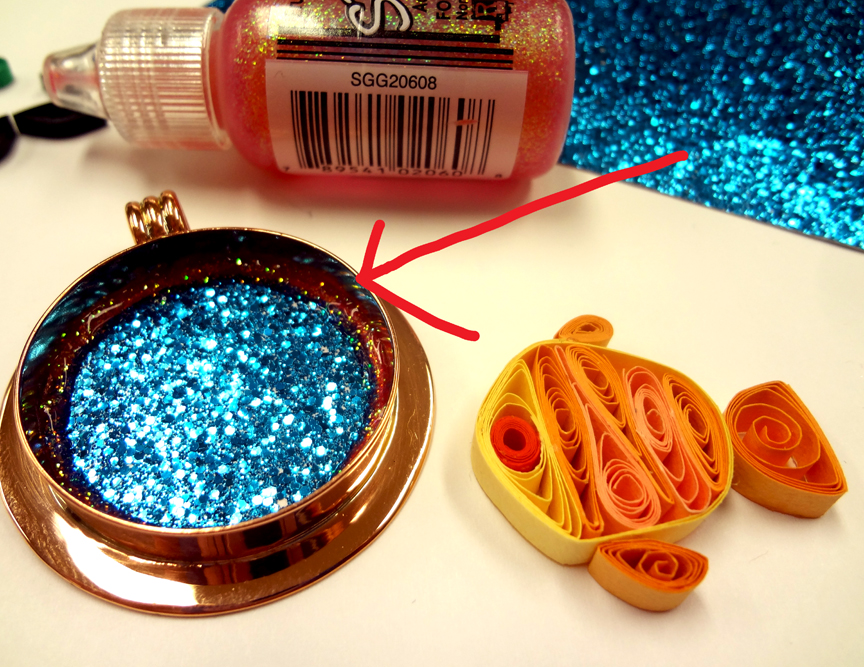
I added a little glitter glue to this edge.
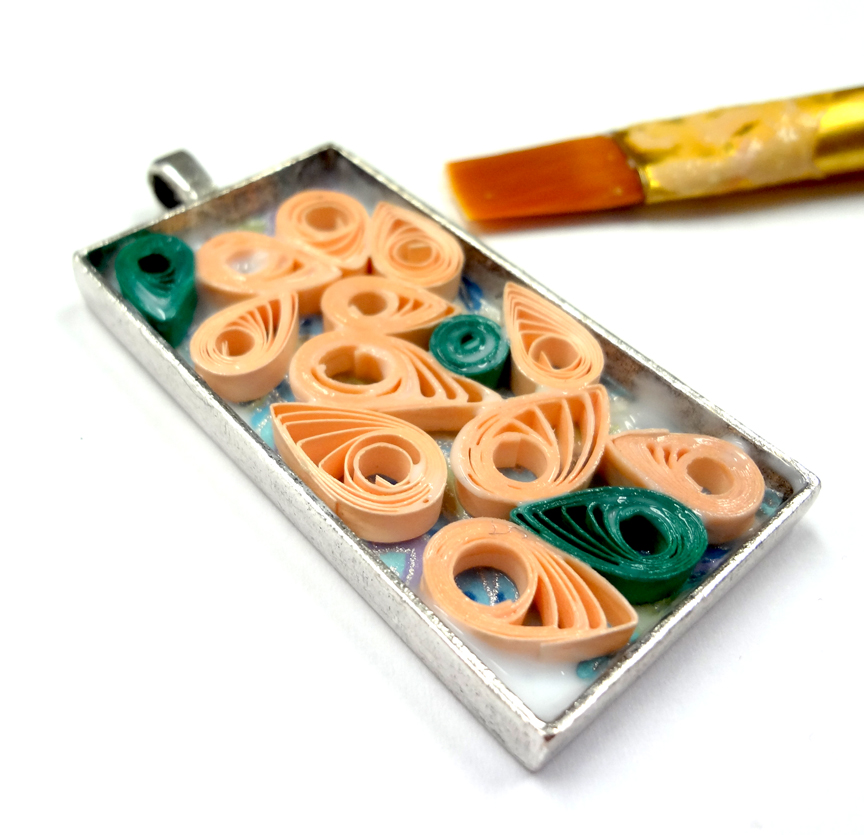
What concerned me the most was sealing the quilled paper. I was worried that I would miss some areas and then the project would have many dark and stained zones. I sealed with Aleene’s decoupage medium three different times and then let everything dry overnight.
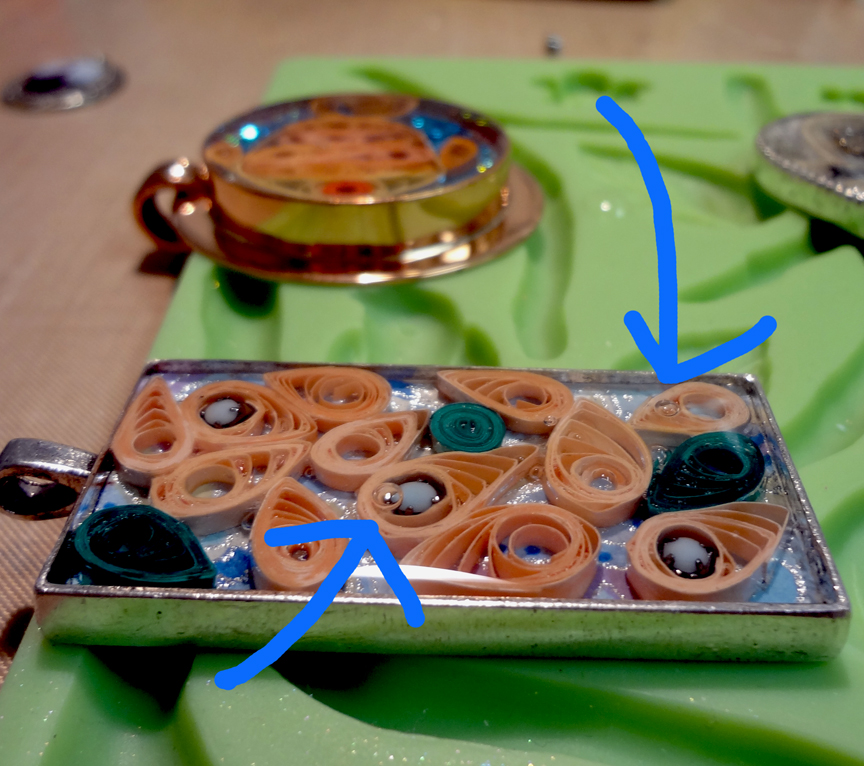
The next day I made a batch of Jewelry Resin and poured it into each bezel. I did not fill completely to the brim…almost though. I wanted the quilled paper to be completely covered on the first pour. Then I waited and popped the pesky air bubbles trapped in between all those quilled areas.
Here is the goldfish bezel after I de-bubbled.
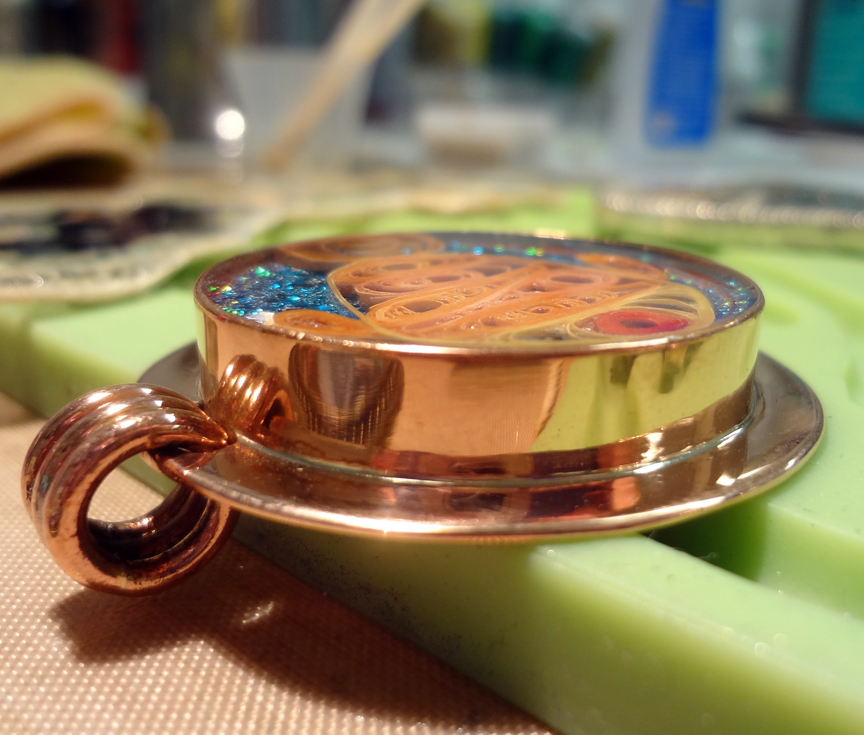
I let this cure for 24 hours.
These two quilled bezels already looked amazing and I was so surprised that the papers all looked so good.
No odd or unusual stains!
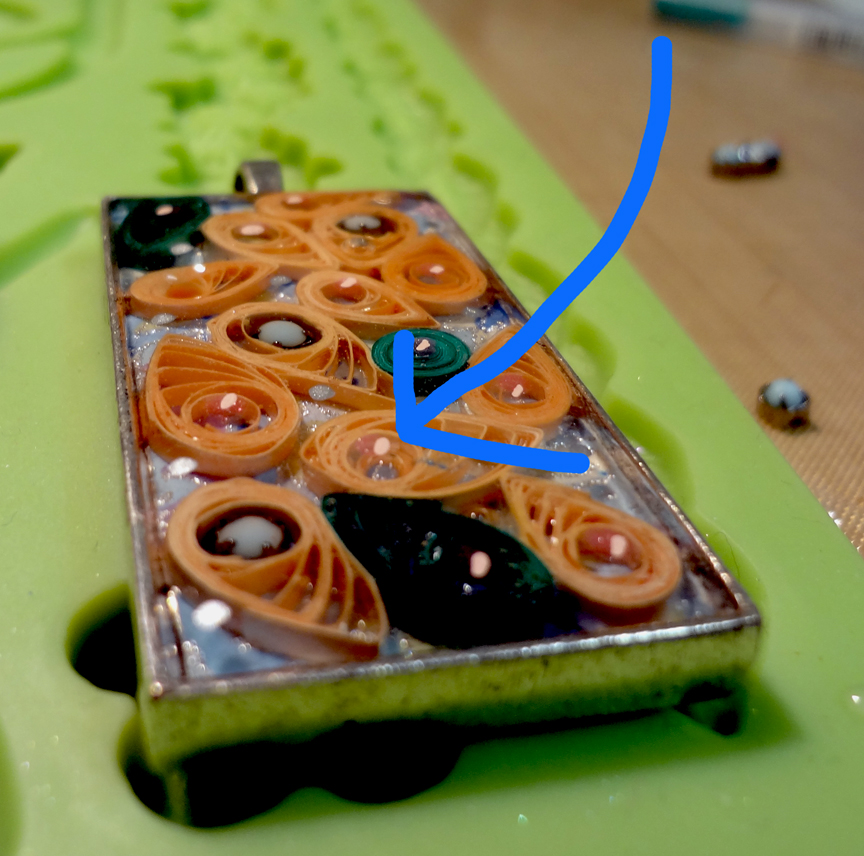
On that first cured surface I added some extra dots with paint markers.
When my paint dots were dry I simply poured a doming layer of Jewelry Resin over both pieces.
I let this cure for an additional 24 hours and then took my pictures!
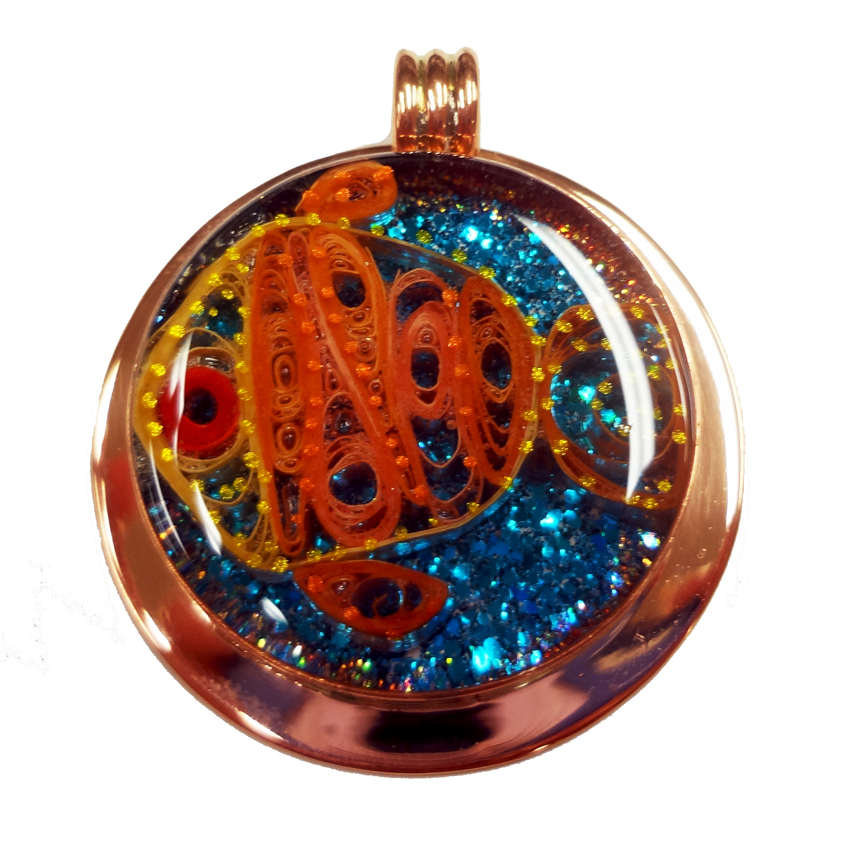
Ta Da!
I never thought this would work!
Now I have another resin pouring success story!


Thank you for the intresting story and pics!!! I do have a couple questions….do any of the pieces unwrap in the entire process? Do any of the pieces float? I have used the acrylic 'water' but not the jewelry resin. I wonder if they are the same? I used the 'water' to make something a couple months ago and it never hardened completely….disappointed!!!…..does this harden HARD? Thank you again!!! Cathy
Jewelry Resin is a two part epoxy, so it cures in 48 hours solid. Nothing floated because I really glued it all in place before I poured.
You can use any of the resins. Sometimes they don't harden completely because you either don't get to measurements exact or it may be too humid. I've used many different brands with no problems. There are 2 really easy brands Ice Resin (http://too-bad-dogs-inc.com/store/WsDefault.asp?One=563) and Crystal Coat Glaze ( http://too-bad-dogs-inc.com/store/WsDefault.asp?One=586 )
If you use the canned resin you have to also buy the hardener separately. Then you must be exact on your measurements. Before I put quilling in to be covered in resin I make sure that it's properly glued and then I also brush on some resin so it keeps its shape.
We're adding a link to your instructions on our resources for quillers page. Great work.
How is the best way to get all the bubbles out between the tiny quilling twirls? areas?
You can spray them with a spray sealer or paint resin onto them prior to casting.