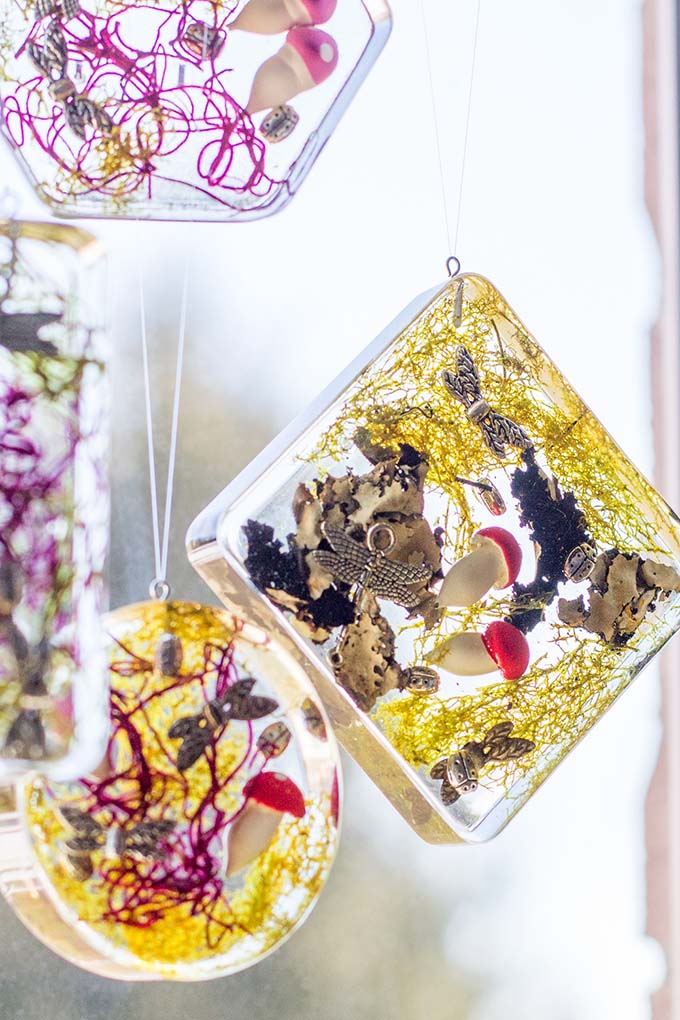
These resin fairy garden light catchers are the perfect way to bring a little woodland magic to your room!
With the warmer days here to stay, I imagine the depths of the forest floor slowly coming to life. Plants that have lay dormant for months have reached for the sunshine. The moss is starting to get greener and little mushrooms and toadstools are beginning to emerge. It’s almost magical and I can just picture the little fairies tapping their wands to make everything grow again.
DIY Resin Fairy Garden Light Catchers
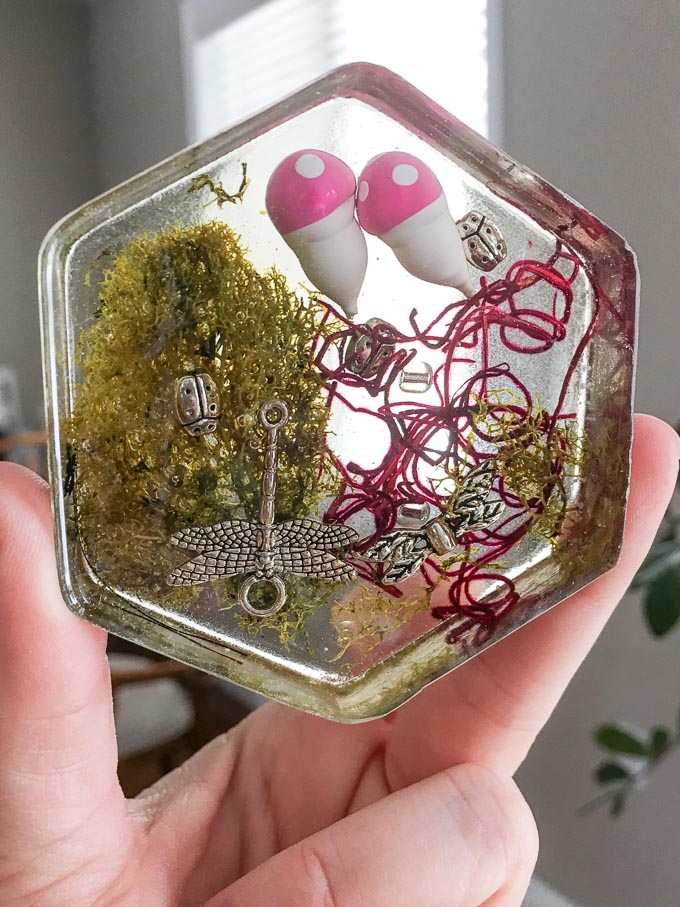
There is something about the moss and forest floor that is so peaceful and serene. Resin allowed me to recreate and capture a bit of this serenity and make these mini fairy garden light catchers. They look beautiful hanging in my bathroom window reflecting the rays of sunlight and make me smile each time I see them.
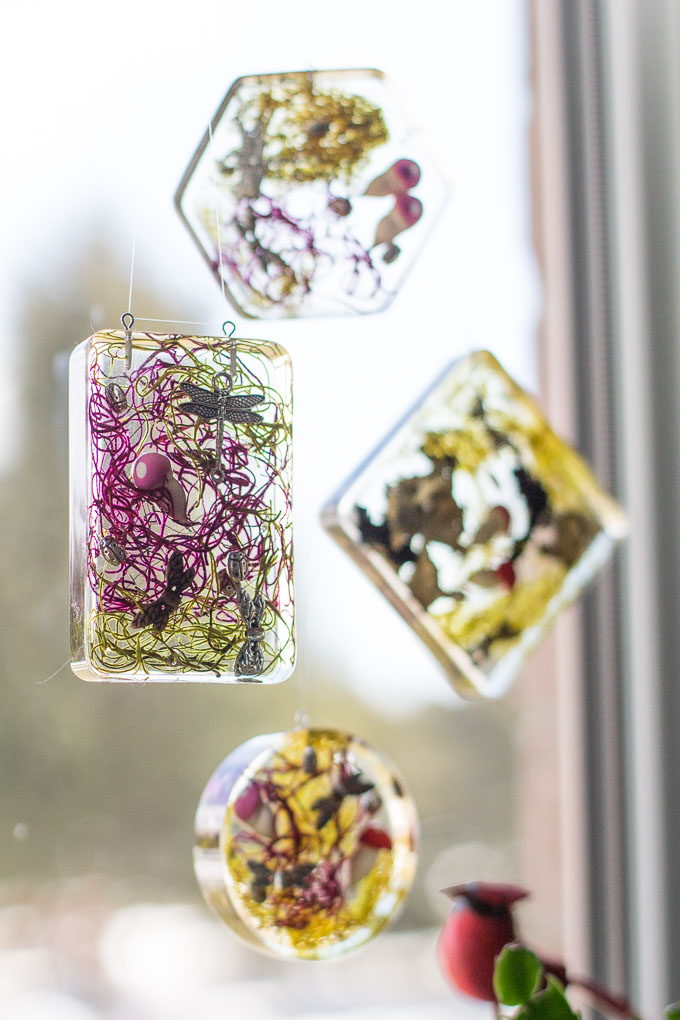
Although these little fairy gardens make lovely lightcatchers, they’d also be pretty each on their own as paperweights on a desk or even unique coasters for your morning coffee cup.
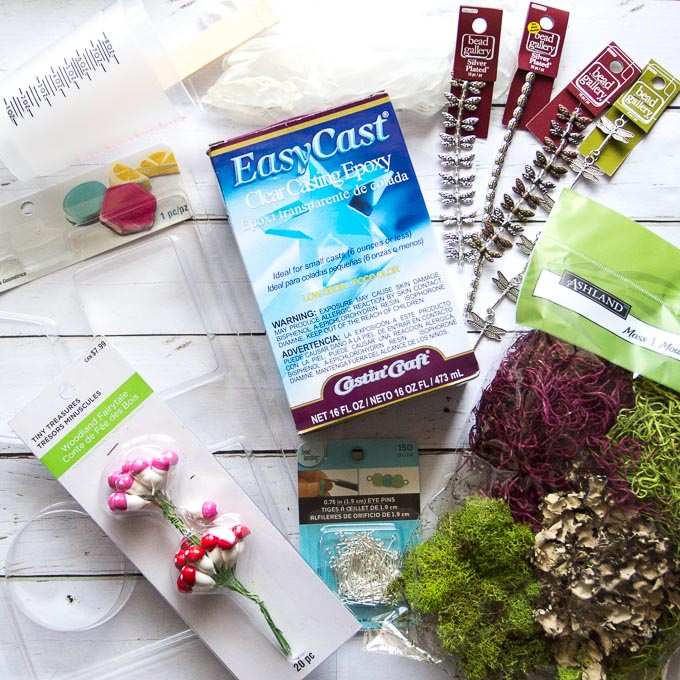
Materials Needed for these Resin Fairy Gardens
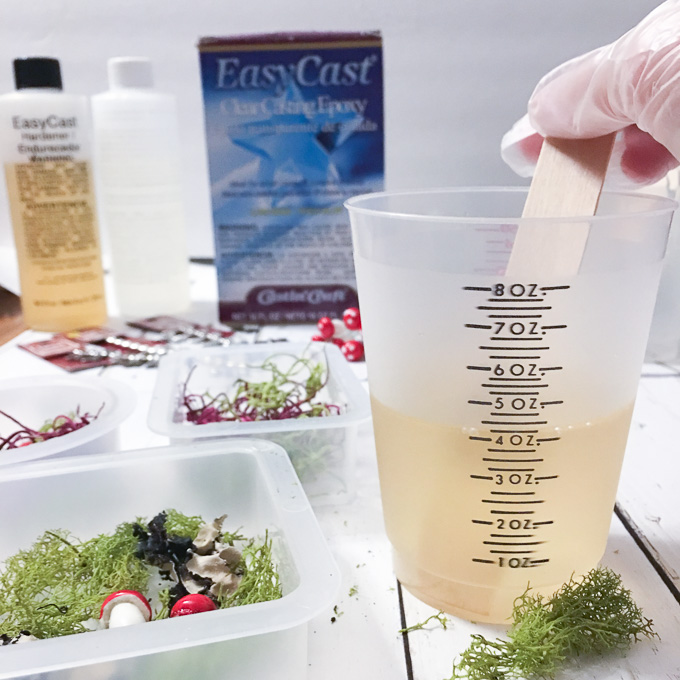
- EasyCast Clear Casting Epoxy
- Mold Release Conditioner
- Castin’ Craft reusable casting molds: I used the MC-2 (2-1/4″x 2-5/8″ x 1-1/8″ deep), MC-3 (2-3/8″x Dia. x 1-1/8″ deep), and MC-4 (2-1/8″x 3-1/4″ x 1-1/8″ deep)
- Measuring cups, wooden craft sticks, straw, paper towels
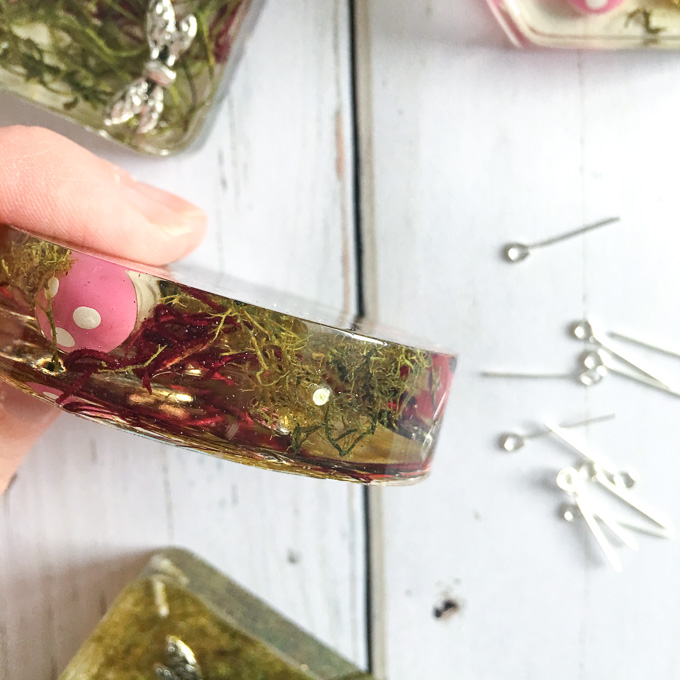
- Multi-colored dried moss
- Bead Gallery silver plated insect beads (ladybugs, dragonfly, butterflies)
- Tiny Treasures Woodland Fairytale Toadstools
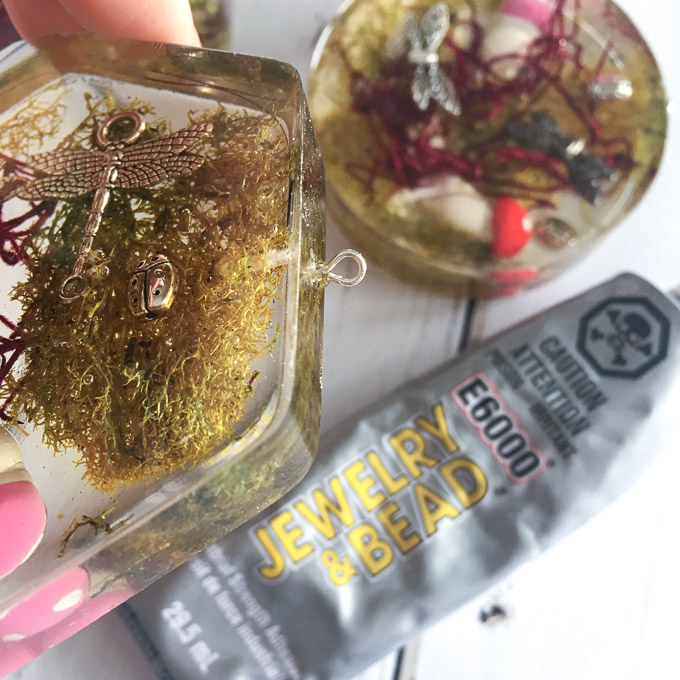
- Bead Landing eye pins
How to Make a Resin Fairy Garden
Read all package instructions. Use gloves and work in a well-ventilated area on a surface protected with plastic or newspaper.
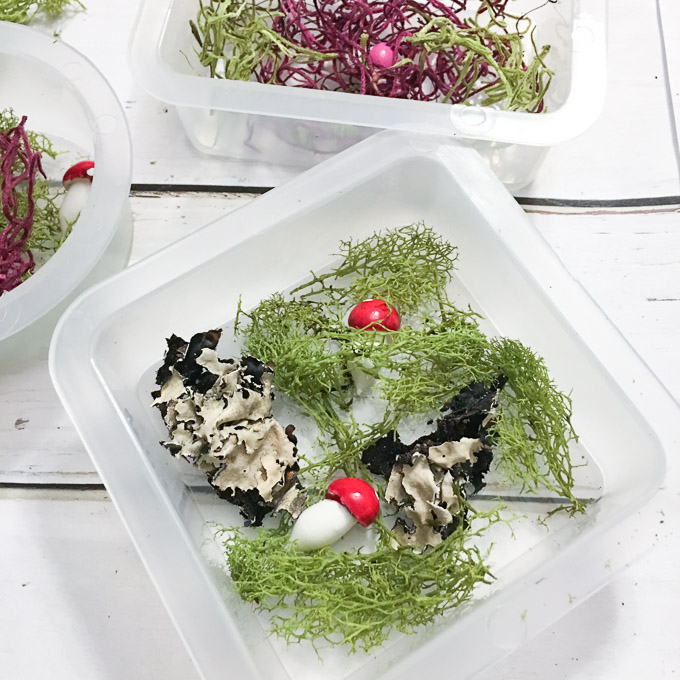
Prepare the molds using a Mold Release Conditioning agent.
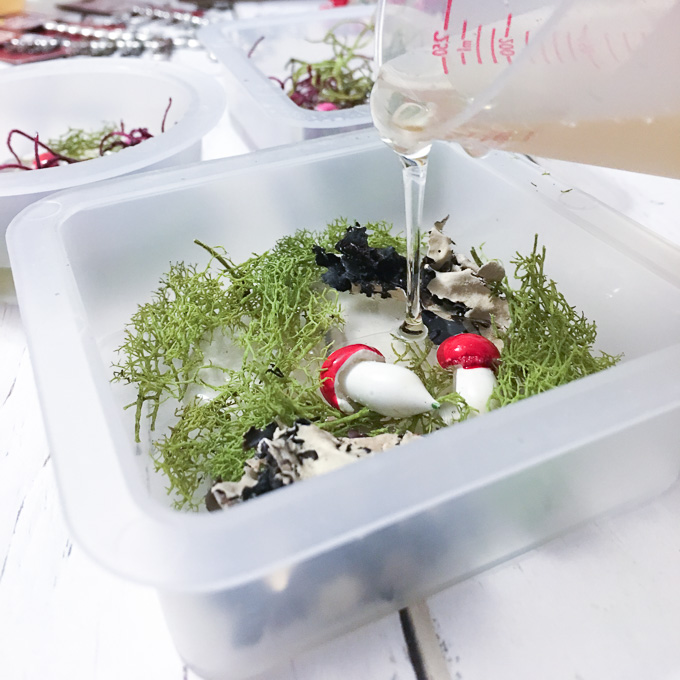
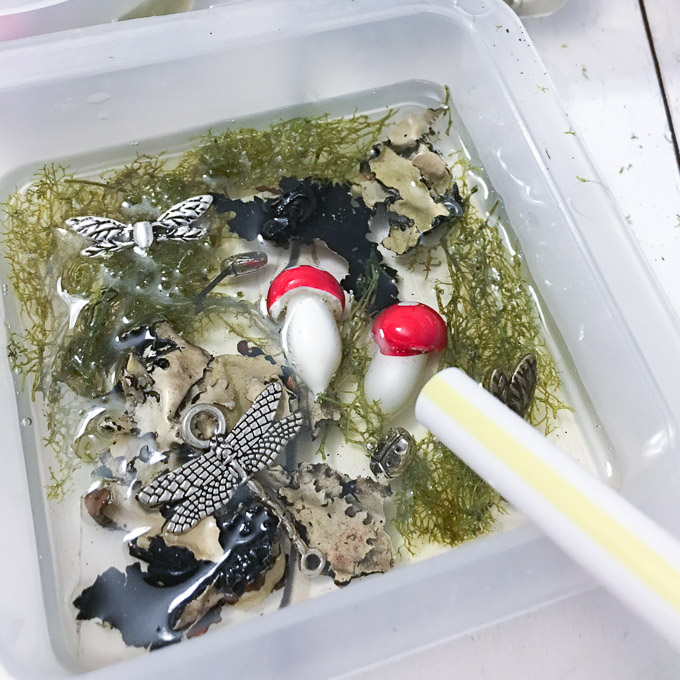
Arrange the moss and toadstools loosely in the molds.
Mix resin (1 oz total for each mold).

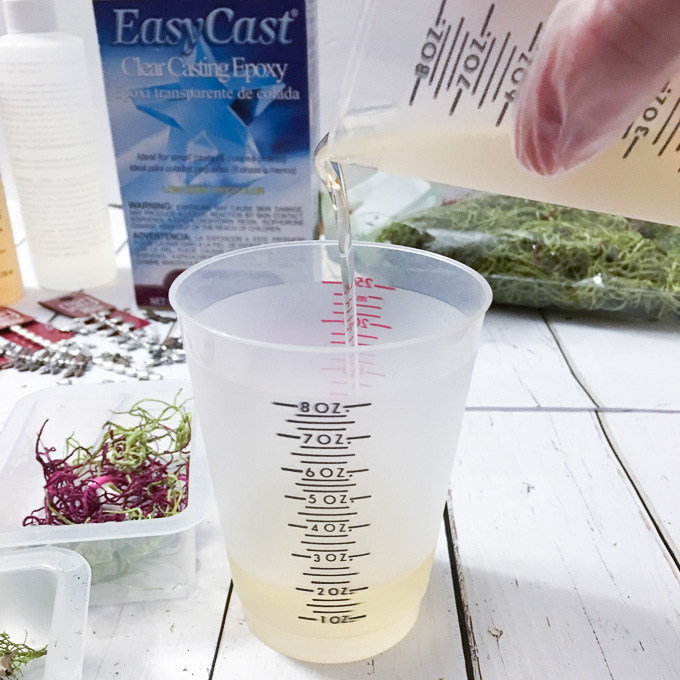
Pour about 1/2 oz of mixed resin over the moss and toadstools in each mold.
Gently submerge and rearrange the moss in the molds using the wooden stir sticks.
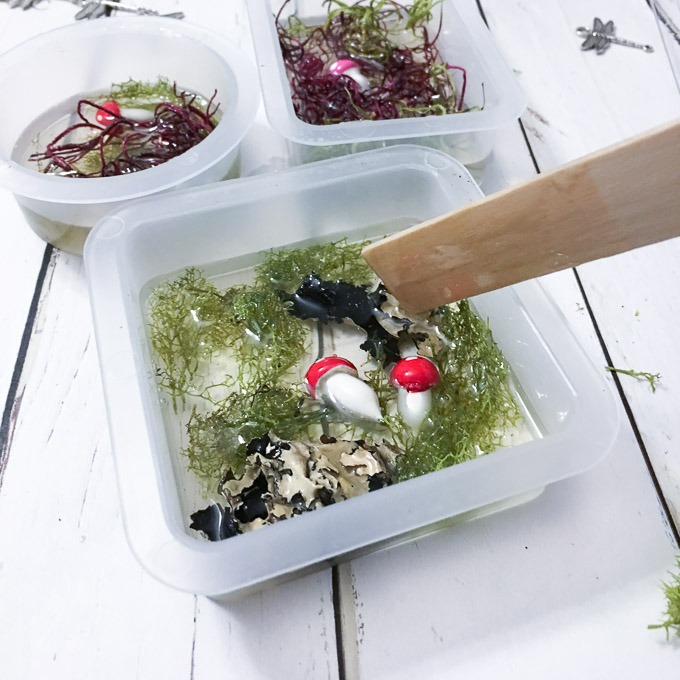
Add in the insect beads. Pour the remainder of the resin equally in each mold.

Let the resin set for about 1 minutes and then blow off any bubbles which rise to the top using a straw or with a kitchen torch.
Place on a level surface, cover and allow the resin to set at least 4 hours.
Mix another ½ oz of resin (total volume) for each of the molds. Pour into the molds ensuring that all contents are completely submerged.

Optionally, add a few more beads into each arrangement.
Blow off any air bubbles as previously, place on level surface, cover and allow the resin ot set for at least 24 hours (soft cure) but ideally for 72 hours (hard cure).
Carefully remove the arrangements from the molds. Drill and insert the eye pins to the top of each arrangement. Hang using invisible line.
Like it? Pin it for later!

Jane and Sonja are sisters, moms and lifelong craft addicts both living near Toronto, Canada with their families. They share their love of creativity, nature and coastal DIY ideas on their blog Sustain My Craft Habit. They craft and decorate their homes using repurposed and upcycled items and materials found in nature.


Leave a Reply