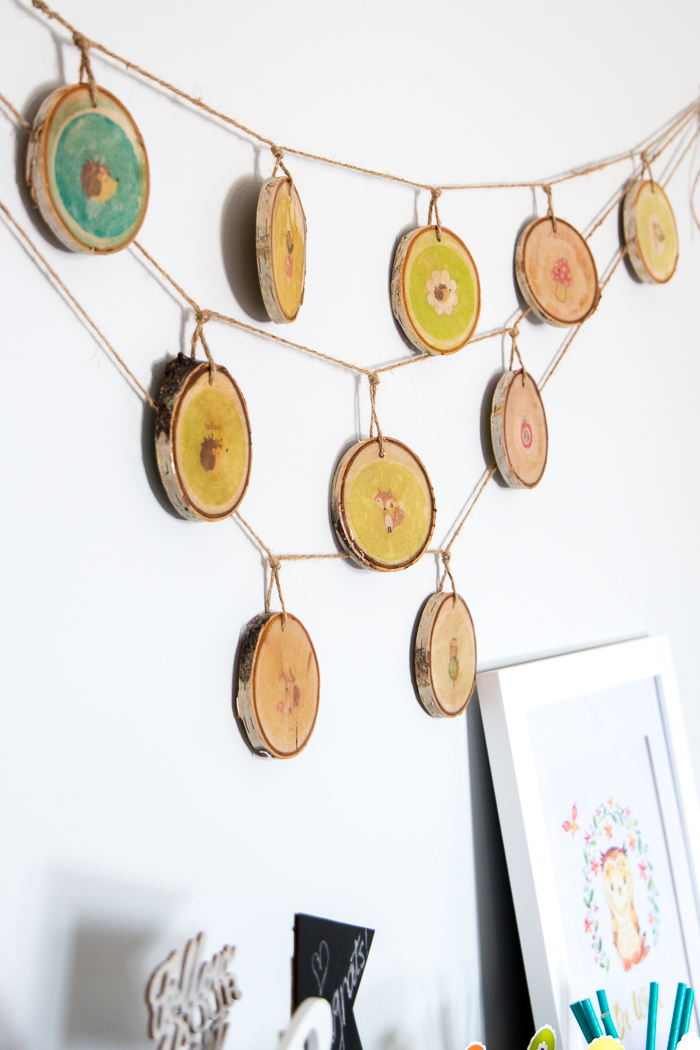
You can transform any image into fun and beautiful wall decor! This DIY rustic garland would make the perfect woodland nursery decor. Or use it to decorate a woodland-themed party or baby shower.
Hello! This is Jane from Sustain My Craft Habit and I’m happy to be back here on the Resin Crafts Blog sharing this lovely rustic wood slice garland idea with you.
When my smallest turned one we had a small birthday party for her which included a DIY owl piñata made from a cereal box. It was a hit and made me think how fun it would be to host a woodland baby shower or make woodland nursery decor. So today I’d love to show you how to make this woodland-themed garland which would be perfect for either. While I used a woodland theme, you could transfer any image onto the wood slices using the methods described below.
Supplies Needed to Make this DIY Woodland Nursery Decor Idea:
- 10 wood slices (ours were birch but any wood with a smooth surface will work), approx 3” in diameter and 1/8″ thick, drilled with a hole for hanging
- Images you’d like to transfer, cut to size
- Photo transfer medium, paint brush, damp cloth
- Ultra-Seal Quick Decoupage (or other multipurpose sealer), paint brush
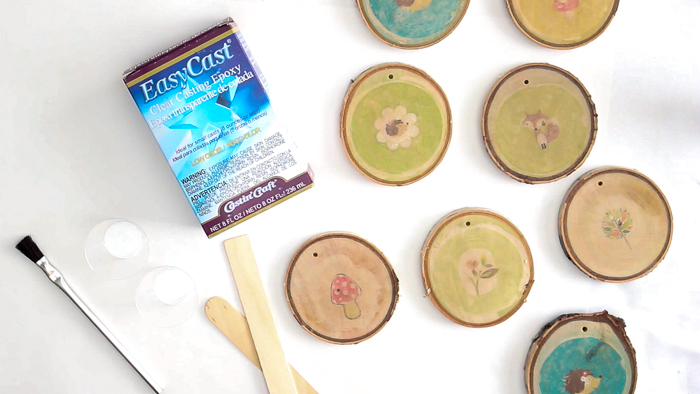
- Castin’ Craft’ EasyCast Clear Casting Epoxy resin
- Mixing cups, stir sticks, gloves, disposable paint brush, lighter (or straw)
- Twine, scissors
Before starting your project be sure to cover your work surface and work in a well-ventilated area. Completely read through the instructions provided in the EasyCast Clear Casting Epoxy box for the best results.
How to Transfer a Printed Image onto the Wood Slice:
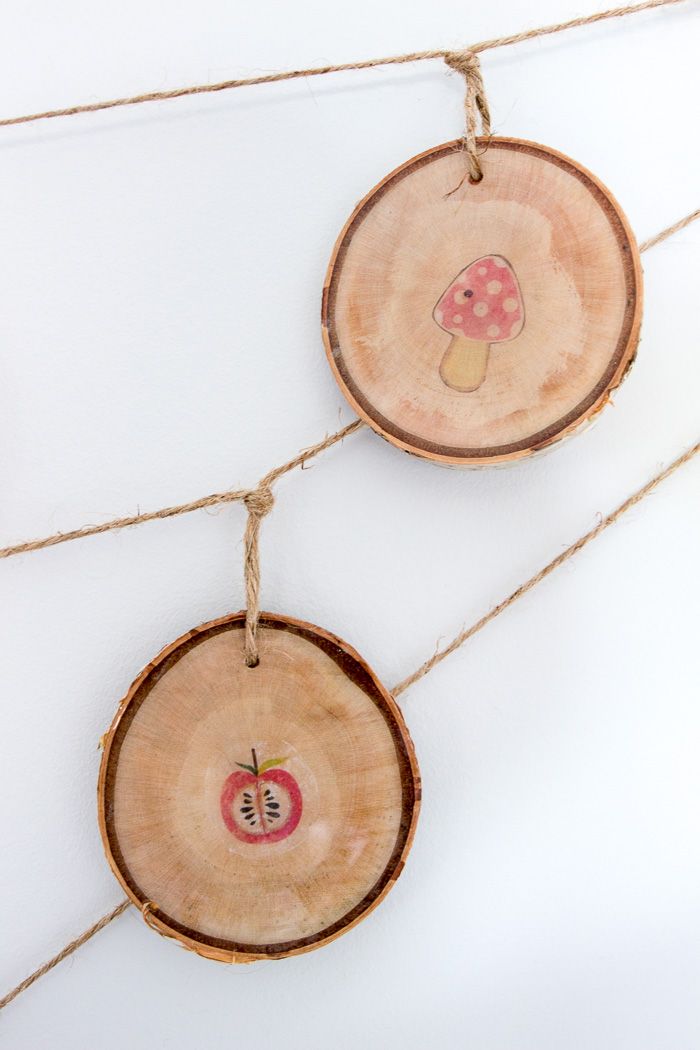
To begin, I found this adorable Woodland Creatures Printable Collage by Sparrow Graphics on Etsy which was just perfect for the garland I had in mind. Each round image is 1″ across so I printed them at 250% to make them larger. Sticking with the yellow/green/teal images (there were 36 separate designs in the download), I cut out 20 image rounds (one for each side of the wood slices).
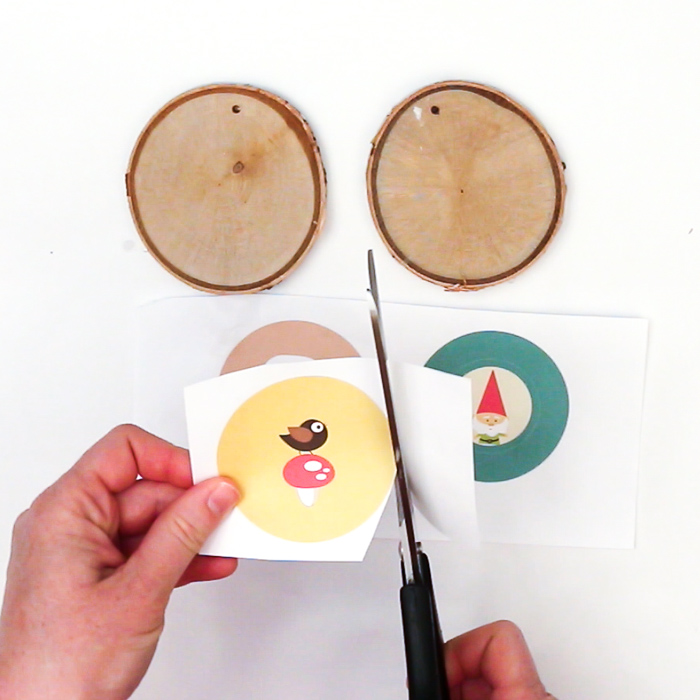
With a paintbrush, I applied the photo transfer medium to the front side of the image and onto the wood slice where I planned to place the image.
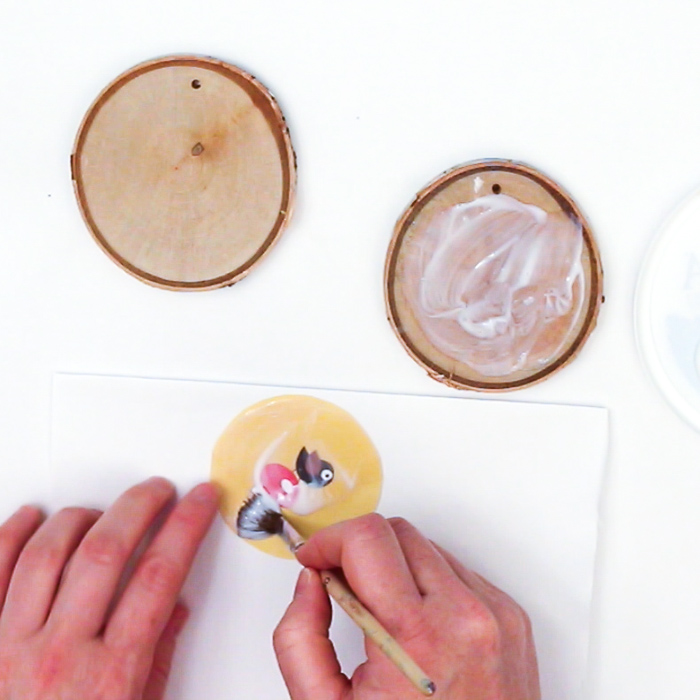
Next, I applied the image to the wood slice with the face side down. I smoothed out any air bubbles and wiped away excess medium with a damp cloth. As per the instructions on the image transfer medium, I let the paper dry completely (overnight).
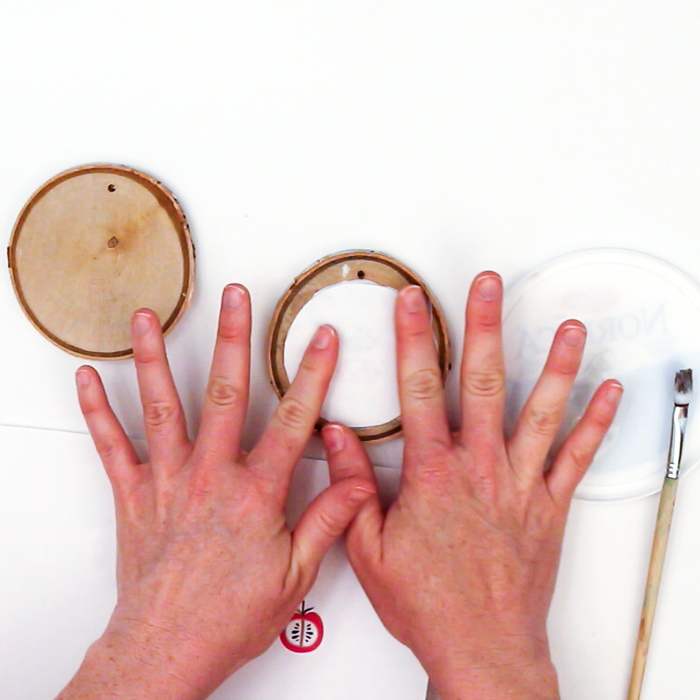
The next day, I wet the dried paper with a damp cloth and let it sit for a few minutes before gently rubbing off the paper with the cloth and my fingers. I wiped off as much of the paper as I could and repeated the wetting part as needed.
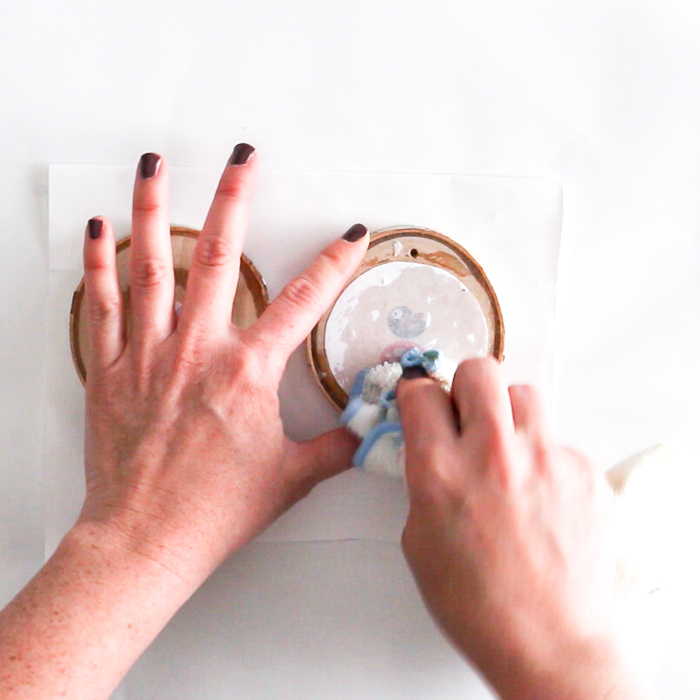
Obviously, the more that I rubbed, the fainter the image became, so I was careful not to completely remove all the ink.
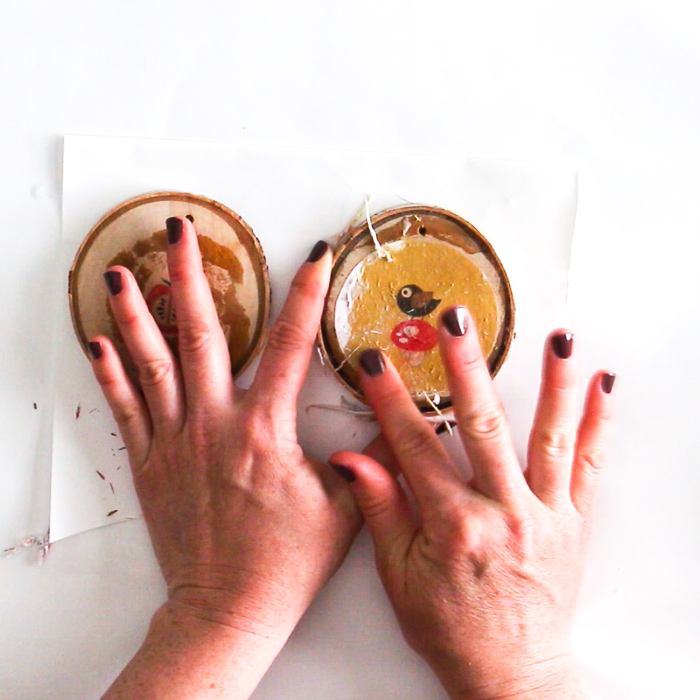
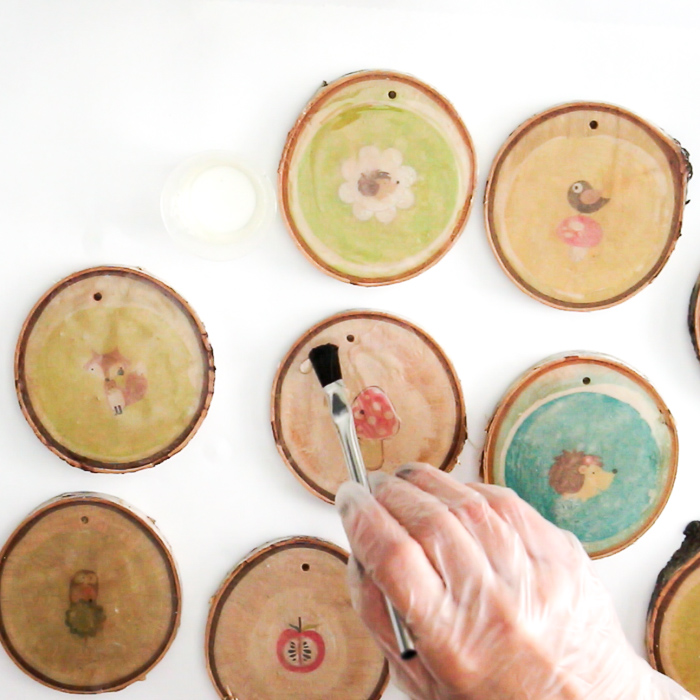
Finally, I coated the entire surface of the wood slice, including the transferred image with a multi-purpose sealer and let it dry completely (overnight) before moving on to the next step.
How to Make a Wood Slice Garland with a Resin Coating:
To make a smooth and shiny coating to this woodland nursery decor idea, I started by combining equal parts of the EasyCast Clear Casting Epoxy Resin and Hardener into a small measuring cup (I used 1/4 oz of each and had plenty to work with).
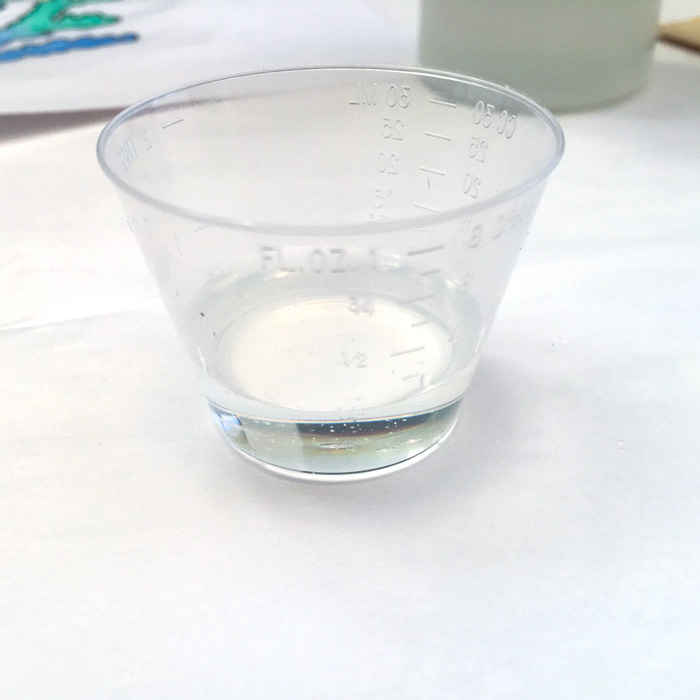
Taking care to scrape the sides and bottom of the measuring cup, I stirred the mixture thoroughly for 2 minutes.
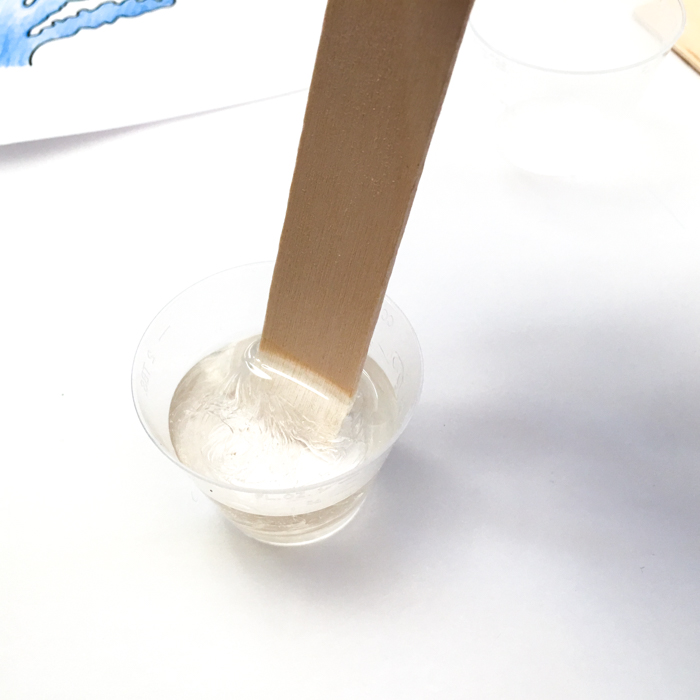
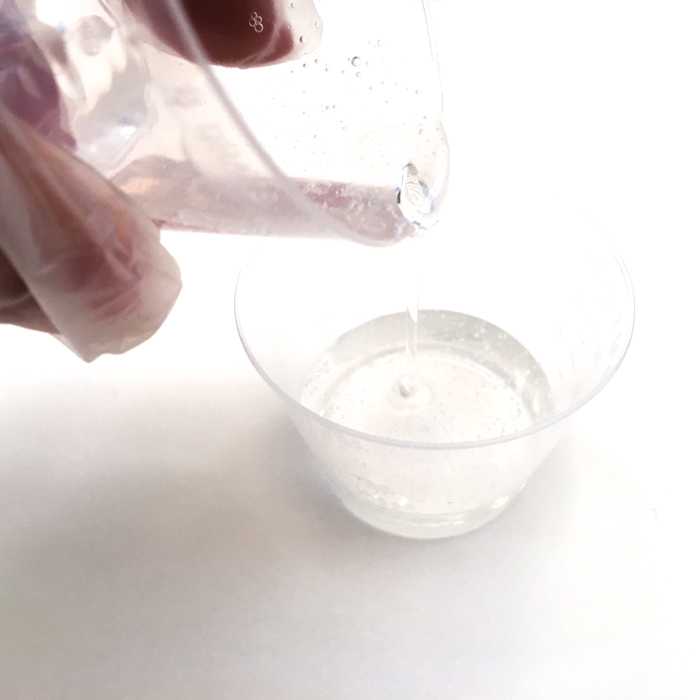
After the two minutes of mixing, I poured the blended resin solution into a second cup, mixing for another minute.
Once thoroughly mixed I applied the resin to the surface of the sealed wood slices using a disposable paint brush.
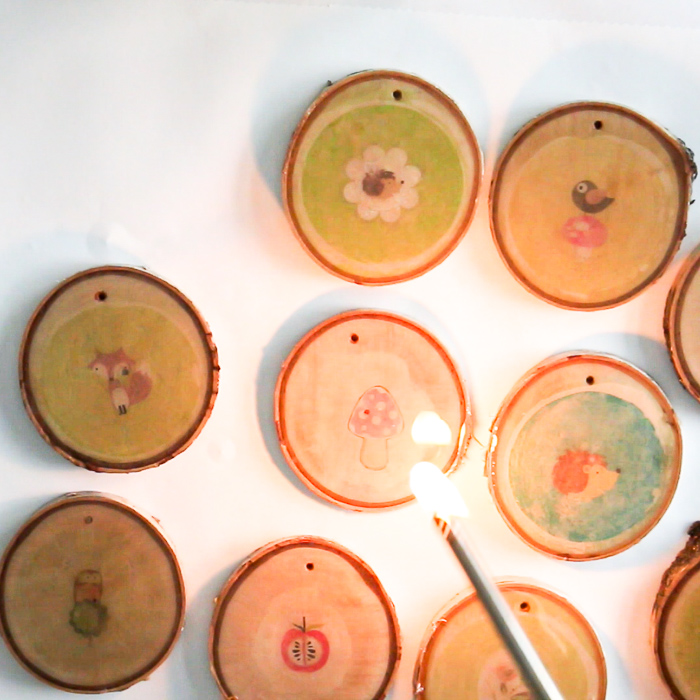
Finally, about 30 minutes after brushing the resin onto the wood slices, I waived a lighter about 4″ over the wood slices to remove any air bubbles that had risen to the surface. You could also use a straw and gently blow over the slices.
After letting them cure for 24 hours I repeated the steps on the reverse side of the wood slices.
How to Assemble this Woodland Nursery Decor Idea:
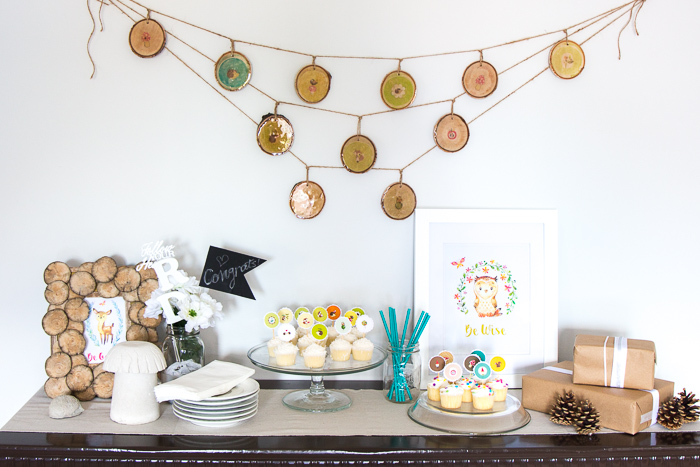
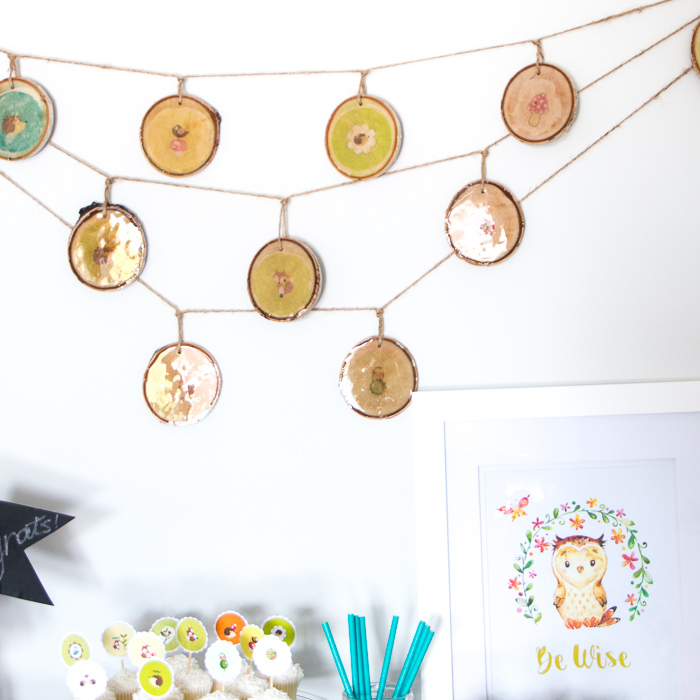
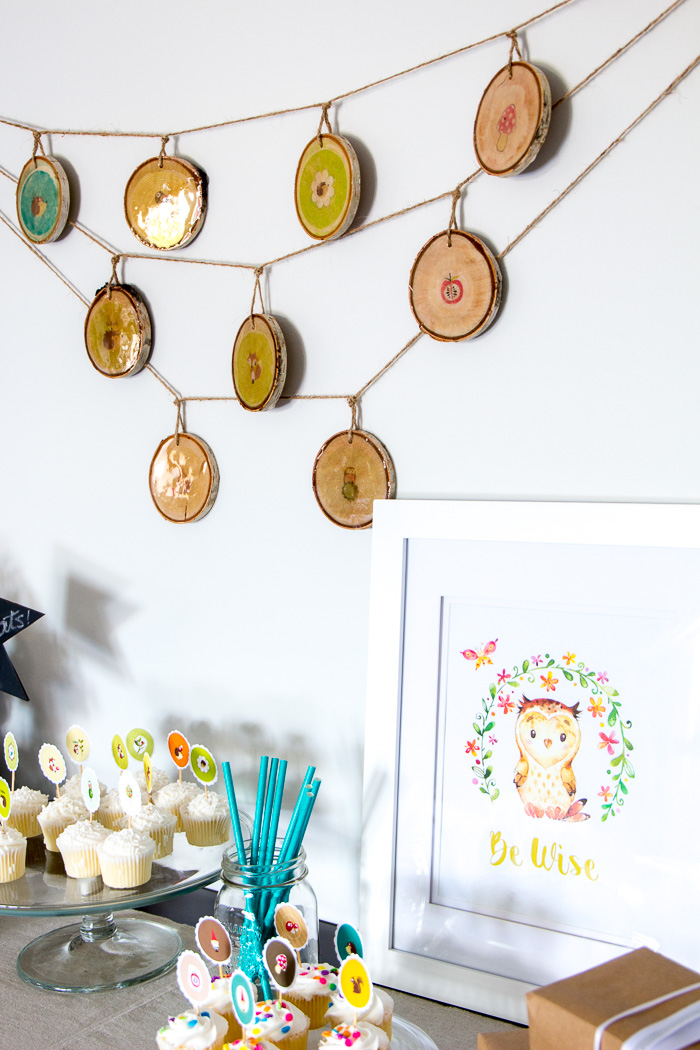
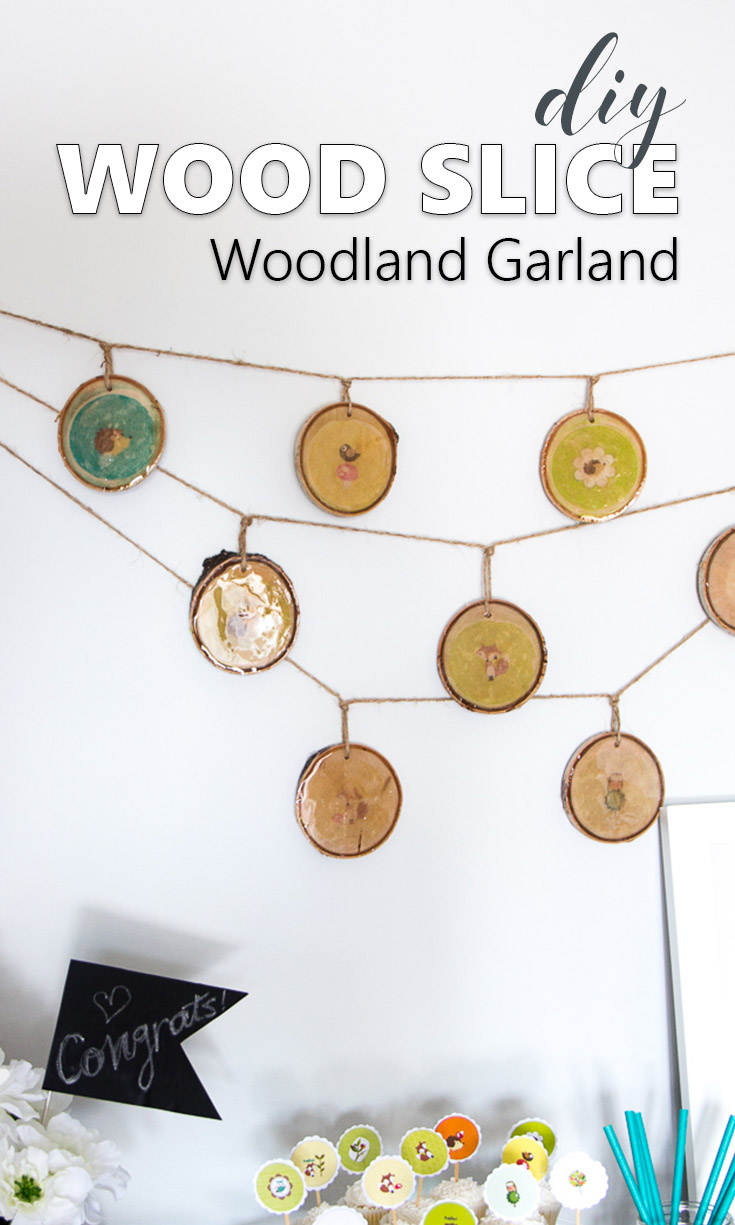
Once fully cured you can use your woodland themed wood slices in many ways including as coasters, ornaments or a simple garland.
To create a multi-layered garland, cut 3 pieces of twine each to 75” long. String and tie the the wood slices on the twine in your desired pattern. I did 6 on the first string, 3 on the second string and 2 on the third string and spaced the wood slices about 7.5-8” apart.

Although it took me several days to finish, this resin-coated woodland nursery decor idea was well worth the effort! The glossy sheen from the EasyCast Epoxy looks like glass and absolutely elevates this DIY craft! You can find a slightly different take on the photo transfer wood slice idea here by our fellow Resin Crafts Creative Team member Sheri.
In addition, be sure to pop on over to our blog for a full run-down of all the woodland baby shower ideas shown here.
Have you tried to transfer images onto wood slices yet?
Like it? Pin it for later!
Jane and Sonja are sisters, moms and lifelong craft addicts both living near Toronto, Canada with their families. They share their love of creativity, nature and coastal DIY ideas on their blog Sustain My Craft Habit. They craft and decorate their homes using repurposed and upcycled items and materials found in nature.


Leave a Reply