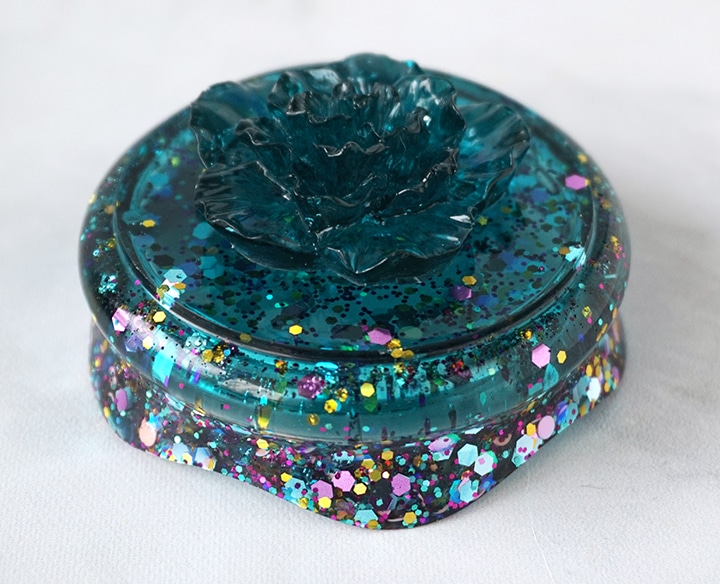
Use glitter, resin dye, and EasyCast Clear Casting Epoxy to make a gorgeous Resin Jar with Flower Lid to store your favorite trinkets!
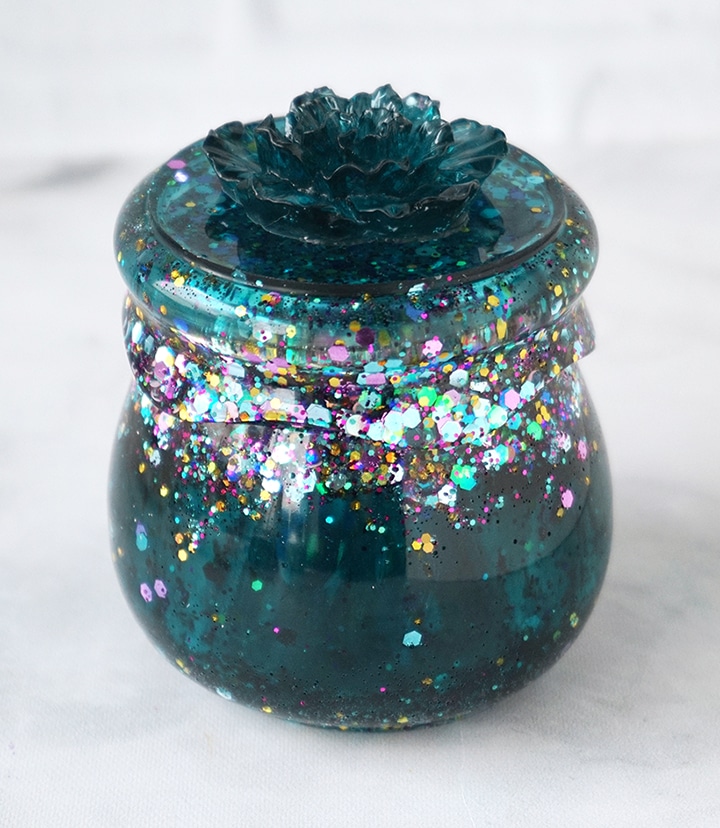
Hello, Resin Crafters! Lindsay from Artsy-Fartsy Mama here with a sparkling new resin project for you to try! I’m always looking for ways to organize small items, like earrings, spare change, and paper clips. Once I found this mold, I knew it was going to be the perfect little jar to keep on a desk or nightstand to hold those kinds of things. This gorgeous Resin Jar with Flower Lid is very simple to make using EasyCast Clear Casting Epoxy. You can also easily customize the jar to fit your decor using different colors of resin dye and variety of glitter.
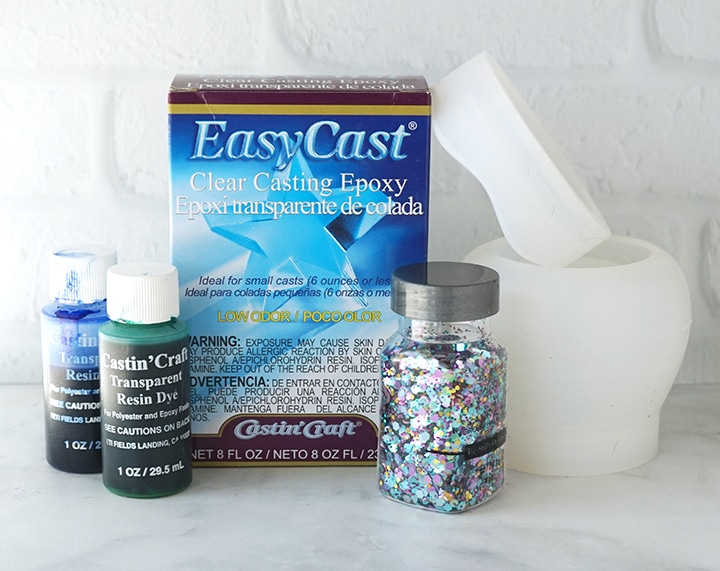
TO MAKE YOU OWN RESIN JAR WITH FLOWER LID, YOU WILL NEED THESE SUPPLIES:
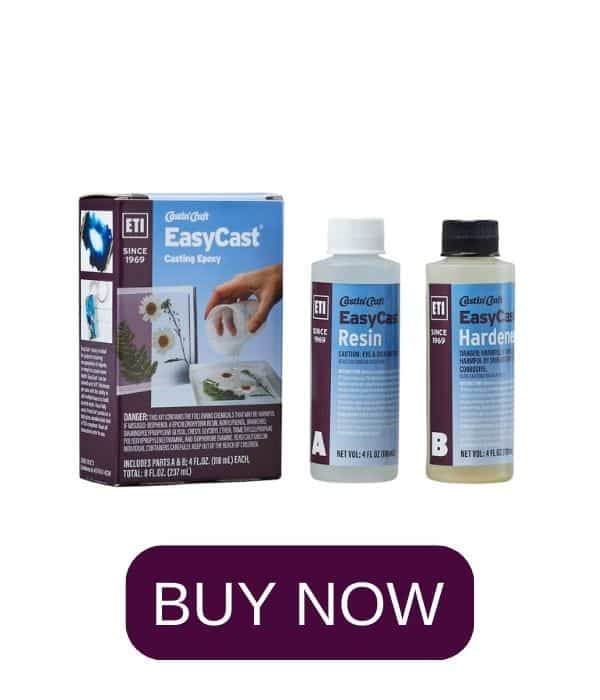
- 8 oz EasyCast Clear Casting Epoxy
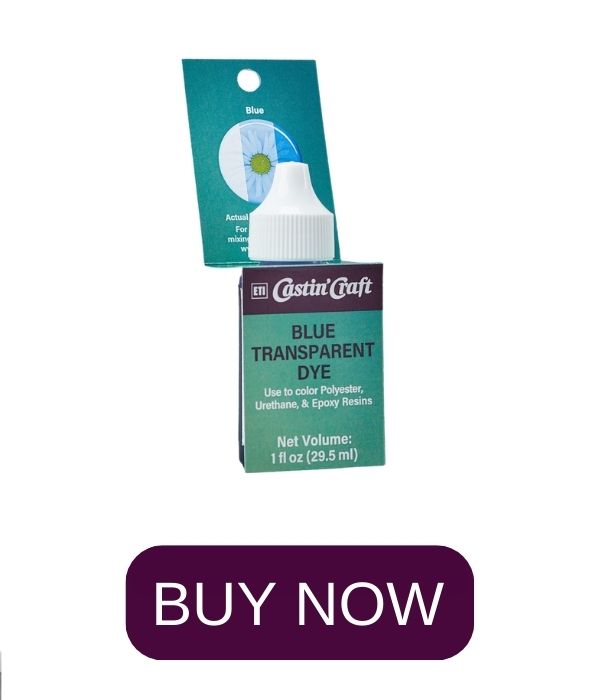
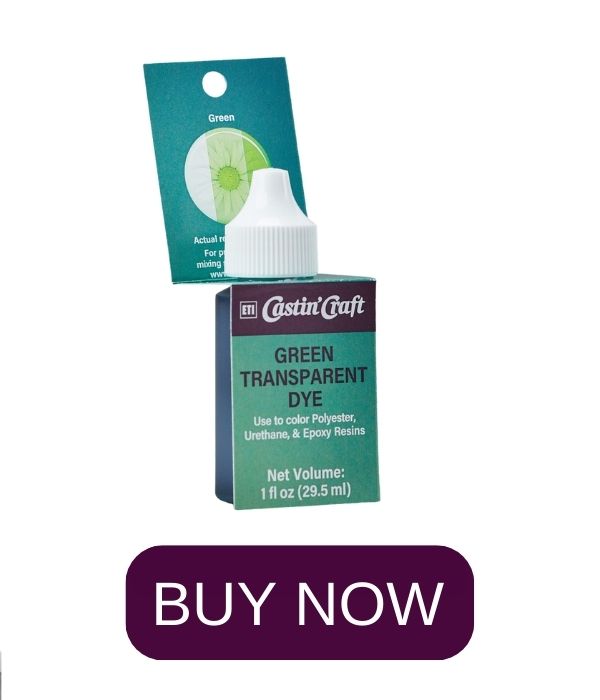
- Castin’ Craft Transparent Resin Dye – green and blue
- Glitter – a mixture of sizes & colors
- Silicone Jar & Lid Mold
- Silicone Flower Mold
- Mold Release and Conditioner Spray
- Mixing Cups
- Stirring Sticks
- Disposable Gloves
Safety first! Before you start working with resin, make sure that you’re wearing disposable gloves & protective eyewear, cover your workspace, and be sure to work in a well-ventilated area.
STEP 1:
Prepare 6 ounces of EasyCast Clear Casting Epoxy according to package directions and follow all safety guidelines. Pour in equal parts resin and hardener into a mixing cup. Stir the resin mixture together SLOWLY with a stir stick for two minutes, and then pour the resin into a clean mixing cup. Stir the resin again for another minute or two with a clean stir stick. If the resin still has streaks running through it, keep mixing until it becomes clear.
STEP 2:
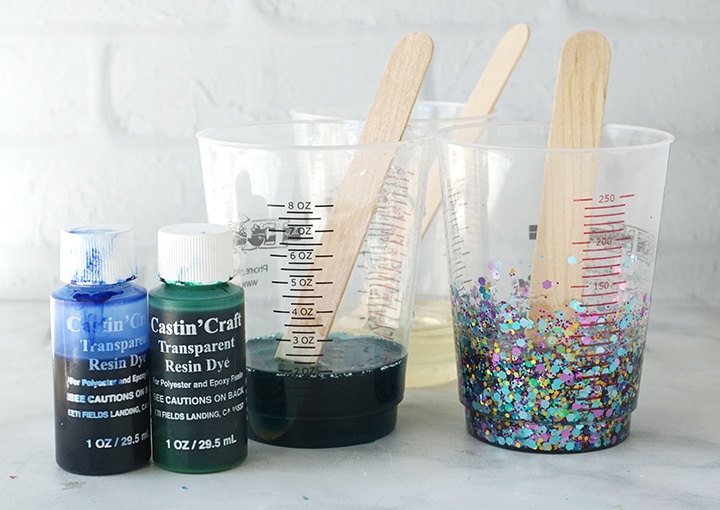
Split the resin into 3 separate mixing cups. Two cups with 1.5 ounces, and the last with 3 ounces. Leave one of the cups with 1.5 ounces as it is. Add a generous amount of glitter to the other 1.5 oz cup, and stir the mixture together well until combined. Add Transparent Dyes to the last cup containing 3 oz of resin. To make this gorgeous teal color, add in 10 drops of blue dye, and 15 drops of green dye and stir the resin mixture until the dyes have been completely mixed in.
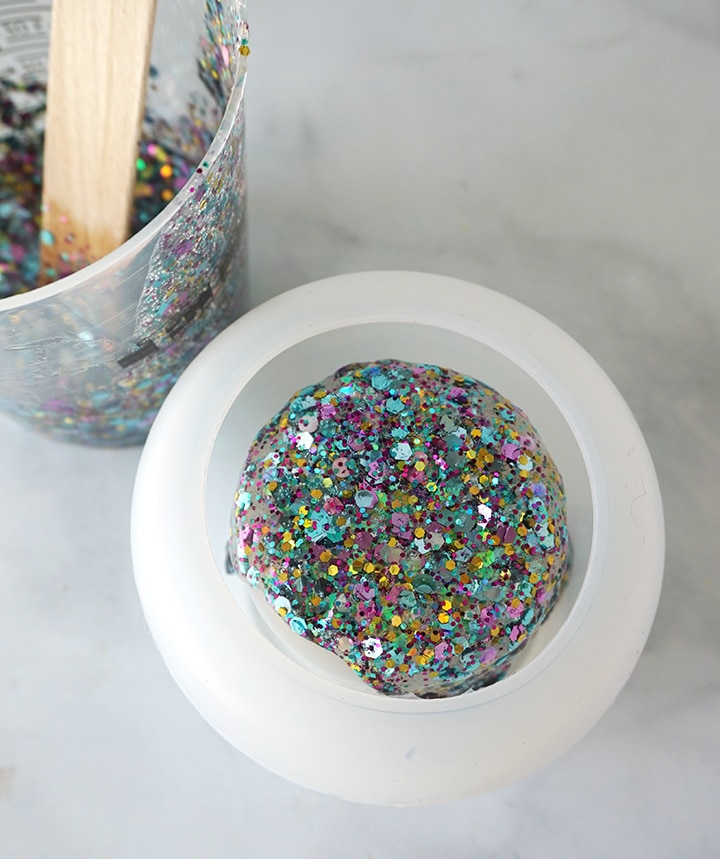
STEP 3:
Pour about an ounce of the glittered resin right in the center of the jar mold. Pour the resin slowly, and let it drip down the edges.
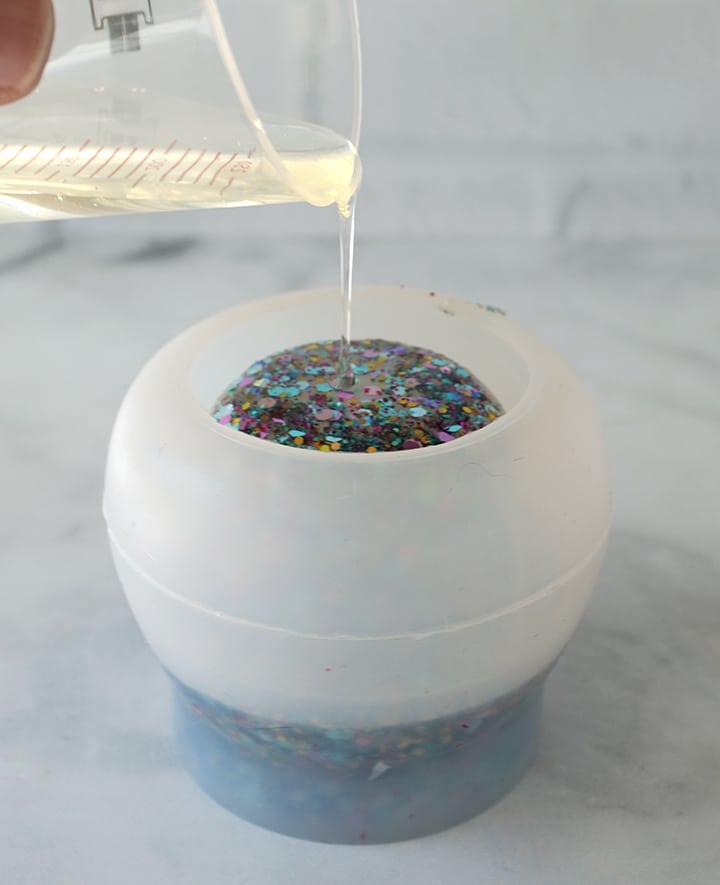
STEP 4:
Immediately pour about an ounce of the clear resin over the top of the glitter resin. Again, pour it slowly and let it run down the edges on its own.
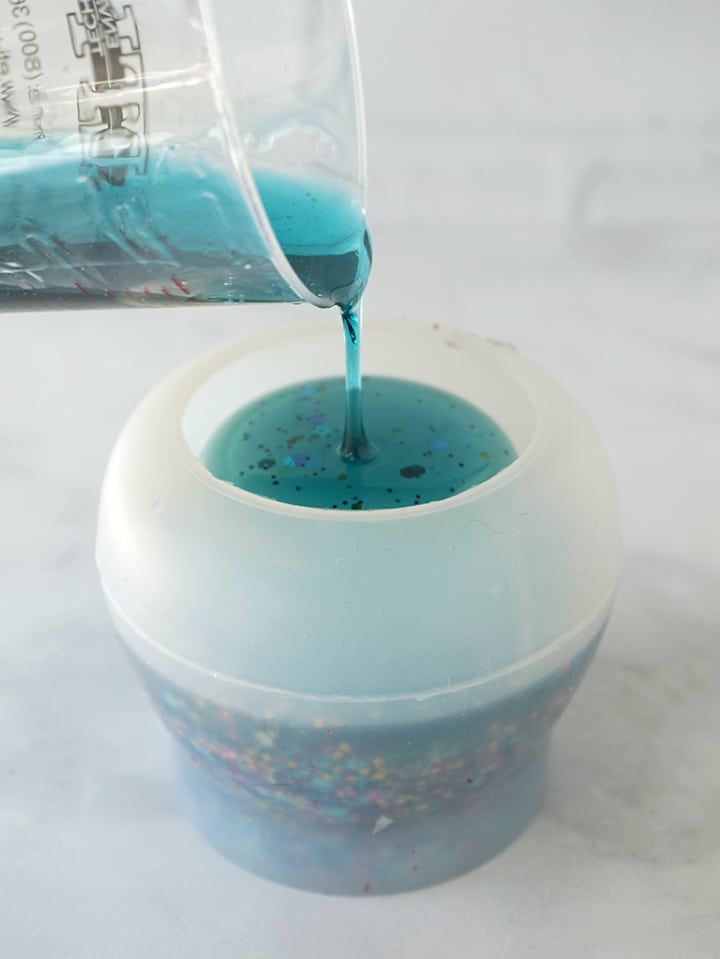
STEP 5:
Lastly, pour the colored resin in the center of the mold on top of the other resins and fill the jar mold to the top. Be careful to not overfill the mold.
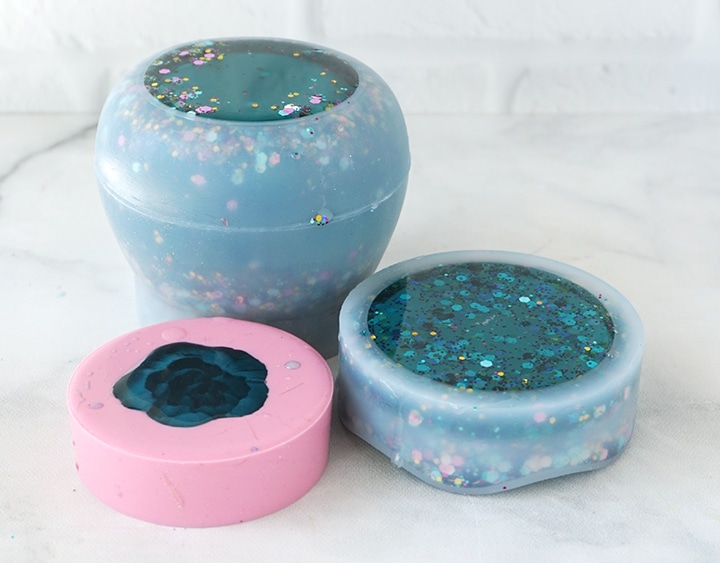
STEP 6:
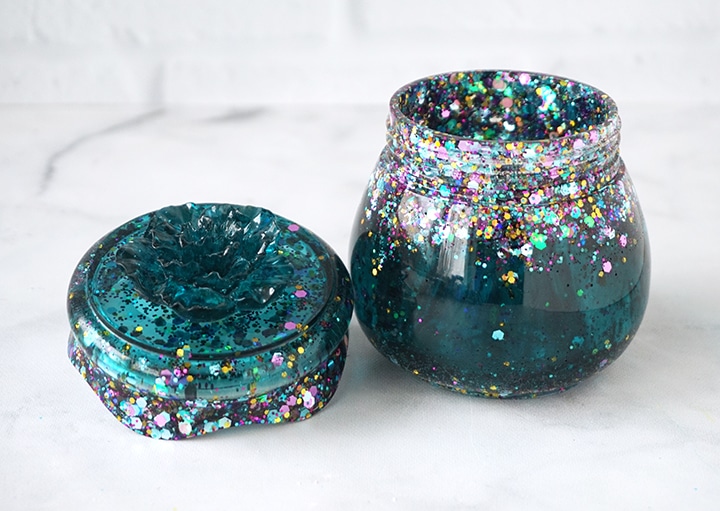
Repeat the process with the remaining glittered and clear resin, and then pour in the colored resin to fill the lid mold to the top. You should have some colored resin remaining, so use that to fill up the flower mold.
Pop any bubbles that rise to the top of each of the molds by using a heat gun, blowing through a straw, or lightly spritzing with alcohol. Leave the resin to cure in an undisturbed area for at least 24 hours. You will know that the resin is completely cured when it is hardened and no longer tacky to the touch.
STEP 7:
Carefully remove the resin pieces from the molds. If you over-poured any resin, you can trim the excess away using a craft knife or scissors.
STEP 8:
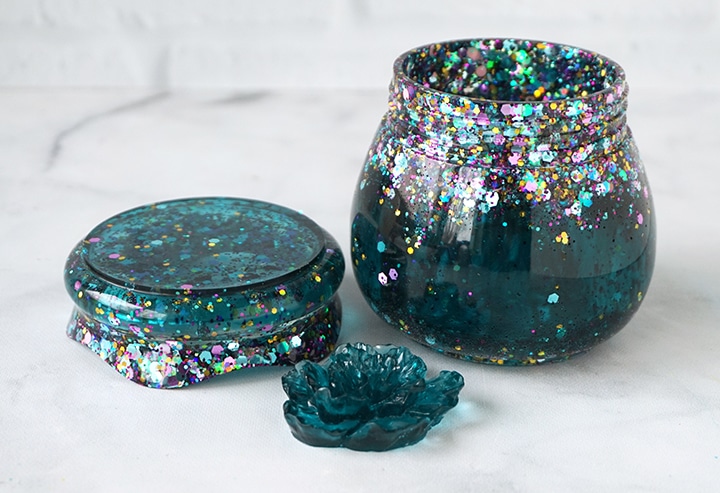
Place a small drop of clear adhesive on the bottom of the flower piece and center it on top of the lid.
STEP 9:
If the resin still feels a little flexible, it may just need more time to cure. This is normal, and you will just need to let it sit in a warm, flat area to cure for a few hours (or days).
If the resin is even slightly flexible and you want to put the lid on the jar, just be careful. You may accidentally bend the lid or the jar top, making them not fit together properly. You also need to separate them immediately after because the resin could stick together, making it almost impossible to separate them later. My personal recommendation is to let the pieces cure for a few days before putting them together.

I absolutely love how this Resin Jar with Flower Lid turned out. The vibrant color from the transparent dyes combined with the sparkling glitter is eye-catching, and makes such a statement when placed on a desk or nightstand. It’s the perfect size jar to hold any of those small items that can easily clutter up your space, and looks beautiful at the same time!
This is such a fun and incredibly simple project for any resin crafters of ANY level. As always, I would love to hear what you think about this Resin Jar with Flower Lid made with EasyCast! Be sure to check out these other resin jar tutorials for more inspiration, and share your own creative resin projects in the ETI Facebook Group!
Don’t forget to Pin, Like, and Share!

Lindsay is a crafter, graphic designer, and glitter enthusiast from Utah. She’s passionate about homeschooling her creative daughter, traveling, and spending time in the craft room. Lindsay shares DIY project tutorials, printables, recipes, kids crafts, and more on her blog, ArtsyFartsyMama.com, where she inspires readers to live a creative life.


Leave a Reply