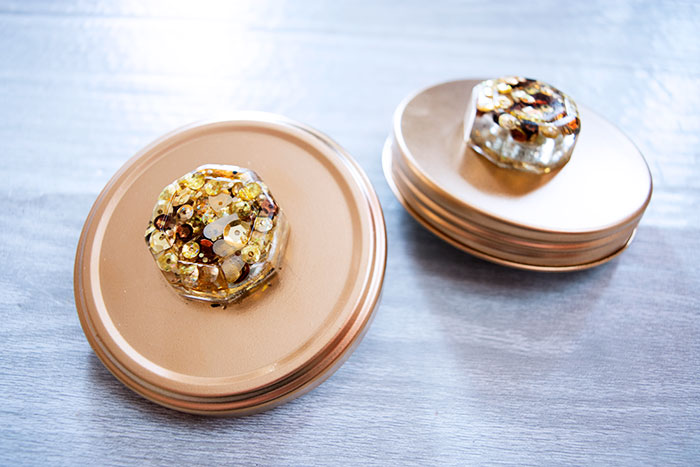
Hi, Resin Crafters! This is Kelli from the Craft shack and I’m so excited to be back again to share this fun project with you! Reusing old glass jars is something I try to do often. There are so many ways you can use them but they don’t have to be ugly or boring. I love to dress my old jars up a little by painting the lids and adding a knob to the top. You can add even more flair by filling the resin with fun sparkling sequins to create a shiny sequin resin knob. These fun Resin Sequin Knobs are simple to make and so easy to customize to fit your personal decor.
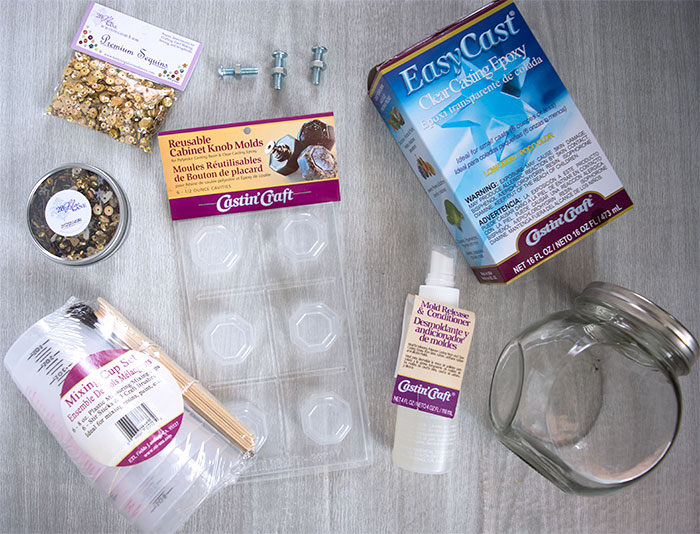
Supplies needed to make Resin Sequin Knobs:
- EasyCast Clear Casting Epoxy
- Reusable Cabinet Knob Mold – Octagon With Border
- Mold Release and Conditioner
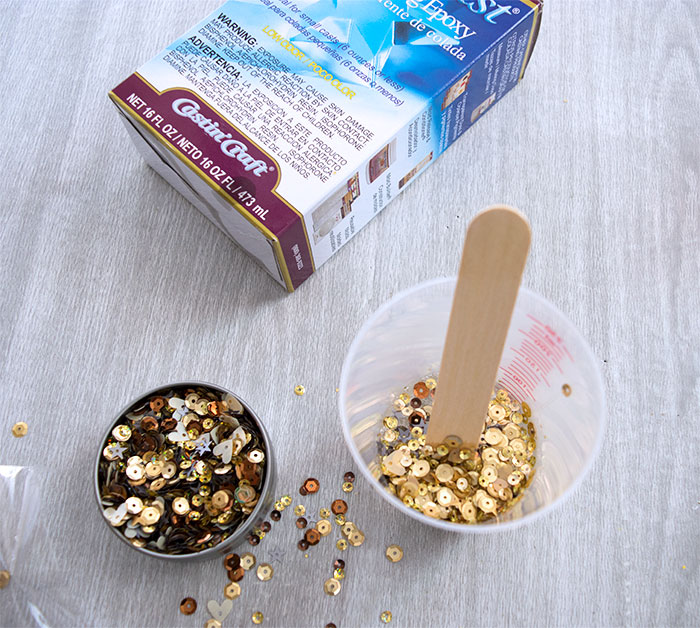
- Sequins
- Cabinet Bolts and Nuts
- Old Jars with Lids
- Bamboo skewers or small dowels
- Tape
- Mixing Cups, Stirring Sticks, Gloves and Eye Protection
To prepare for this project, first, spray Mold Release and Conditioner onto your Cabinet Knob Molds. Follow the directions on the bottle for the best result. Since this mold is ridged this step is super important for helping to release your finished knob once it is cured.
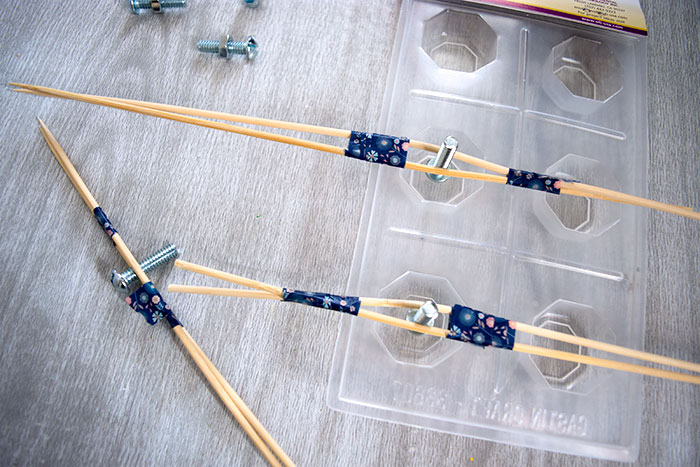
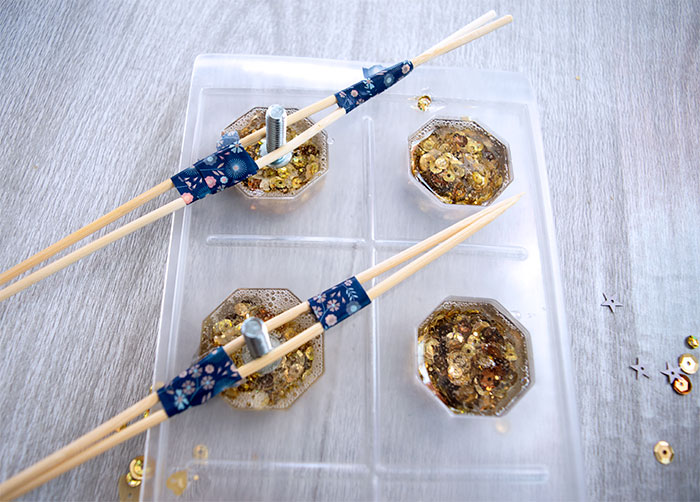
Next, before mixing the resin, you need to create a method to hold the screws upright and in place. If they are not held in place they will sink to the bottom and tip over. To solve this problem I found that by securing the screw between two sticks using tape I could lay the sticks over the mold suspending the screw into the resin. I used simple bamboo skewers. Put these together before mixing your resin to make sure your screws are hanging the height you want them to inside the mold.
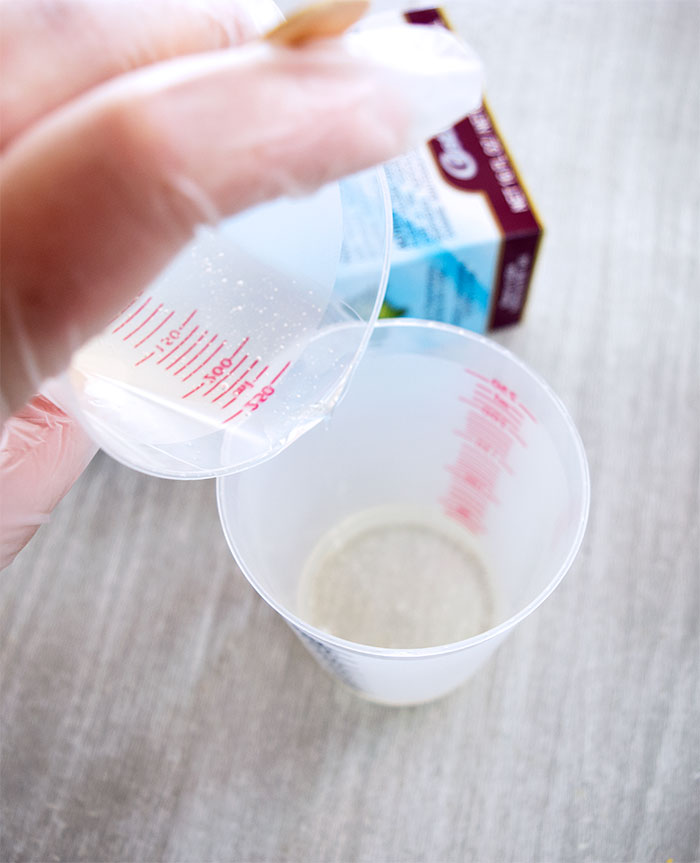
Now you’re ready to mix your EasyCast Clear Casting Epoxy. Be sure to work in a well-ventilated space, and use gloves and eye protection. Combine equal parts Resin and Hardener in a disposable cup and mix following the directions on the packaging. Each knob cavity holds 1/2 ounce of resin. If you want to make all six knobs you will need 1.5 oz each part for a total of 3 oz.
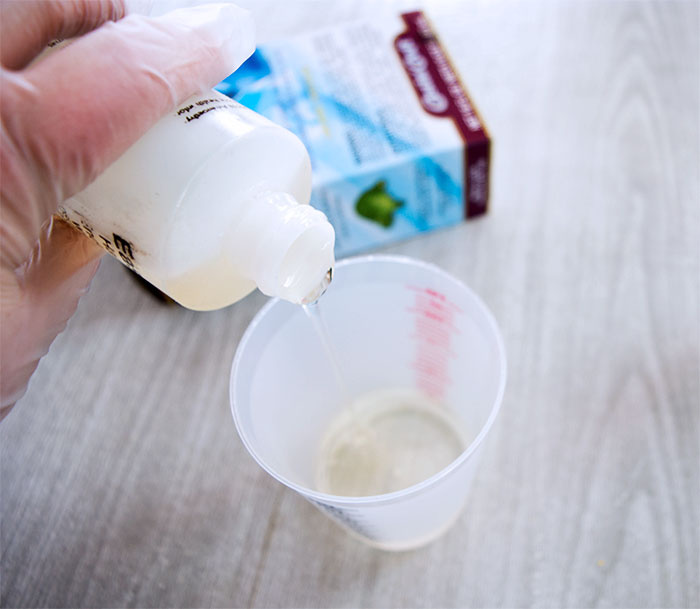
Make sure to use the two container mixing procedure outlined in your product instructions to ensure thorough mixing.
Once the resin is mixed according to the instructions, leave it to sit in the mixing cup for about 5 minutes before adding the sequins. Mix the sequins into the resin.
Next, pour the sequin resin into the cabinet knob molds. Fill each mold to the top and then position your screws over the resin, held in place by the sticks. Pop any bubbles that rise to the surface by gently blowing on them, or use a small torch. Allow the Resin to fully cure before attempting to remove the knobs from the mold. I left mine for a full 24 hours.
Once your resin is cured, you can remove the sticks and unmold the sequin knobs. You can do this by gently pulling on the screws, wiggling a little if needed, to free the knobs from the mold. Having conditioned the mold before starting, the knobs should release easily.

If they are not popping out with a little force, leave them to cure for a few more hours or overnight.

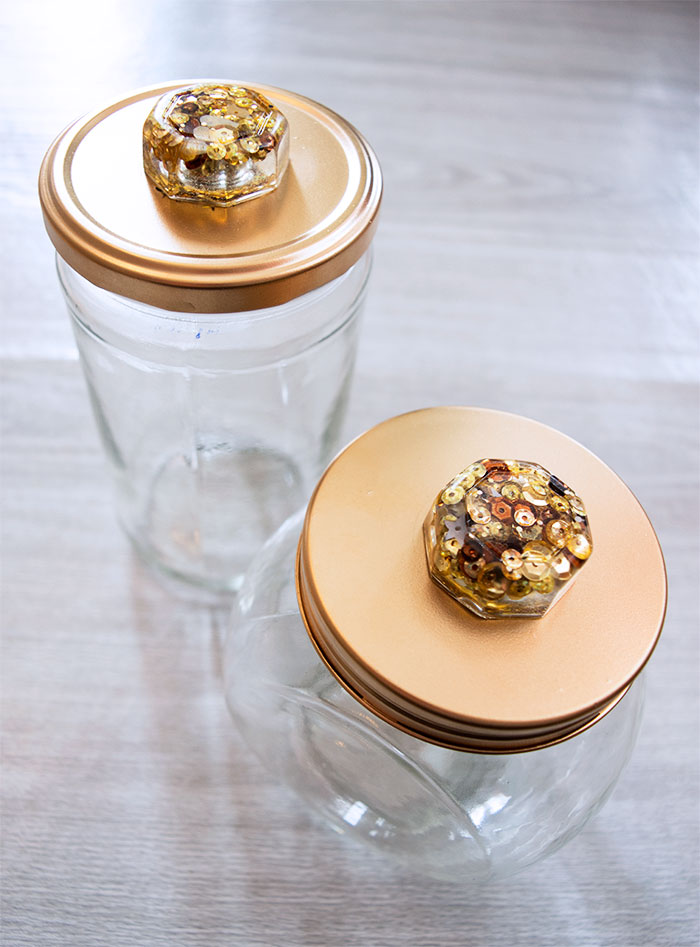
You can spray paint the lids of your jars for a quick update and to hide any product logos.
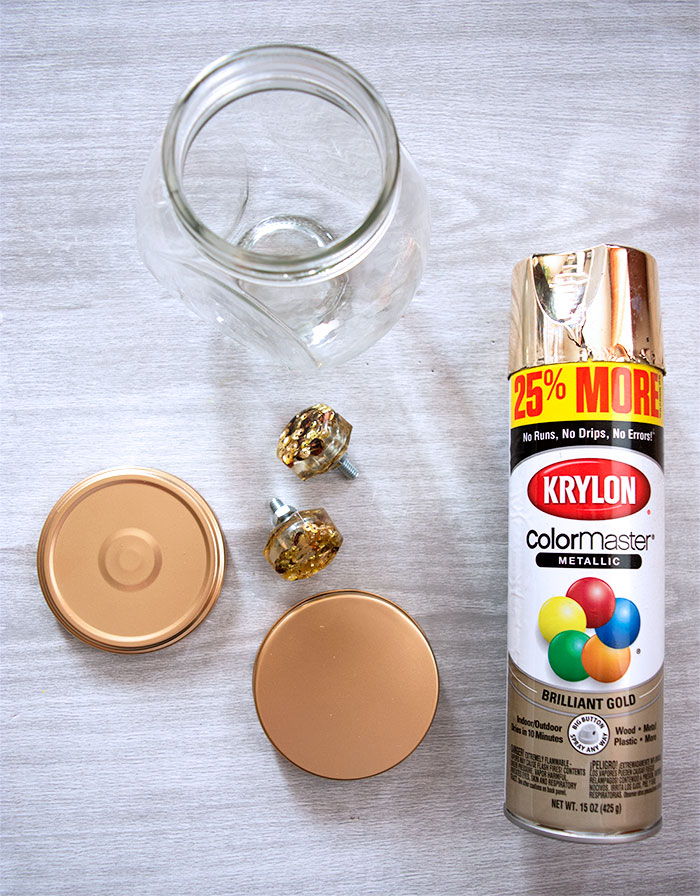
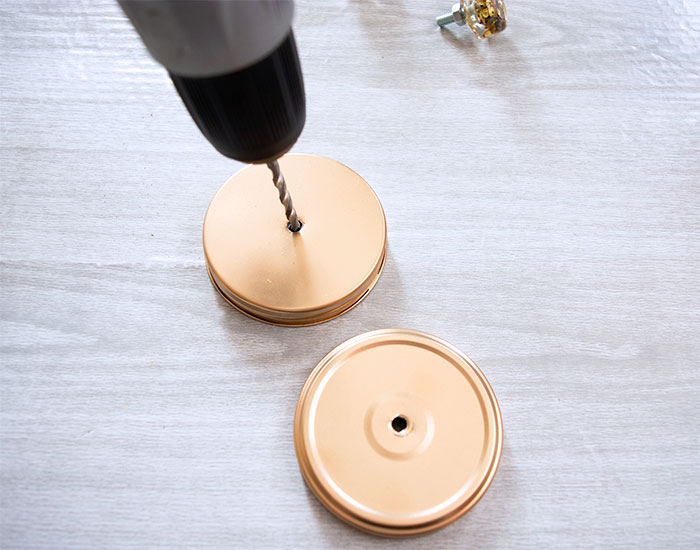
Add your Sequin Knobs to the jar lids by screwing a hole in the lid. My screws were 1/4 inch diameter so I used a 1/4 inch drill bit. The fit will be tight but instead of forcing the screw into the hole, turn it around to screw it in and it will fit perfectly.
Now you have fun repurposed jars to fill with any little trinkets you wish!
I’ve filled these jars with my grandmothers vintage button collection. I love the extra shine the sequin knobs add!

After studying Culinary Arts in Portland Oregon, Kelli went back home to the sunny South West where she decided she wanted to do different kinds of Art. This busy mom of three spends all of her available free time creating in her Craft Shack “she shed” where she can be found wood burning, repurposing old stuff, crafting, and painting just about anything she can get her hands on. She loves to learn new craft techniques and frequently finds inspiration in the world around her. Her motto in life is that you should never be too busy to make something pretty!


Bonjour je voudrais bien savoir ou acheter les moules pour bouton de placard comme les votres et si possible d’autres qui sont originaux.
votre travail est magnifique!!!
merci