DIY: Resin Paperweights
Create show-stopping resin paperweights with Clear Polyester Casting Resin. Try embedding dandelions, succulents and more with crystal clear results.
Hi, it’s Natalie from Doodlecraft! Resin paperweights are so cool and easy to make. They are a great way to make something personal and make a great gift idea. You can embed just about anything in resin. Have you played around with resin yet? This is a great project to start with. Resin Paperweights are a great conversation piece in any room.
Paperweight Supplies
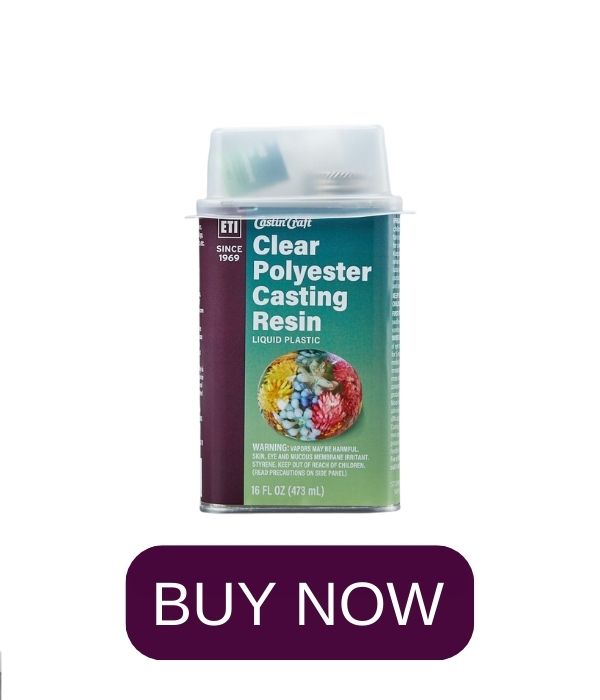
- Clear Polyester Casting Resin
- Mixing cups
- Polyester Casting Resin Molds
- Mold Release
- Items to embed
(examples: dandelion, succulent, fossils and wasp paper)


f you’ve never worked with Polyester Casting Resin before, checkout the below video. This transparent casting material gives much clearer, more UV stable results than a standard 1 to 1 epoxy can.
How to Make Resin Paperweights
Read the resin instructions. Make sure you have everything you need ready to go.
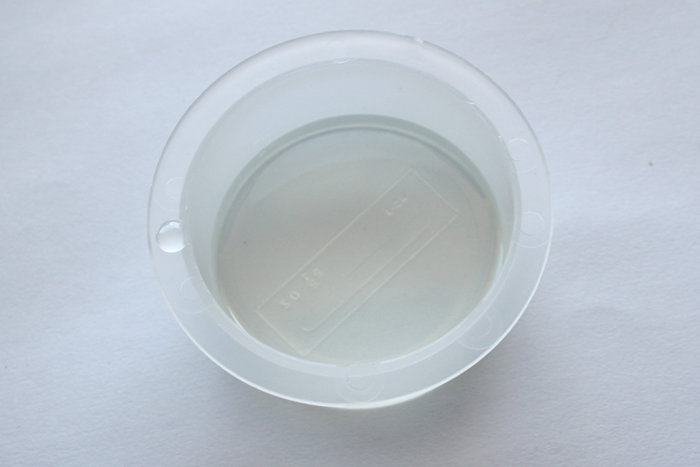
Read the instructions again. Then mix the resin according to the package directions. Spray molds with Mold Release. Pour about 1/4 inch in each mold and let it set until it reaches a gel like consistency (it took me about an hour or 2).
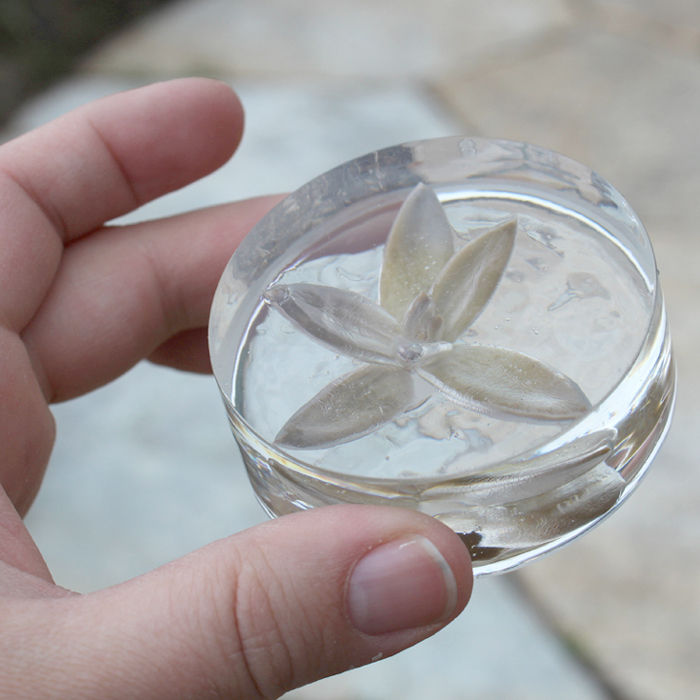
Then gently set the item in the gelled resin face down. You will notice that the fresh vegetation (ie: succulent and dandelion) discolor after hardening.
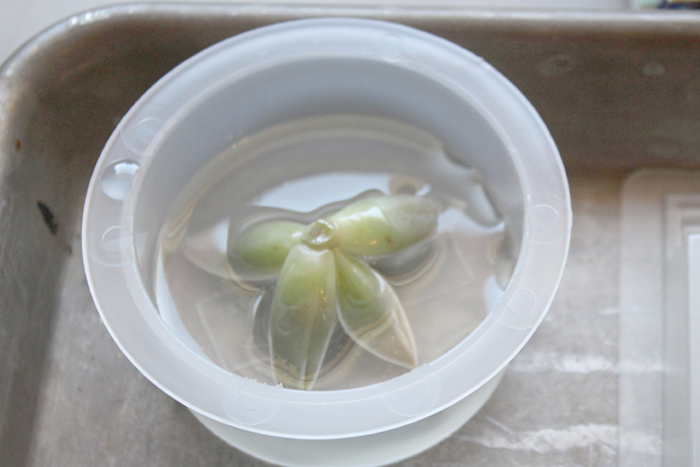
Let the resin sit another couple hours. Then mix up some more resin and pour it over the top to fill the mold. Let it cure for a week or so. Then pop it out and enjoy your paperweights! You’ll see the green color of the succulent has reduced. But it’s still really cool!
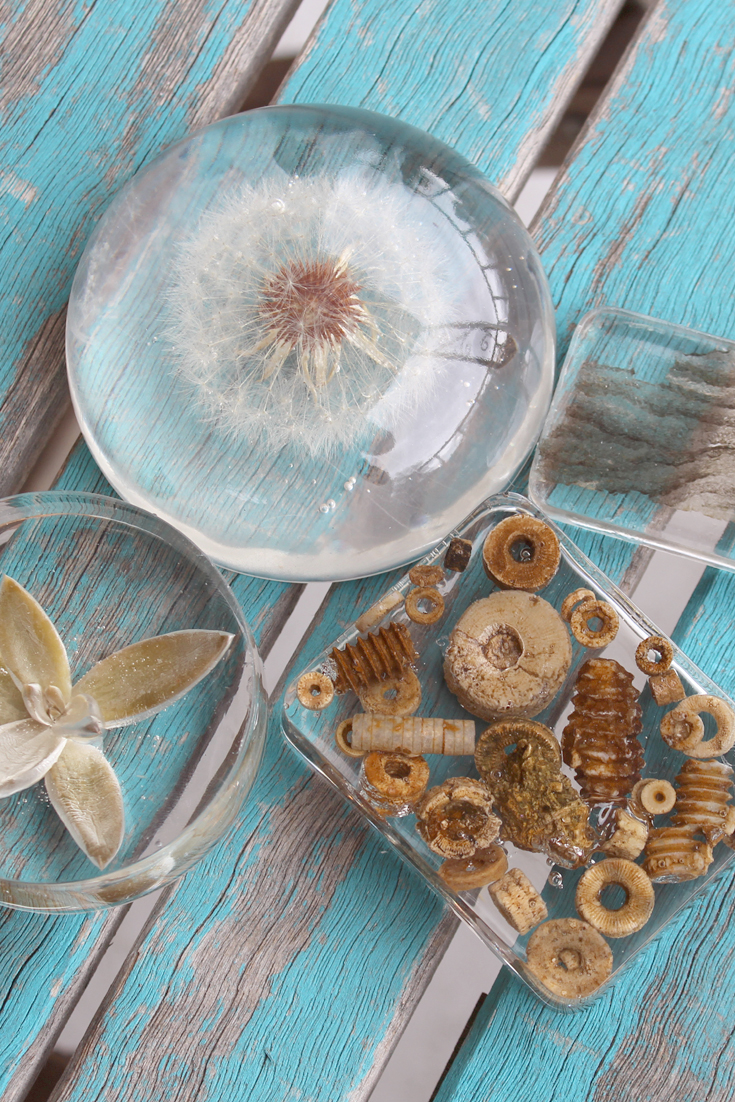
Dandelion Bloom Embedded Paperweight
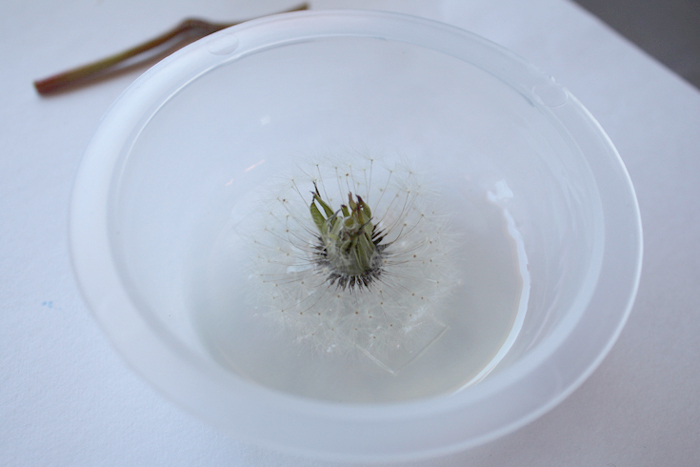
Next I did the same technique with a full dandelion bloom. Just gently set it in the gelled resin…and let it sit for a while.
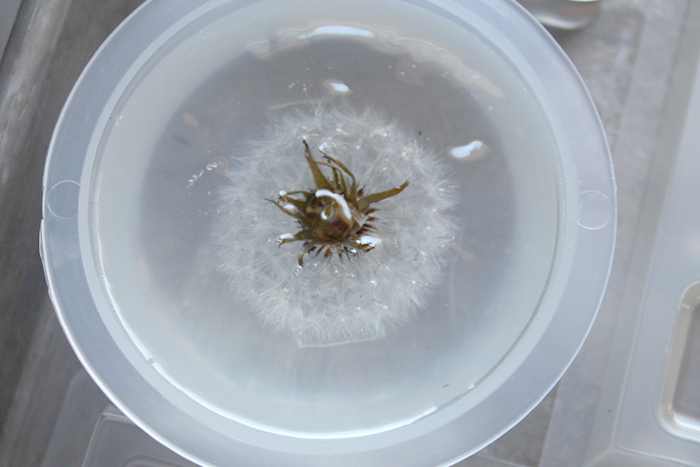
Then fill the mold with more resin to encase the rest of the dandelion. The dandelion held perfectly, just pour the resin in on the side and let it fill in the spaces around the wisps. The resin is gentle enough not to ruffle a feather as it fills in around the object.
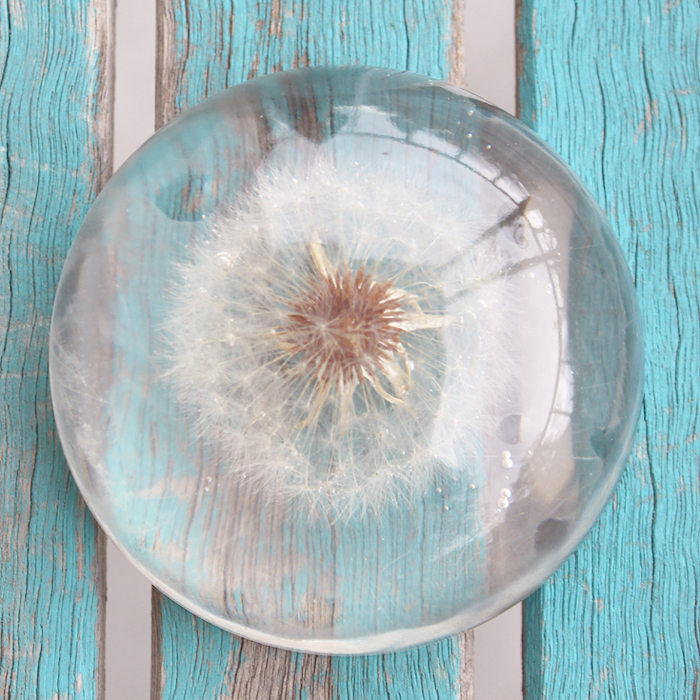
It is so amazing! I love that it is a complete blossom of seeds in there!
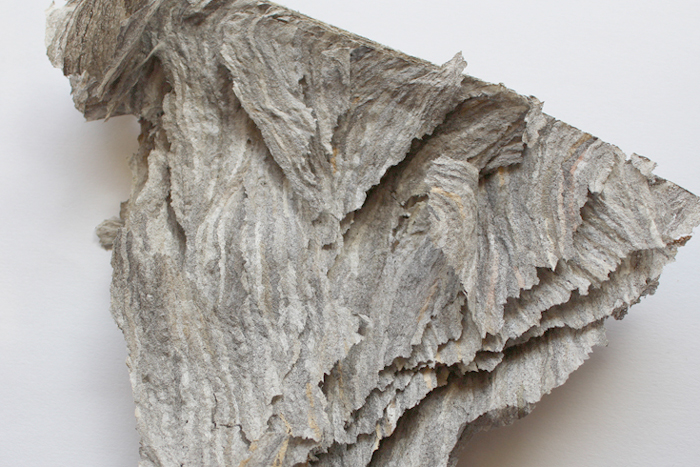
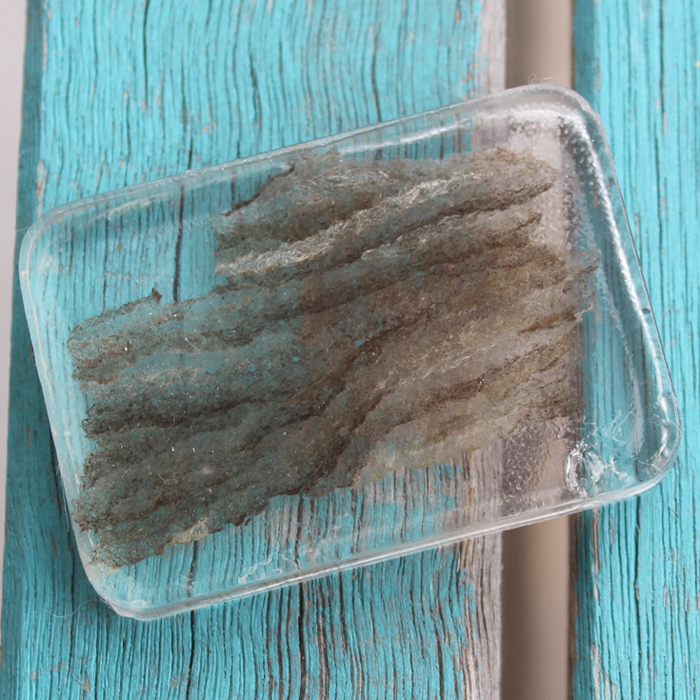
Wasp Paper Paperweight
Next I used some wasp paper… it has the coolest zebra-striped patterns.
I filled the mold with about a half inch of resin, slipped a piece of wasp paper right on top and then gently pushed with a stick to get the paper in half way.
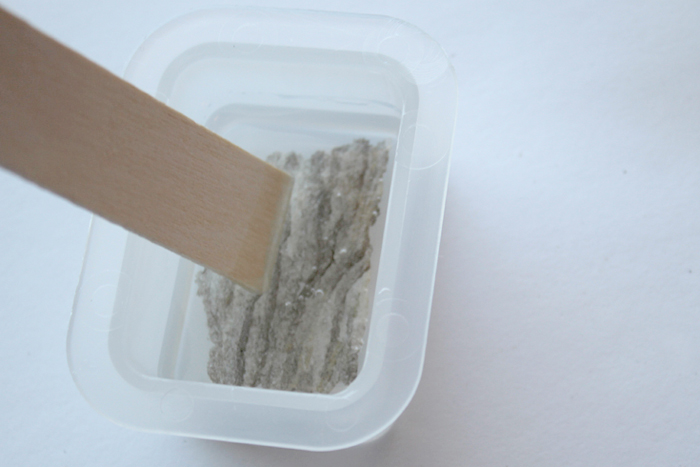
Let it dry and pop it out!
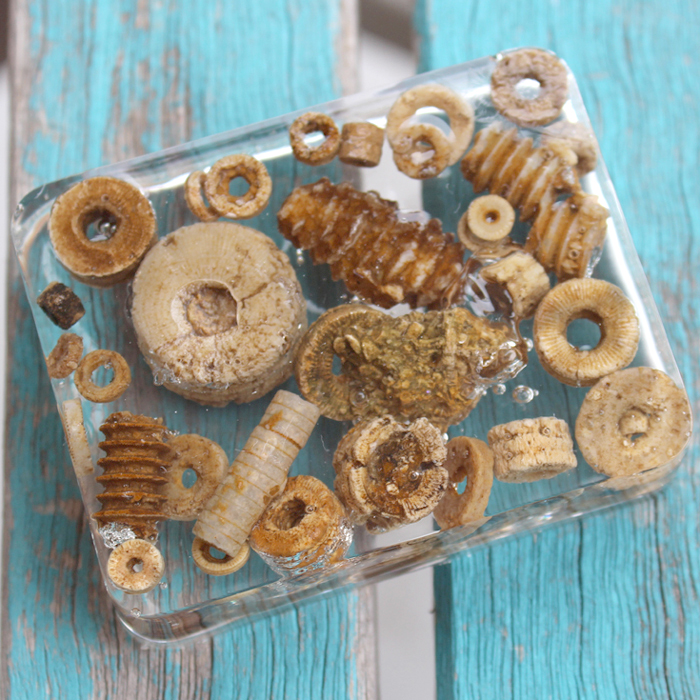
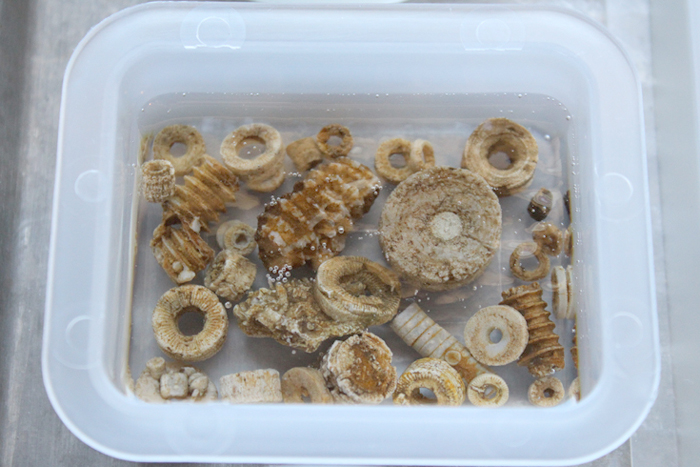
Fossil Embedded Resin Paperweights
The last one are these cool fossils. They are called Crinoids…they look like little screws and machine parts, but they are primitive animal, similar to a sea star. I just dropped them in after the resin set to a gel consistency. See how they are just floating on the resin? Perfect.
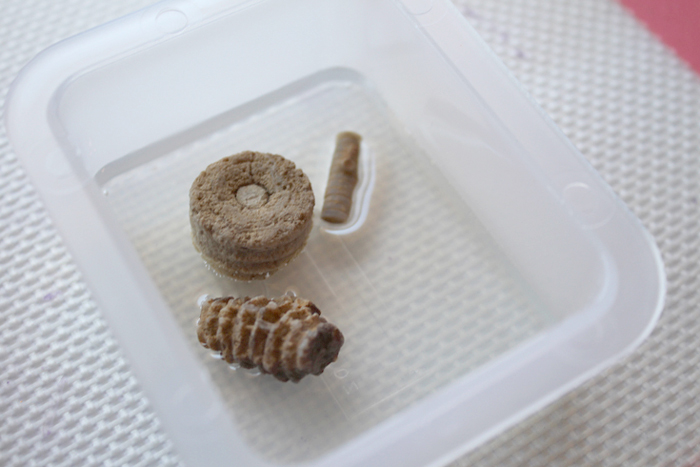
I filled it up; these little tiny fossils are so delicate that it would be easy for them to break, so this is a great solution to enjoy them.

After a couple hours, I poured more resin on them to cover them completely.
Let them harden completely. A good way to know if they are hard is that they will not smell like resin at all. And trust me, this stuff smells. Work in the garage or well ventilated area.
Now enjoy your paperweights! Give them as gifts, encase things that are important to keep. Maybe get crazy and encase baby teeth, your first house key, even candy.
Natalie Shaw is a Craft/DIY blogger at Doodlecraftblog.com. She loves sci-fi, fantasy and video game geekery and that comes out in many of her projects. She posts budget conscious DIY’s, crafts, jewelry, kid friendly projects, upcycled treasures and other fun on her blog 5 days a week.


Thank you so much for posting this! I’m hoping to give this a try with my first set of flowers that I received from my husband!
Where did you buy the bowls and domed shape silicone to make these?
The link for the mold is right in the post. https://www.eti-usa.com/mc-poly-molds
Hope that helps! 🙂
Hello,
Wish to make a photo of my grand daughter into a desk paper weight.
Can you help me?
Thank you,
Don
Hi Don! You can follow this tutorial which will help you to make it a paperweight: https://resincraftsblog.com/resin-photo-keychains/
Will this technique work for fresh flowers such as a rose?
I’m actually working on that exact casting. So far I have had 2 failed attempts because too much air stays trapped between petals during casting, and then releases during curing. When I get it ironed out, I’ll have a new post on resincraftsblog.com. Thanks!
Where to buy the resin
Hi Doris! Here’s a link to where you can find our products: https://resincraftsblog.com/where-to-buy/
Is it possible to use silk flowers or pieces of paper in the resin?
Yes, both those things should work. Flowers are a bit tricky, just work in thin layers to get the resin between the petals.
This has been so helpful as I am wanting to do this for an activity with a group of friends, but none of us have done it before. I could find the molds for sale with pictures of what you could make but no info on what resin to buy. Thank you so much.
I’m new to resin casting but want to cast a small pieces of a fire ant mound to use for a presentation. My fear is that the lump of dirt will fall apart as it’s basicall held together with ant spit. Any experience or or ideas would be greatly appreciated. I don’t want to preserve the negative space by filling with molten aluminum.
Resin is surprisingly gentle and can hold a delicate dandelion blossom together…so I am thinking it would probably work just fine with a fire ant mound. Test a small piece and see if it works!
Thank you! Your instructions are so clear! I can’t wait to get started!❤
Please can you tell me the exact product you used for the resin and any gardener that you used. I’m in the uk.
Thanks for your interest! The exact product is linked to in the post…and I’m not sure what you mean about gardener, I just picked a weed in my yard and found some interesting things to encase in resin. I’m sure once you get started, you’ll find many things that would work great as a paperweight!
Hello.
I’ve never tried resin casting before, but I have a plan to fill shells with resin with pearls embedded in them. Am I right in thinking that the resin will stick to the inner surface of the shells or is it likely to detach? If so, is there some way of preparing the shells so that the resin stays in place?
Many thanks,
Ruth.
Yes the resin will stick to the shells without detaching. Just find a way to keep the shells the right direction while filling and drying and you should be good.
Hi, when measuring the amount of resin, is it important to use paper measuring cups, or will plastic cups work?
The plastic mixing cups I use (the ones from Eti-usa.com) have the measurements on the side for easy measuring and mixing.
Hey,
I like your idea. “Paperweight gift”, full of love & feelings which one will love!!!
Well instructed post.
Thanks
Hi There, I wish to make a paperweight enclosing my grandsons baby teeth. I have found over the years they deteriorate if not kept in air tight container. Will your product allow this. Thank you
I have not used teeth in resin, but the resin does protect the item from oxygen…so I think it would work just fine!
Hello. I just tried to save my daughter in laws flowers, and think I failed miserably. Still, I think I could grow to love this hobby once I get the hang of it.
Oh no, flowers are hard. I tried to do a rose and the resin can seep into all the places without creating masses of air bubbles. I wish I had more advice…I can do pressed flowers, but not a full rose.
Hello! I am wanting to put a succulent in a sphere mold, did you do anything to the succulent before you put it in the resin? Also I am using a full sphere mold, do you have any tips or tricks for spheres? Thank you!
I’ve had trouble with sphere molds because too many air bubbles form when I place the item into the resin. It works best if you set the item in 1/2 inch of resin, then add more gradually. I’ve used half spheres with great success and had problems with a full sphere. Good luck!
I am starting on doing paperweights, as soon as my stuff comes in.. I saw on Pinterest, that in order to make real rose or flower paperweights, or any sort of sculpture is to dry your flowers first. It’s called Flower Drying Art, and you can get it at Michael’s. I Guess it is suppose to hold the shape better, The only problem i saw with this is that if you do large and small flowers at the same time , the smaller ones tends to crumble, if you leave them in the same amount of time… I made it easier on me, this time I just bought dry flowers, and used them instead, about the same price if you do it yourself, But I think my dry flowers that I bought, was less than the do -it-yourself.. hope this helps
Hi,
I am hoping to encapsulate the last piece of our wedding cake!
On Amazon it shows that this clear material is made of epoxy, which I know creates heat when it is mixed. Do you think I will be able to use it on a piece of cake? Or will it just become mush!
Thanks
MArk
Unless the cake is completely dried out and sealed before coating it would become mush. 🙂
If one uses insects (dead) or recently picked flowers, should that work since they are not yet dry? Will they just rot inside the resin? Thanks! Cool project!
Plants and flowers can discolor in the resin over time, but I have had no issues with insects.
This post is setting people up for failure. Why would you tell people to use fresh flowers and succulents?? Is it so they will have to buy more of your resin once their project fails? If you try to use fresh flowers in resin (or anything with water content) the resin won’t cure properly. If it does manage to harden, the organic material will begin to rot inside the resin quite quickly. You should feel ashamed for misleading people that use this website to try to learn a new hobby, and for causing them to fail.
I’ve had no issues with resin not setting properly when casting fresh flowers or succulents, and I’ve done it multiple times. I do mention that they can lose some of their coloration, but it’s still a great way to preserve things. No shame here, happy casting!