Updated April 2026
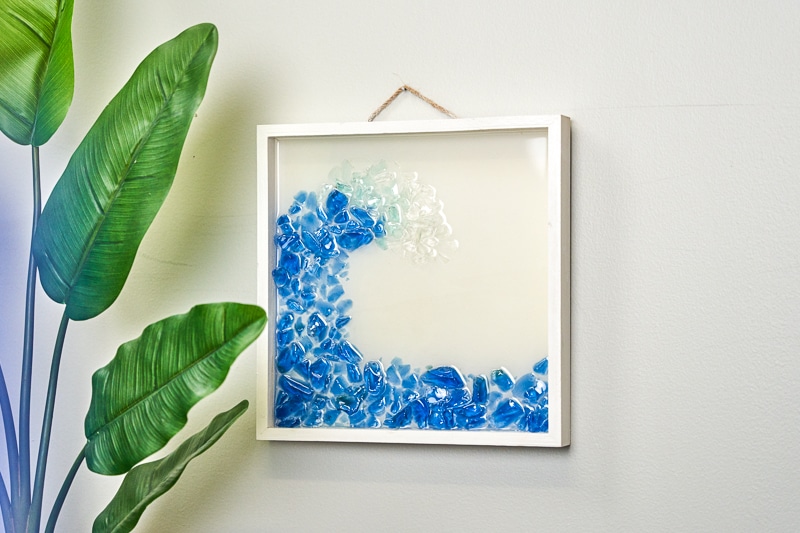
Is there any empty wall in your home that’s calling out for something? A piece of artwork that really speaks to your design tastes? With compatible epoxy resin at your disposal, you’ve got a lot of mixed media options. Today we wanted to talk about sea glass in particular and the gorgeous mosaic-like resin art pieces you can create.
This project is great for beginners, but can also be expanded upon for those looking to broaden their creative horizons and make something even more unique. Let’s talk about what you’ll need to get started.
Sea Glass 3D Resin Art Supplies
- Nitrile Gloves
- Safety glasses
- White Wooden Photo Frame Plaque
- 8 oz. Alumilite Amazing Clear Cast Epoxy
- Mixing cups
- Stir sticks
- Frosted sea glass in dark blue, sea blue, and white
- Twine (if your frame doesn’t already have a hanger)
Creating Your Sea Glass Resin Artwork
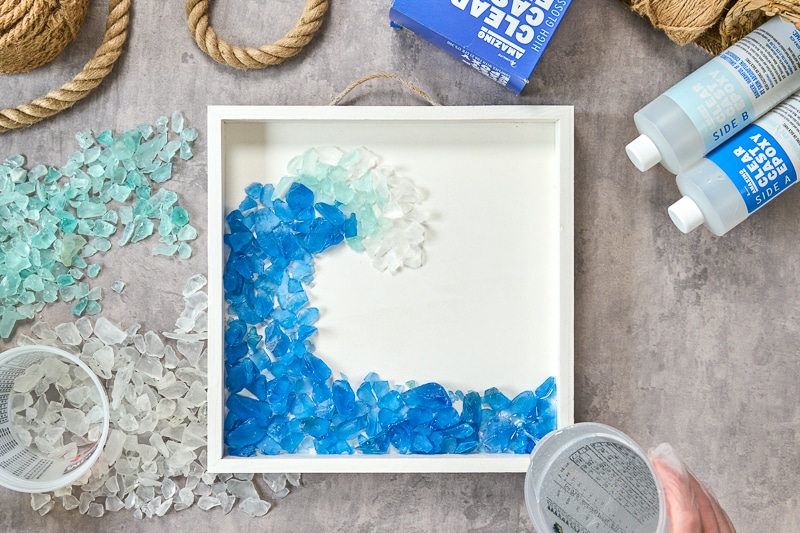
Make sure your workplace is protected. Assemble all of your project items and start by placing your wooden photo frame in front of you. Before we pour the epoxy, we’re going to create that masterpiece beneath.
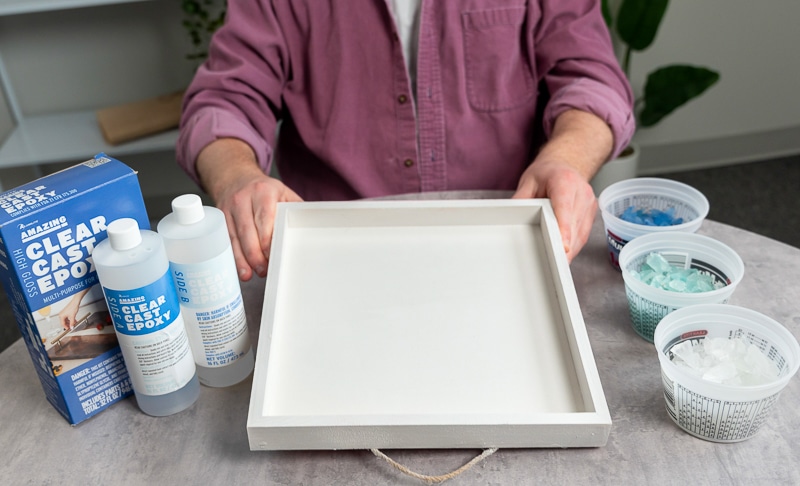
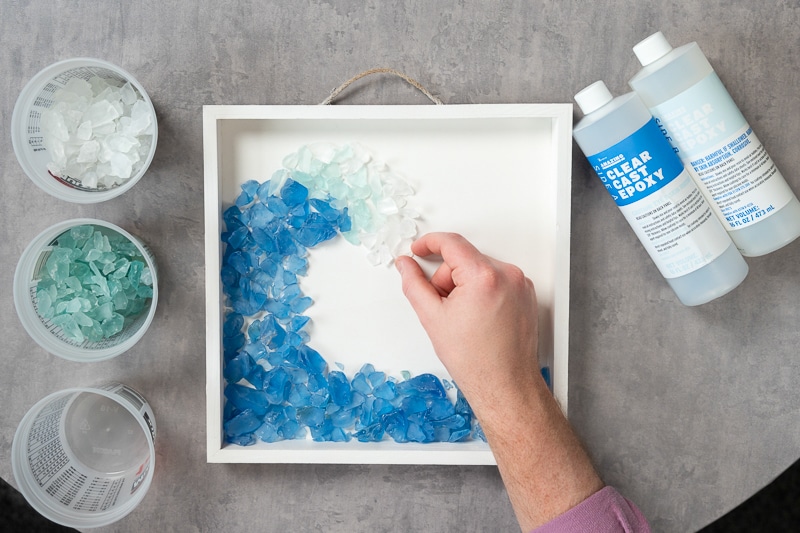
- The white wooden frame is going to serve as your canvas. Lay your pieces of sea glass on the bottom of the frame as shown below. Start with the darker blue to create a base for your tidal wave design. You can either pour out the sea glass pieces from a cup or place them on your own.
- Once you’ve created a base and the curve of the wave, you can turn to the sea green sea glass. You don’t need as much of this color, just enough to create a slight gradient at the top of the wave.


3. Now we’ll use the white sea glass. Just add a small amount at the very end of your wave art to mimic foam.
Mix and Pour Your Epoxy Resin
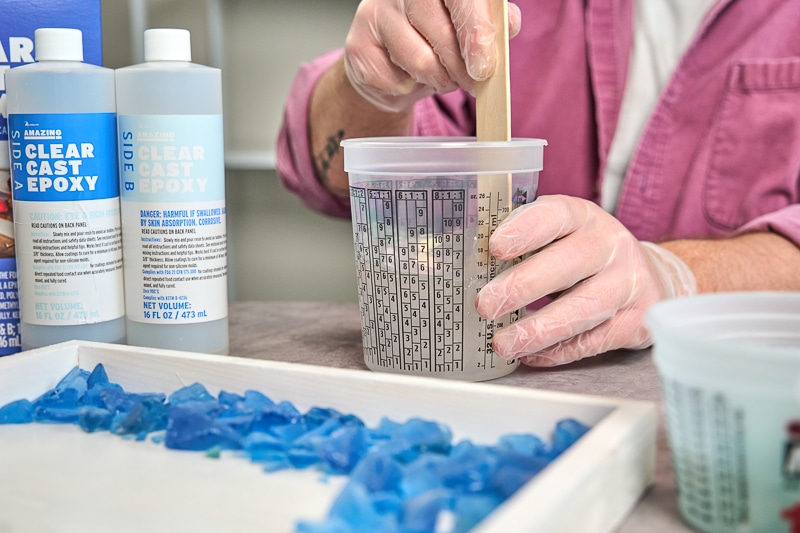
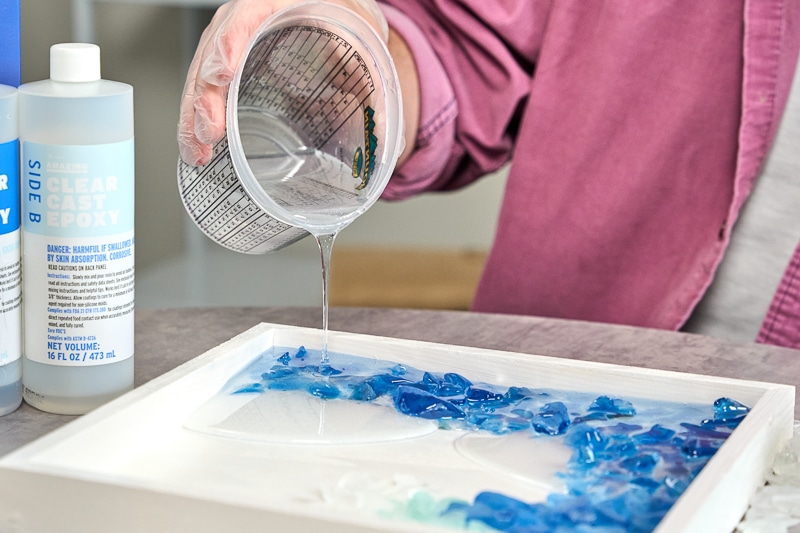
4. Don’t forget to put on your nitrile gloves and safety glasses before you begin using the resin. Amazing Clear Cast is a clear epoxy that is measured and mixed in a 1:1 ratio by volume. Combine 4 oz of resin and 4 oz of the hardener and mix thoroughly with a stir stick for 2 – 4 minutes. Once the mixture is completely clear and has no swirls, it’s ready to pour.
5. When you pour the layer of resin, you’ll notice how it begins to spread out on its own. This is because Amazing Clear Cast is self-leveling. So you don’t need to pour everywhere to make sure it fills in evenly.
- There are a few different ways you can approach covering your art with resin. Since some of the lighter pieces of sea glass might float, you can glue every piece down. This is definitely time-consuming, however. Another alternative would be to push the pieces down through the curing process or leave them as is. We chose the latter for this tutorial, which resulted in a really fun finish and texture. When pouring the epoxy, you don’t want to cover the sea glass entirely. Pour about half of the way up the sea glass pieces. Pour enough so that the sea glass isn’t loose, but not too much or the texture of the sea glass wave will be hidden.
- With resin crafts, there is always a risk of air bubbles. However, you can use tools like a heat gun to help remove them before the project cures.
- Allow your epoxy resin art to cure for 24 to 48 hours. If it’s no longer tacky and instead has cured to a solid clear surface, it’s ready to be displayed.
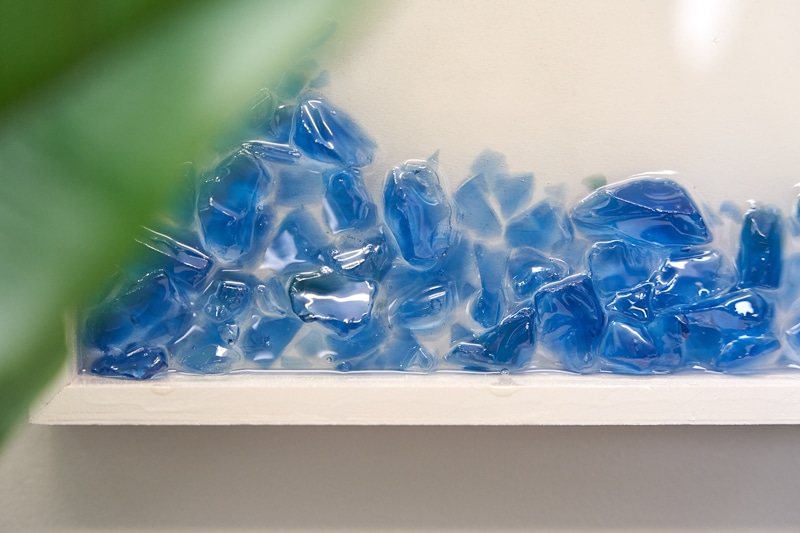
Look at the way that glossy finish catches the pieces of sea glass and really lets them shine!
The Possibilities of Sea Glass for Epoxy Resin Art
When it comes to making resin artworks with sea glass, there really are a lot of directions you could go in. Aside from creating specific shapes, you could also make patterns with a rainbow of sea glass colors and coat that before displaying it in your living room. It’s a relatively simple method of creating resin art for any type of space.
Sea glass is available in so many different colors; just because we focused on a specific palette for this project, doesn’t mean you’re limited. Pick the colors that best suit the space you plan on hanging it in or make a piece for a friend and include their favorite shades.
What did you think about this project? Have you ever made sea glass wall art before? What about resin wall art? Let’s talk about it—or you can even share it with us on @resincraftsblogbyeti using the tag #resincraftsblog!
Lydia Nordhoff is the creator of Lydi Out Loud, a blog where she shares her adventures in crafting and DIY. Lydi Out Loud has been featured on the Home Depot Blog, House Beautiful, Good Housekeeping, Southern Living, Elle Decor, Brit + Co., Buzz Feed, Cricut and Somerset Home Magazine.


This is so pretty!!
Great job!
This is nice; very pretty
So you say only pour the resin about halfway up, that means the top surface once complete is not entirely smooth? I’ve seen some of these in person but they appeared to be totally smooth on top. Thank you, I want to try this!
Hi Marci! If you would like it smooth, you can absolutely pour until the sea glass is completely covered.
What if I want to do this on a picture frame/glass, so as to look like a window frame? Would I glue the glass to the frame so the resin won’t seep through?
Hi! I’m looking for instruction on making bottle bottom glass art. Do you offer this, if not are you aware of available workshops? Thank you!
Hi I want to know more about the heat gun ,what’s does it do ? Where do you purchase
What do you recommend thank you Lucille