If you’ve ever tried to drill through a rock you’ll know it’s not an easy task. Today I have a fun alternative that makes creating a piece of stone jewelry much easier!
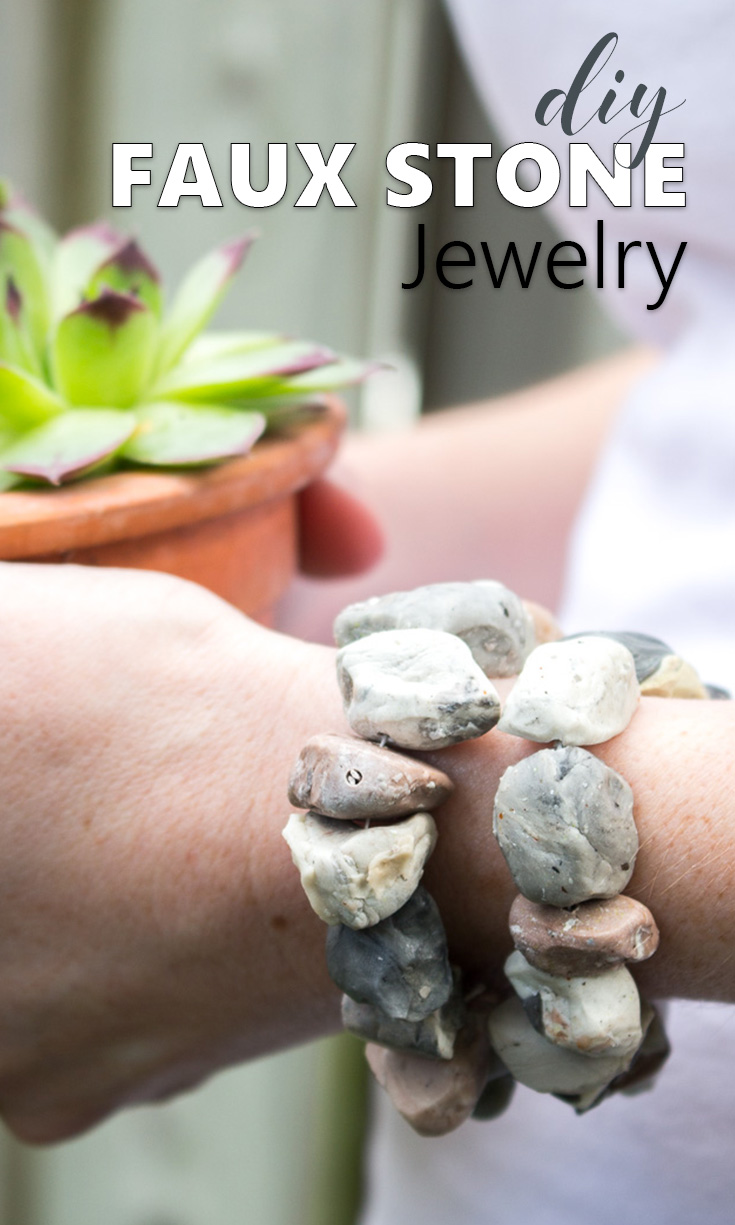
Hi friends! Sonja here from Sustain My Craft Habit and I’m pleased to share a new project with you: a DIY faux stone jewelry idea. One of my favourite things to do while at the beach is to collect rocks and unique stones. But for anyone that has tried, you know how difficult it is to drill a hole through rocks. By making these DIY faux stones, you can easily drill a hole through them and to create earthy and stylish Bohemian stone beads.
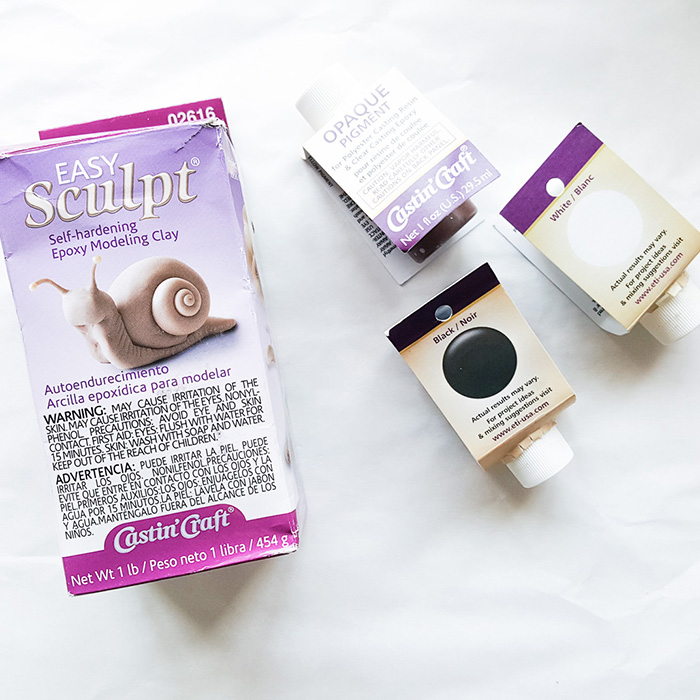
Materials Needed to Make Stone Jewelry with Easy Sculpt Modeling Clay
- EasySculpt Self-hardening Epoxy Modeling Clay
- A release agent such as vegetable oil, olive oil or Castin’ Craft Mold Release and Conditioner
- Universal Opaque Pigments in assorted colours (black, white, pearl, brown, yellow)
- Gloves, wooden craft sticks, wax paper
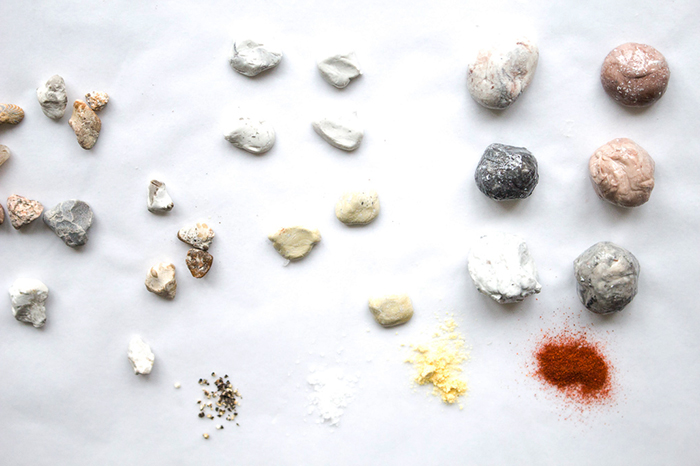
- Sea Salt, Ground Pepper, Chilli Powder, Ground Mustard Powder (optional for creating texture on the stones)
- Hand-held Drill with small 5/64” drill bit
- Elastic jewelry thread, scissors
Before starting, be sure to read the instructions provided in the packaging prior to starting. Also, protect your working surface with a sheet of wax paper.
How to Form the Faux Stone Beads:
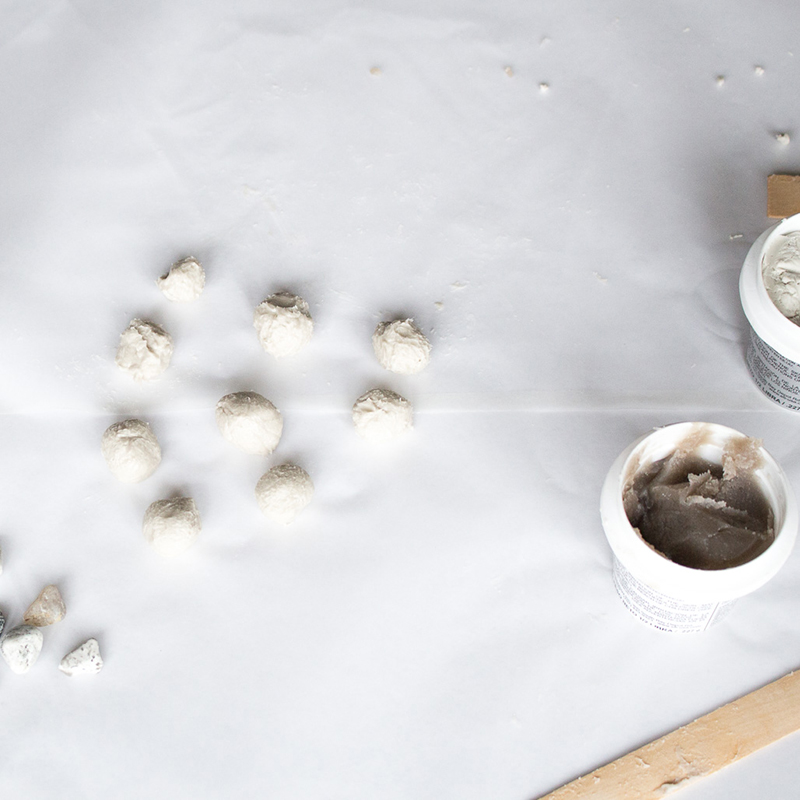
1. Use two wood sticks to take equal amounts of components “A” and “B” from the containers (be careful not to cross mix the materials in the containers).
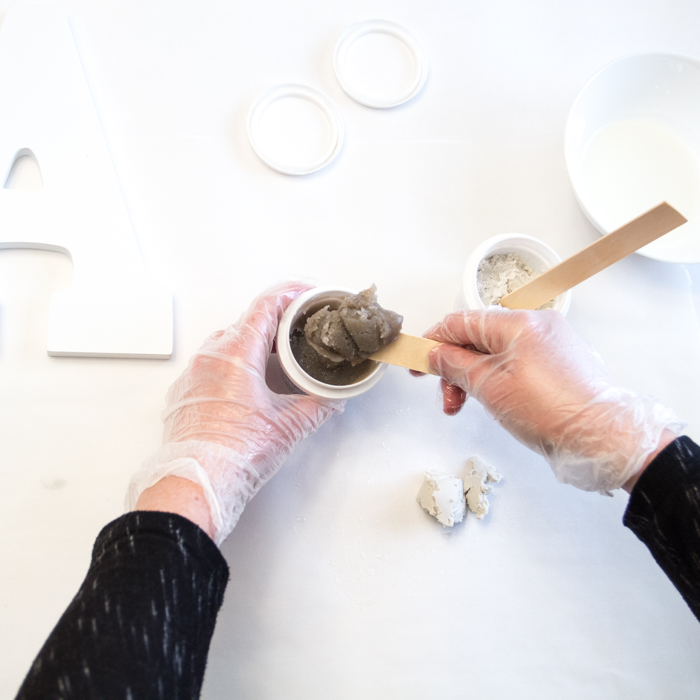
2. Spread some of the release agent on your gloves to keep the clay from sticking. Form the clay into balls of approximately equal size by eye, about the size of a golf ball.
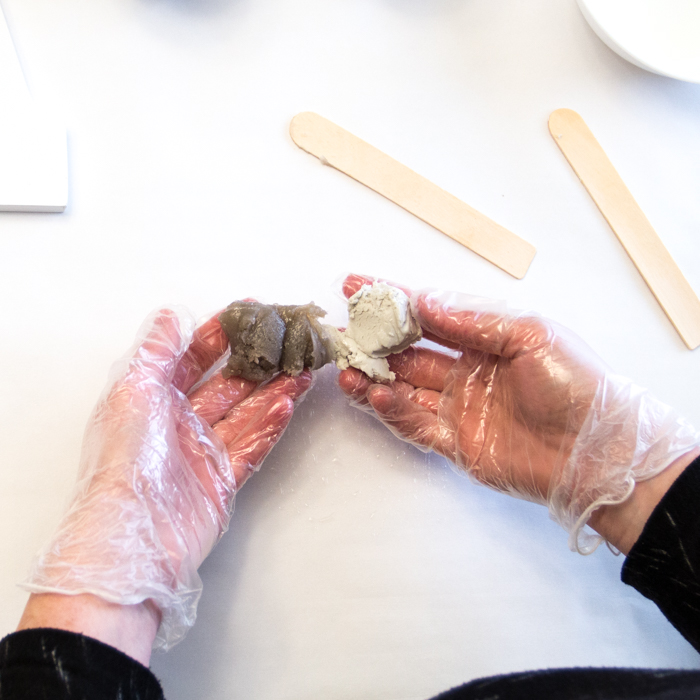
3. Press together completely and blend the two balls until they are uniform colour with no ribbons or marbling or little lumps (about 2 minutes). Separate the large clay ball into 8-9 smaller balls of clay. Keep adding the release agent to your gloves as needed.
4. The clay will start to get softer and stickier at this point (great to use as an adhesive in this state!). Add 1 drop of Pigment to each clay ball starting with the white or lightest to darkest Pigments and mix until you get the desired effect. Use a different pair of gloves when adding the darker dyes to avoid color transfer to other clay balls.
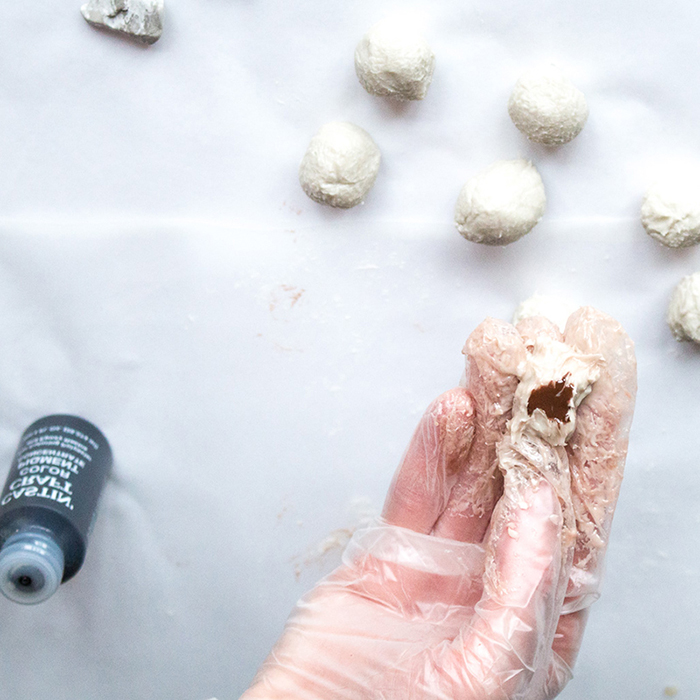
5. Blend together for a shorter period of time for a more marbled look and for longer for a smooth even colour. Put aside on wax paper for about 15 minutes. TIP: if you find the clay ball to be too sticky to work with, put it aside for 15 minutes before adding the first drop of Pigment.
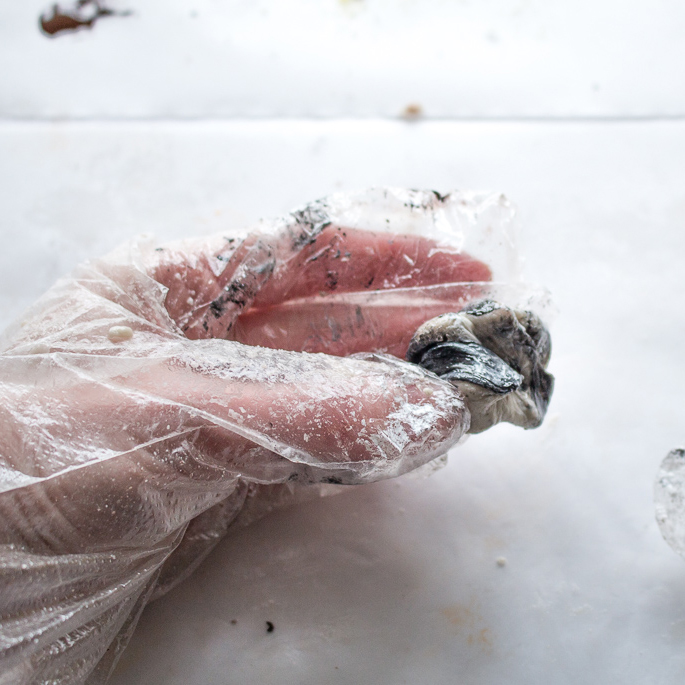
6. Next, add an additional drop of Pigment into each ball until you get the desired look. Experiment with mixing 2 or 3 different Pigments in one ball of clay. Put aside on wax paper for about 45 minutes.
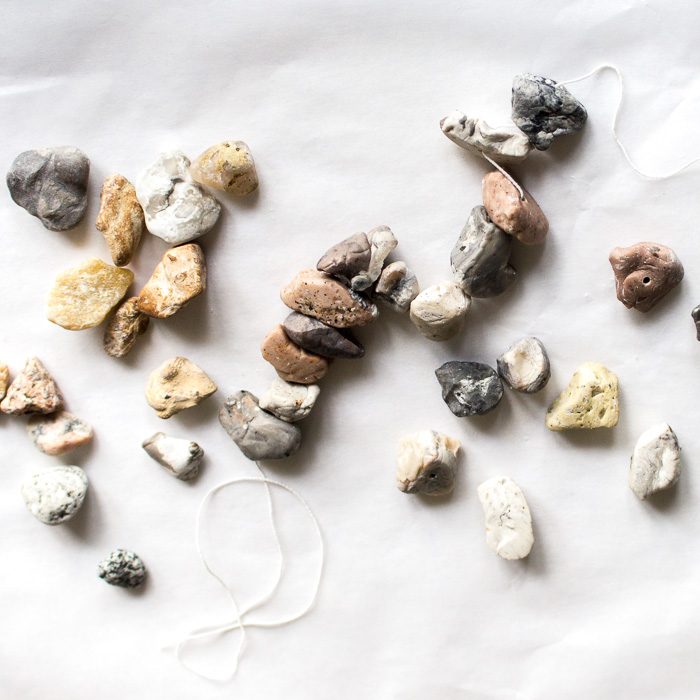
7. Begin to pull apart the balls of clay into smaller pebble sized pieces and form into small stones. Optional: Add a dash of kosher sea salt, ground pepper, chili powder or dried mustard powder for additional texture and colour. Put aside on wax paper once stone shape is formed. TIP: Have a collection of real rocks nearby to reference for color, shape and size.
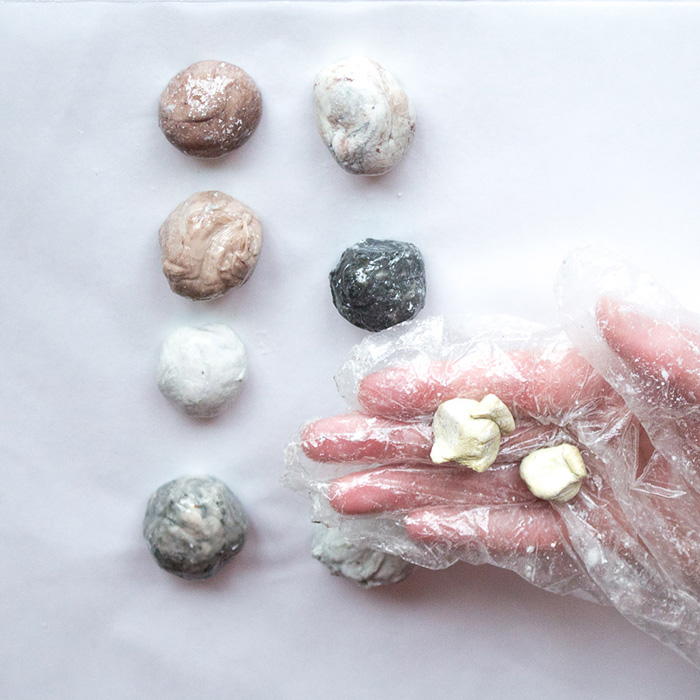
8. Let the rocks cure overnight (fully cured in 24 hours).
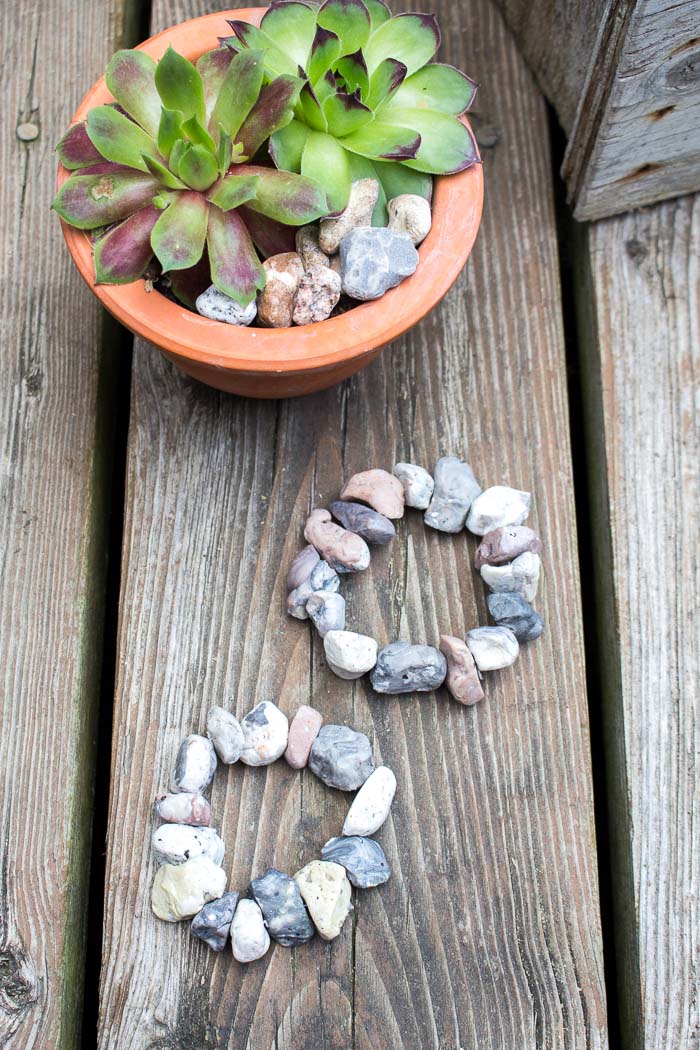
Can you tell which stones are real and which are faux?
Transforming the DIY Faux Stones into Beads:
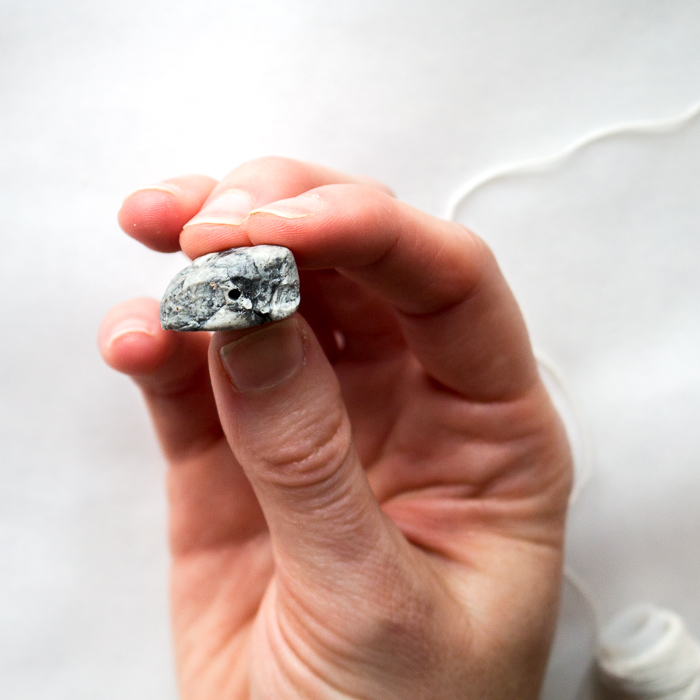
1. Protect your surface while drilling. With your hand-held drill, begin drilling through the center of your stones while carefully holding the stone in place.
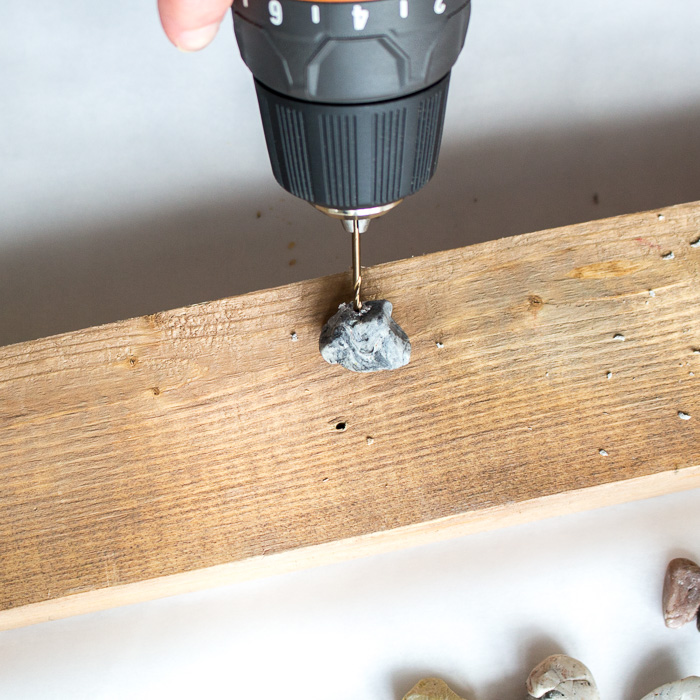
2. Wipe away the clay dust from from each of the beads, caused by the drilling.
3. Finally, thread the rocks through a jewelry elastic until you have enough to fit around the wrist. Cut and securely tie off the elastic ends.
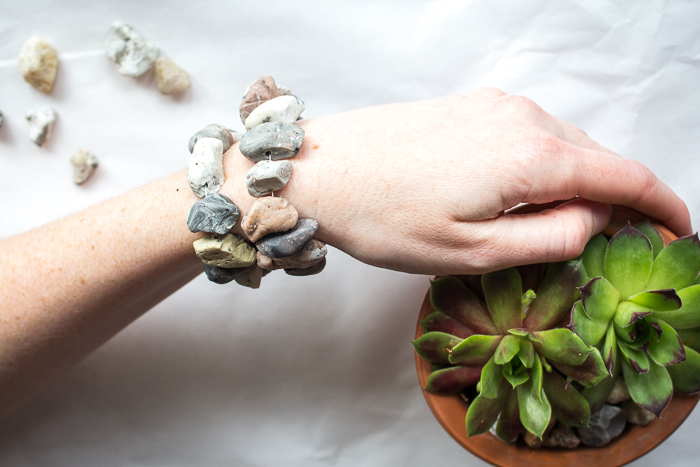
Create as many or as few of these stone jewelry pieces as you like! Wear and enjoy or give to someone special as a gift idea!
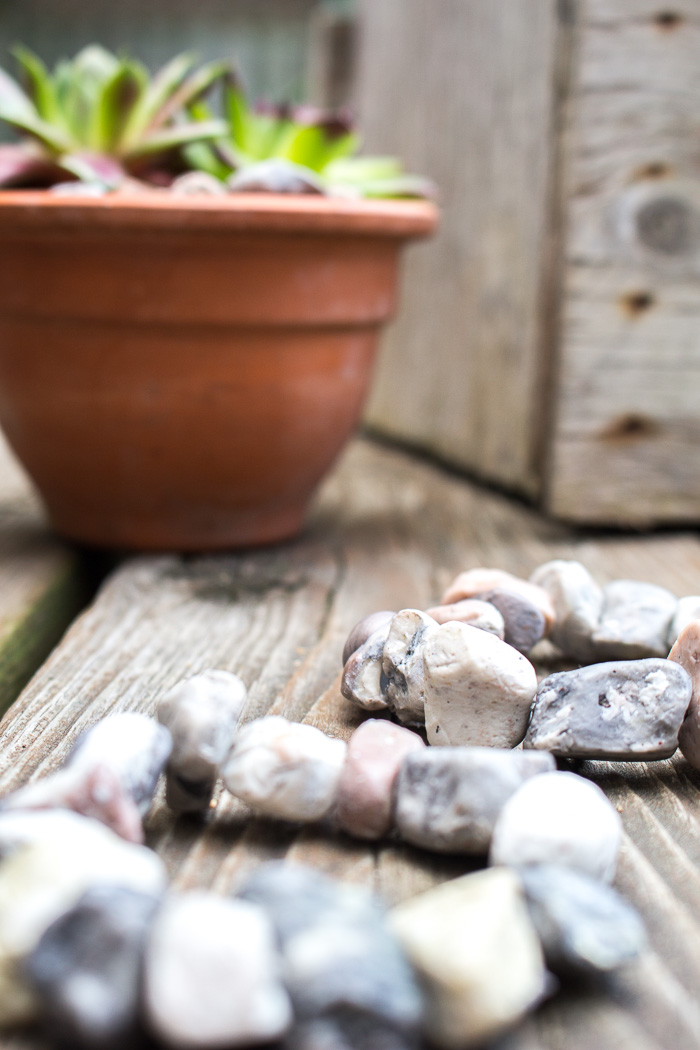
We really can’t believe how real these little faux rocks look. With this faux stone tutorial you can adjust the size and shape to create larger faux rocks to use in other DIY stone bead projects.
Jane and Sonja are sisters, moms and lifelong craft addicts both living near Toronto, Canada with their families. They share their love of creativity, nature and coastal DIY ideas on their blog Sustain My Craft Habit. They craft and decorate their homes using repurposed and upcycled items and materials found in nature.


That’s so fun! I never would have thought of something like this! Great work–I love rocks!
Thank you Natalie! We were a little impressed with ourselves in the end LOL 🙂
Oh my gosh, these are AWESOME!! Pinned to share. Do you guys offer these for sale online? Would make such unique gifts.
Thank you so much Marie! You just made our day 🙂 . No, we don’t have them for sale, but thank you so much for the suggestion. Have a wonderful day!
What a fabulous idea! Can’t wait to make this jewelry!Thank you for sharing!